
Why You’ll Love This Nutella Cookie Butter Cups
Imagine whipping up a treat that brings together the creamy joy of hazelnut and chocolate with the warm spice of cookie butter, all in under an hour. These Nutella Cookie Butter Cups are perfect for anyone craving a quick, homemade delight that feels both indulgent and easy to make. With their simple steps and everyday ingredients, you’ll find yourself returning to this recipe again and again for family gatherings or a personal pick-me-up.
One of the best parts about these cups is how straightforwardsimple: they take just a few minutes of hands-on time, making them ideal for busy folks like students or working professionals who want something tasty without much fuss. Plus, they offer a fun way to explore flavors that balance sweetness with texture, appealing to baking enthusiasts and home cooks alike. Whether you’re sharing with friends at a party or enjoying a quiet moment, these cups add a special touch to your day.
Beyond ease, these treats can fit various lifestyles, letting you tweak them for dietary needs while keeping that rich taste intact. For instance, you can swap ingredients to make them vegan or gluten-free, which is great for diet-conscious individuals and newlyweds building their recipe collection. Overall, Nutella Cookie Butter Cups stand out as a versatile snack that combines fun preparation with rewarding results, encouraging everyone from seniors to travelers to give homemade baking a try.
Key Benefits of the Recipe
This recipe shines because it’s not just fastit’s also adaptable to what you have on hand. The blend of flavors creates a unique experience that’s hard to resist, especially when you’re looking for something that feels homemade yet professional. By focusing on fresh ingredients and simple methods, you’ll love how these cups turn ordinary moments into sweet memories.
For busy parents, this means a no-stress option for after-school treats, while food enthusiasts will appreciate the chance to experiment. Keep in mind, using high-quality ingredients like real white chocolate can make a big difference in the final texture and flavor. If you’re new to baking, this recipe serves as a gentle entry point, much like other easy treats on sites such as the one for almond croissant bites, which offers similar quick baking ideas.
Jump to:
- Why You’ll Love This Nutella Cookie Butter Cups
- Key Benefits of the Recipe
- Essential Ingredients for Nutella Cookie Butter Cups
- Why These Ingredients Work
- How to Prepare the Perfect Nutella Cookie Butter Cups: Step-by-Step Guide
- Tips for Success
- Dietary Substitutions to Customize Your Nutella Cookie Butter Cups
- Seasonal and Flavor Twists
- Mastering Nutella Cookie Butter Cups: Advanced Tips and Variations
- Pro Ideas for Every Occasion
- How to Store Nutella Cookie Butter Cups: Best Practices
- FAQs: Frequently Asked Questions About Nutella Cookie Butter Cups
- What ingredients do I need to make Nutella Cookie Butter Cups?
- How can I prevent Nutella Cookie Butter Cups from melting too quickly?
- Can Nutella Cookie Butter Cups be made gluten-free?
- How long do Nutella Cookie Butter Cups last, and how should I store them?
- What are some easy ways to customize Nutella Cookie Butter Cups?
- Nutella Cookie Butter Cups
- Ingredients
- Instructions
- Last Step:
- Notes
- Nutrition
- Did you make this recipe?
Essential Ingredients for Nutella Cookie Butter Cups
Gathering the right ingredients is the first step to creating delicious Nutella Cookie Butter Cups that everyone will enjoy. This recipe keeps things simple with a short list of items you probably already have or can easily find. Let’s break it down into a clear, structured list to make shopping and preparation a breeze.
- 2 cups chopped white chocolate
- 1/2 cup cookie butter spread
- 1/3 cup hazelnut cocoa spread
- Melted dark chocolate (for optional decoration)
- Cookie crumbles (for optional decoration)
This straightforward list ensures you have everything needed for a successful batch. Each measurement is precise to help you achieve the perfect balance of flavors and textures. Remember, using real white chocolate with at least 20% cocoa butter will give you the best results, just as mentioned in helpful tips from various sources.
Why These Ingredients Work
Each ingredient plays a key role in making these cups irresistible. The chopped white chocolate forms the base, providing a smooth, creamy foundation that melts beautifully. Cookie butter spread adds that signature spice and crunch, while hazelnut cocoa spread brings in the rich, nutty flavor we all love. For those with special diets, you can swap in alternatives like plant-based spreads to keep things inclusive.
To expand on options, you might consider adding extras like nuts or fruits, but stick to the core list for the classic version. This setup not only makes the recipe accessible for beginners but also ties into broader baking trends, similar to variations found in recipes like cinnamon bread, which uses simple ingredients for big flavor.
How to Prepare the Perfect Nutella Cookie Butter Cups: Step-by-Step Guide
Diving into making Nutella Cookie Butter Cups is as fun as it is rewarding, and it all starts with a few easy steps. Begin by combining 2 cups of chopped white chocolate and 1/2 cup of cookie butter spread in a bowl. Melt them together in the microwave using 15-second intervals, stirring well after each one to ensure a smooth mixture without any lumps.
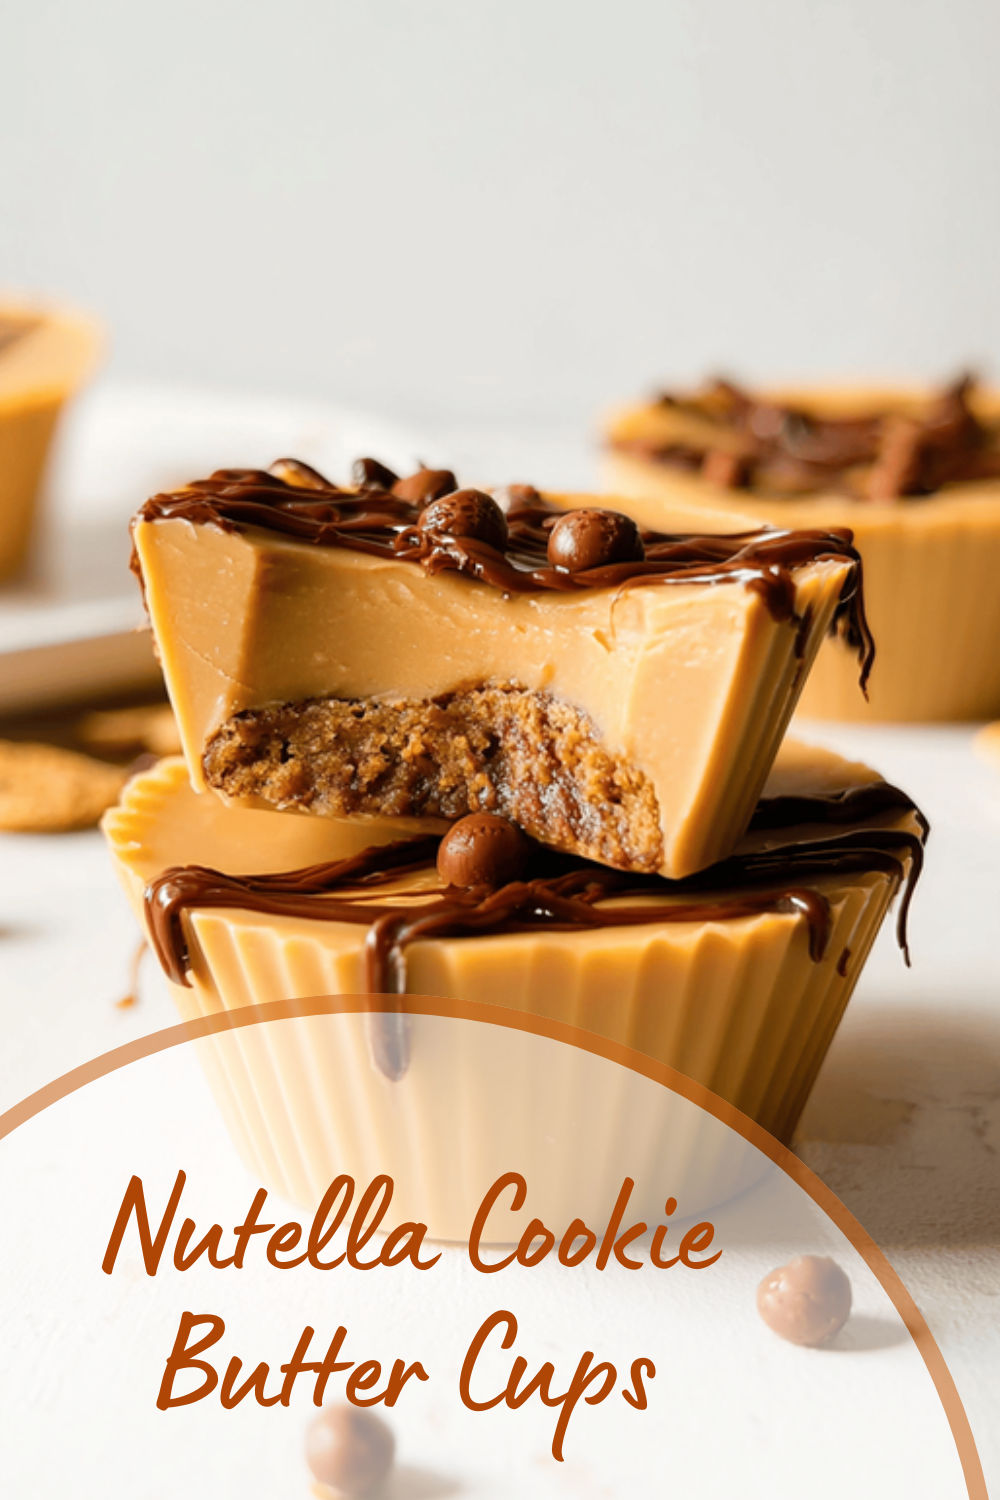
Next, pour 2-3 tablespoons of this melted blend into the bottom of silicone muffin cups or paper-lined metal cupcake pan cups, aiming to fill just below the middle heightabout 1 tablespoon per mini muffin cavity. This layer sets the base, so pop the pan into the freezer for 5-10 minutes until it’s firm. Once set, pipe or spoon in the 1/3 cup of hazelnut cocoa spread into the center of each cup for that gooey surprise inside.
Pour the remaining melted white chocolate and cookie butter mixture over the top to nearly fill each cup, then gently tap the tray to smooth everything out and remove air bubbles. Finish by freezing for 30 minutes or refrigerating for a couple of hours until fully set. For the best taste, let the cups sit at room temperature for about 10 minutes before serving, and optionally decorate with drizzles of melted dark chocolate and sprinkled cookie crumbles.
Tips for Success
To make this process even smoother, always use high-quality white chocolate for the creamiest results, and ensure the bottom layer is completely firm before adding the hazelnut spread to avoid any sinking. A piping bag can help keep the layers neat, but a spoon works just fine if you’re keeping it casual. This recipe totals about 45 minutes, with 10 minutes of prep and 35 minutes of resting or freezing, making it perfect for quick treats.
Nutritional info shows each cup has roughly 300 calories, so it’s a balanced option for snacks. You might also enjoy exploring related ideas, like those in the blueberry banana muffins recipe, which offers another easy baking project.

Dietary Substitutions to Customize Your Nutella Cookie Butter Cups
One of the great things about Nutella Cookie Butter Cups is how easy it is to tweak them for different needs. For example, if you’re watching your diet, swap traditional white chocolate with options like milk, dark, or semi-sweet varieties to change the flavor profile. This keeps the recipe flexible for everyone, from vegan eaters to those seeking gluten-free treats.
Protein and main component alternatives include using almond or sunflower seed butter in place of hazelnut cocoa spread for nut allergies, or adding chickpea protein powder for an extra boost. When it comes to vegetables and seasonings, try mixing in pumpkin puree for moisture and natural sweetness, or add spices like cinnamon to enhance the warmth. These changes let you make the cups your own while staying true to the original charm.
Seasonal and Flavor Twists
For seasonal fun, incorporate mashed sweet potato to add a healthy twist, or experiment with nutmeg for a cozy feel. Remember, sauces like cocoa nib drizzle can elevate the taste without straying from dietary goals. This adaptability makes the recipe a hit for occasions, much like customizing other favorites on the site.
Mastering Nutella Cookie Butter Cups: Advanced Tips and Variations
Once you’ve nailed the basics, it’s time to get creative with Nutella Cookie Butter Cups. Start by using a low-speed mixer for an ultra-smooth texture, making sure all ingredients are at room temperature to blend perfectly. This technique helps avoid any graininess and ensures your cups turn out just right every time.
For flavor variations, mix in espresso powder for a mocha kick or add crushed peppermint for a holiday vibe. Presentation is key, so consider serving them in fun liners with a light dust of cocoa powder for extra appeal. If you’re prepping ahead, make a big batch, wrap them individually, and freeze for easy access later.
Pro Ideas for Every Occasion
These tips can turn your baking into something special, whether for a party or a simple gift. Just like enhancing other recipes, such as turning basic muffins into something more, this approach keeps things exciting and personalized.
How to Store Nutella Cookie Butter Cups: Best Practices
Proper storage is essential to keep your Nutella Cookie Butter Cups tasting fresh and delicious. Store them in an airtight container in the refrigerator for up to 5 days, or freeze them wrapped individually for up to 3 months to extend their shelf life. Always thaw frozen cups in the fridge overnight to maintain the best texture without melting.
For meal prep, label your containers with dates and any substitutions, and consider making batches to save time. Note that chocolate might change color over time, so check them periodically. This method ensures your treats stay enjoyable, much like storing similar baked goods for later.
FAQs: Frequently Asked Questions About Nutella Cookie Butter Cups
What ingredients do I need to make Nutella Cookie Butter Cups?
To make Nutella Cookie Butter Cups, you will need Nutella, cookie butter (such as Biscoff), chocolate chips or melting chocolate, and optionally, heavy cream or butter for smoother texture. Additionally, cupcake liners or a silicone mold will help shape the cups. Most recipes call for a simple layering of Nutella and cookie butter inside melted chocolate shells, which then set in the fridge. These ingredients are easy to find in most grocery stores or online.
How can I prevent Nutella Cookie Butter Cups from melting too quickly?
To keep Nutella Cookie Butter Cups from melting too quickly, store them in an airtight container in the refrigerator. Chocolate and spreads like Nutella soften at room temperature, so refrigeration helps maintain their firmness. Before serving, remove them from the fridge for about 5-10 minutes to soften slightly for ideal taste and texture. Avoid leaving them out for extended periods, especially in warm environments.
Can Nutella Cookie Butter Cups be made gluten-free?
Yes, Nutella Cookie Butter Cups can be made gluten-free if you choose gluten-free cookie butter and confirm that your chocolate and Nutella do not contain gluten or cross-contamination. Many brands offer gluten-free cookie butter alternatives, and standard Nutella is generally gluten-free, but checking labels is important. Making them gluten-free ensures that those with gluten sensitivities can enjoy this treat safely.
How long do Nutella Cookie Butter Cups last, and how should I store them?
Nutella Cookie Butter Cups typically last about 1 to 2 weeks when stored properly in the refrigerator. Keep them in an airtight container to prevent moisture and odors from affecting flavor. If you want to store them longer, they freeze well for up to 3 months; just thaw in the refrigerator before serving. Proper storage helps maintain their texture and taste.
What are some easy ways to customize Nutella Cookie Butter Cups?
You can customize Nutella Cookie Butter Cups by adding chopped nuts, sea salt flakes, or shredded coconut on top before the chocolate sets. Swirling a bit of peanut butter or cream cheese into the filling adds extra flavor. For a fun twist, try using different types of chocolate such as dark, milk, or white chocolate shells. These variations add texture and taste without extra effort, making the cups unique to your preference.
Nutella Cookie Butter Cups
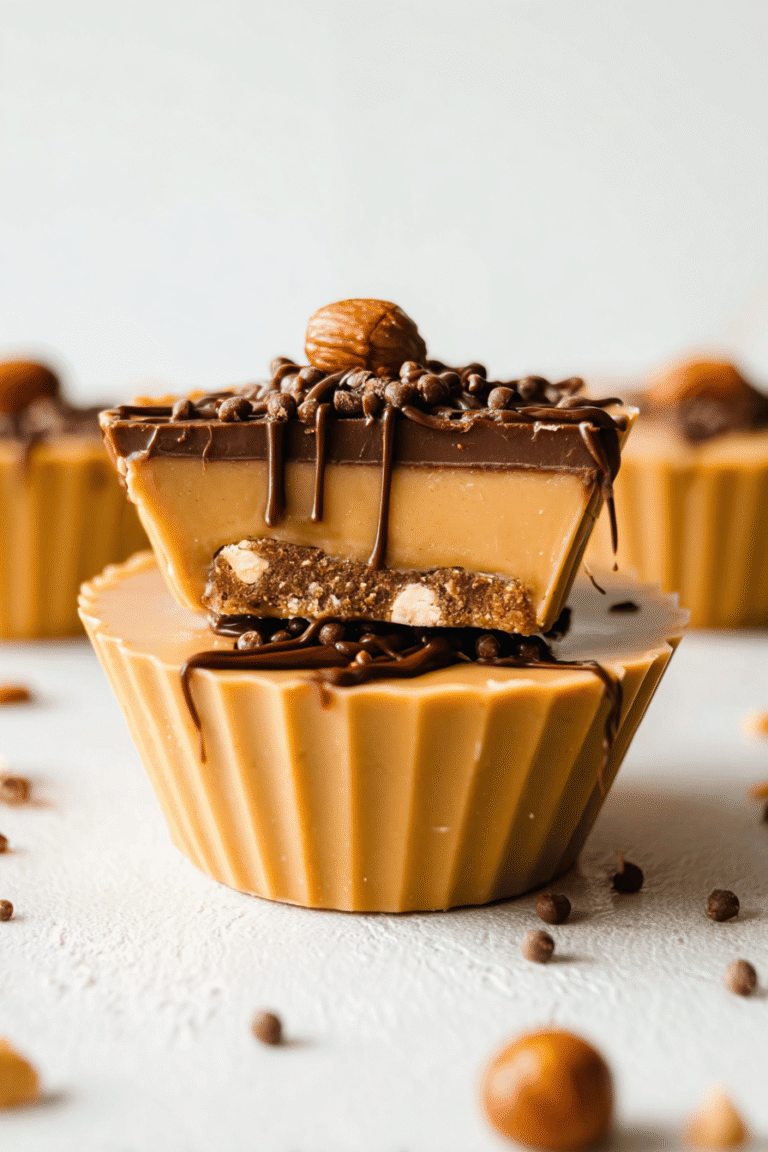
🍫 Dive into the deliciousness of Nutella Cookie Butter Cups that combine creamy hazelnut and cookie butter flavors in each bite.
🍪 These homemade treats are easy to make, perfect for satisfying your sweet tooth anytime at home.
- Total Time: 45 minutes
Ingredients
2 cups chopped white chocolate
1/2 cup cookie butter spread
1/3 cup hazelnut cocoa spread
Melted dark chocolate for optional decoration
Cookie crumbles for optional decoration
Instructions
1-Diving into making Nutella Cookie Butter Cups is as fun as it is rewarding, and it all starts with a few easy steps. Begin by combining 2 cups of chopped white chocolate and 1/2 cup of cookie butter spread in a bowl. Melt them together in the microwave using 15-second intervals, stirring well after each one to ensure a smooth mixture without any lumps.
2-Next, pour 2-3 tablespoons of this melted blend into the bottom of silicone muffin cups or paper-lined metal cupcake pan cups, aiming to fill just below the middle heightabout 1 tablespoon per mini muffin cavity. This layer sets the base, so pop the pan into the freezer for 5-10 minutes until it’s firm. Once set, pipe or spoon in the 1/3 cup of hazelnut cocoa spread into the center of each cup for that gooey surprise inside.
3-Pour the remaining melted white chocolate and cookie butter mixture over the top to nearly fill each cup, then gently tap the tray to smooth everything out and remove air bubbles. Finish by freezing for 30 minutes or refrigerating for a couple of hours until fully set. For the best taste, let the cups sit at room temperature for about 10 minutes before serving, and optionally decorate with drizzles of melted dark chocolate and sprinkled cookie crumbles.
Last Step:
Please leave a rating and comment letting us know how you liked this recipe! This helps our business to thrive and continue providing free, high-quality recipes for you.Notes
🍫 Use high-quality white chocolate with over 20% cocoa butter for best results.
❄️ Ensure the bottom chocolate layer is firm before adding hazelnut spread to prevent sinking.
🎨 Using a piping bag helps keep the hazelnut spread centered, but a spoon works too.
- Prep Time: 10 minutes
- Resting/Freezing Time: 35 minutes
- Cook Time: 0 minutes
- Category: Dessert
- Method: No bake
- Cuisine: International
Nutrition
- Calories: 300 per cup