
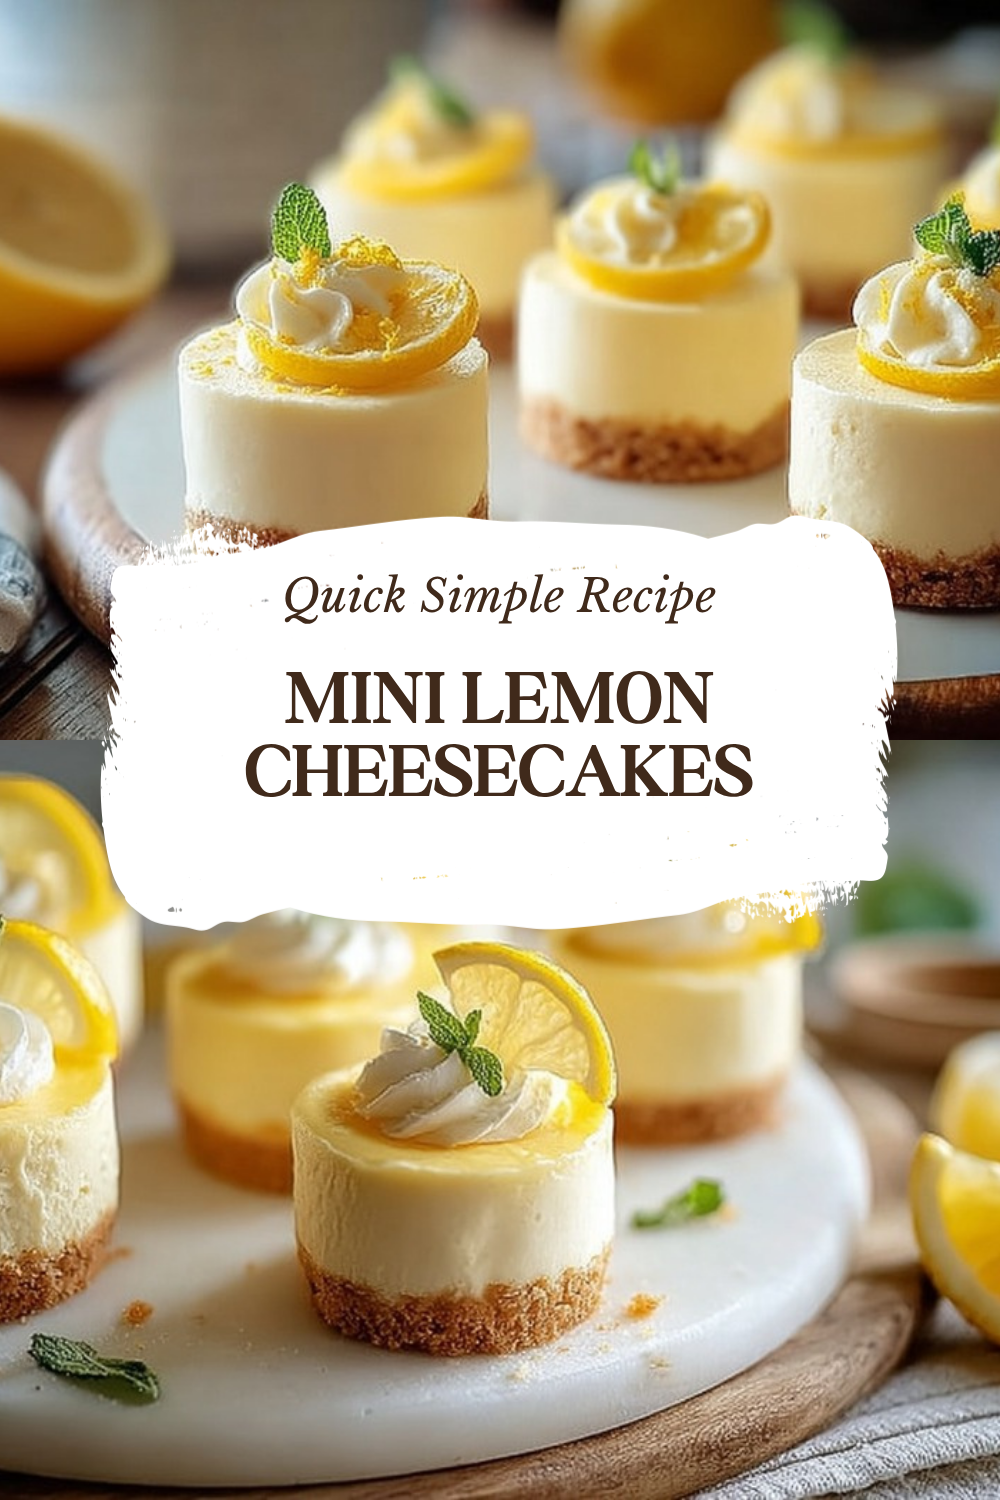
Why You’ll Love These Mini Lemon Cheesecakes
Mini Lemon Cheesecakes are the kind of dessert that feels right at home at birthdays, showers, potlucks, holiday tables, and easy weeknight treats. They bring bright citrus flavor, a creamy texture, and a cute single-serve size that makes them perfect for sharing. If you love the natural brightness lemons can bring to recipes, this lemon cheesecake recipe will quickly become a favorite.
- Easy to make: The crust, filling, and glaze all come together with simple pantry ingredients and a muffin pan. The bake time is much shorter than a full cheesecake, so you can get these into the fridge fast.
- Great for parties: Mini cheesecakes are one of the best party desserts because they already come in individual portions. No slicing is needed, which makes serving faster and cleaner.
- Bright lemon flavor: Fresh lemon juice and zest give each bite a fresh, tangy taste that balances the rich cream cheese filling.
- Make-ahead friendly: These mini lemon cheesecakes for parties taste even better after chilling, so they fit busy schedules and next-day entertaining.
They also work well for home cooks who want something special without spending all day in the kitchen. Since they chill beautifully, you can prepare them ahead for guests, then finish them with glaze right before serving.
One of the best things about Mini Lemon Cheesecakes is how they give you classic cheesecake flavor in a smaller, easier, party-ready format.
| Recipe Detail | Information |
|---|---|
| Prep Time | 30 minutes |
| Cook Time | 18 minutes |
| Total Time | 48 minutes |
| Yield | 24 to 28 servings |
| Best For | Parties, showers, holidays, and make-ahead desserts |
Jump to:
- Why You’ll Love These Mini Lemon Cheesecakes
- Essential Ingredients for Mini Lemon Cheesecakes
- Crust Ingredients
- Filling Ingredients
- Glaze Ingredients
- Special Dietary Options
- How to Prepare the Perfect Mini Lemon Cheesecakes: Step-by-Step Guide
- First Step: Prepare the pan and oven
- Second Step: Make the crust
- Third Step: Mix the cheesecake filling
- Fourth Step: Fill and bake
- Fifth Step: Cool before chilling
- Sixth Step: Make the lemon glaze
- Final Step: Assemble and serve
- Dietary Substitutions to Customize Your Mini Lemon Cheesecakes
- Protein and Main Component Alternatives
- Vegetable, Sauce, and Seasoning Modifications
- Mastering Mini Lemon Cheesecakes: Advanced Tips and Variations
- Pro cooking techniques
- Flavor variations
- Presentation tips
- Make-ahead options
- How to Store Mini Lemon Cheesecakes: Best Practices
- Refrigeration
- Freezing
- Reheating
- Meal prep considerations
- Nutrition Snapshot for Mini Lemon Cheesecakes
- FAQs: Frequently Asked Questions About Mini Lemon Cheesecakes
- How are mini lemon cheesecakes different from regular cheesecake?
- How long do you bake mini lemon cheesecakes?
- Can you put lemon curd on mini lemon cheesecakes?
- How do you make mini lemon cheesecakes without liners?
- How do you store mini lemon cheesecakes?
- Mini Lemon Cheesecakes
- Ingredients
- Instructions
- Last Step:
- Notes
- Nutrition
- Did you make this recipe?
Essential Ingredients for Mini Lemon Cheesecakes
Below is the full ingredient list for this mini lemon cheesecakes recipe. Each item is listed with its exact measurement so you can prep with confidence.
Crust Ingredients
- 2 and 2/3 cups graham cracker crumbs
- 1/3 cup sugar
- 2/3 cup melted butter
The crust gives the cheesecakes structure and adds a sweet, buttery crunch that pairs well with the creamy filling.
Filling Ingredients
- 24 ounces cream cheese, room temperature
- 1 and 1/4 cups sugar
- 3 eggs, room temperature
- 2 tablespoons lemon zest
- 3 tablespoons lemon juice
- 1 teaspoon vanilla
The filling is smooth, rich, and full of lemon flavor. Room temperature cream cheese and eggs help the mixture blend smoothly and lower the chance of cracks.
Glaze Ingredients
- 1 cup sugar
- 2 eggs, room temperature
- 1/4 cup lemon juice
- 3 tablespoons lemon zest
- 6 tablespoons melted butter
The lemon glaze adds shine and an extra burst of citrus. It also gives these mini cheesecakes that bakery-style finish people love.
Special Dietary Options
- Vegan: Use dairy-free cream cheese, plant-based butter, and egg substitutes such as flax eggs or a commercial egg replacer. Keep in mind that the texture will be softer.
- Gluten-free: Swap the graham cracker crumbs for certified gluten-free crumbs or gluten-free cookies.
- Low-calorie: Use reduced-fat cream cheese, a lighter sugar substitute, and a smaller amount of glaze.
If you enjoy easy baking ideas, you may also like these apple oat muffins from Flavors by Design for another simple treat that works well for brunch or snack time.
How to Prepare the Perfect Mini Lemon Cheesecakes: Step-by-Step Guide
First Step: Prepare the pan and oven
Preheat your oven to 350 degrees F. Line a muffin pan with paper liners or spray the cups well with nonstick spray. If you are not using liners, make sure the pan is greased generously so the cheesecakes release cleanly later.
Gather all ingredients before you begin. Since this recipe moves quickly once the filling is mixed, having everything measured out ahead of time makes the process much smoother.
Second Step: Make the crust
In a mixing bowl, combine 2 and 2/3 cups graham cracker crumbs, 1/3 cup sugar, and 2/3 cup melted butter. Stir until the crumbs look evenly coated and hold together when pressed.
Spoon the crumb mixture into the muffin cups and press it firmly into the bottoms. A small measuring spoon or the bottom of a glass works well for this step. Bake the crusts for 5 minutes, then remove the pan from the oven and let it cool slightly.
Third Step: Mix the cheesecake filling
Beat 24 ounces cream cheese until smooth and creamy. Add 1 and 1/4 cups sugar and mix until well blended. Then add the 3 eggs, one at a time, along with 2 tablespoons lemon zest, 3 tablespoons lemon juice, and 1 teaspoon vanilla.
Mix just until combined. Overmixing can add too much air to the batter, which may lead to cracks or a less silky texture.
Fourth Step: Fill and bake
Spoon the filling over the crusts, dividing it evenly among the muffin cups. Fill each cup nearly to the top, but leave a little room for the batter to settle.
Bake for 16 to 18 minutes at 350 degrees F. The centers should still look a little wobbly when you gently shake the pan. That slight jiggle means the cheesecakes are done and will finish setting as they cool.
For the best texture, pull the cheesecakes from the oven while the centers are still soft and slightly wobbly.
Fifth Step: Cool before chilling
Set the pan on a wire rack and let the mini cheesecakes cool for 1 hour at room temperature. This slow cooling helps reduce cracking and gives the filling time to settle.
After that, transfer the pan to the refrigerator and chill for 4 hours or overnight. Overnight chilling gives the cleanest slices and the best flavor.
Sixth Step: Make the lemon glaze
While the cheesecakes chill, prepare the glaze. In a saucepan, whisk together 2 eggs, 1 cup sugar, 1/4 cup lemon juice, and 3 tablespoons lemon zest. Add 6 tablespoons melted butter and stir over medium heat until the mixture thickens.
Let the glaze cool completely, then refrigerate it until you are ready to use it. The chilled glaze spreads more easily and sets nicely on top of the cheesecakes.
Final Step: Assemble and serve
Spoon or drizzle the chilled glaze over the mini cheesecakes. Serve them cold for the best taste and texture. These are wonderful on a dessert tray, at a baby shower, or alongside coffee after dinner.
If you like easy breakfast or brunch baking too, try pairing dessert planning with something cozy like this cinnamon bread recipe for a comforting menu idea.

Dietary Substitutions to Customize Your Mini Lemon Cheesecakes
Protein and Main Component Alternatives
If you need to adjust the filling for dietary reasons or ingredient availability, there are a few simple swaps that can help. For a dairy-free version, use plant-based cream cheese and a dairy-free butter substitute. If you want to reduce fat, try reduced-fat cream cheese, though the texture may be a little less rich.
For egg-free baking, use a commercial egg replacer that works in baked desserts. The texture may be softer, but the lemon flavor will still come through. If you are making mini lemon cheesecakes for parties and want a firmer bite, you can also mix a small spoonful of flour into the batter, which is a helpful trick when turning this recipe into bars.
Vegetable, Sauce, and Seasoning Modifications
Even though this recipe does not use vegetables, you can still change the flavor profile with simple additions. Try Meyer lemon juice for a sweeter citrus flavor, or add a little extra zest if you want a sharper lemon taste. For a different topping, swap the lemon glaze for fresh berries, berry sauce, or a light dusting of powdered sugar.
If you want a softer dessert for spring or summer, serve the cheesecakes with fresh raspberries or strawberries. For a richer finish, add whipped cream or a thin layer of lemon curd. The base recipe stays the same, but the toppings can shift to match the season, event, or your mood.
Mastering Mini Lemon Cheesecakes: Advanced Tips and Variations
Pro cooking techniques
Room temperature ingredients matter a lot in this recipe. Let the cream cheese and eggs sit out before mixing so the batter blends smoothly and bakes evenly. This helps prevent lumps and keeps the filling creamy.
If you want to reduce cracking, bake the mini cheesecakes in a water bath or wrap the muffin pan in foil if you are using a larger pan setup. Another helpful tip is to avoid overbaking. The centers should still move a bit when the pan is gently shaken.
For a firmer texture, you can add a small amount of flour to the filling. This works especially well if you want to turn the recipe into bars later. If you are interested in another creamy ingredient breakdown, this guide to cream cheese nutrition offers helpful background on how cream cheese fits into different eating styles.
Flavor variations
You can change the flavor without changing the whole recipe. Try adding a little lime zest for a lemon lime twist, or use orange zest for a softer citrus note. A berry topping also pairs nicely with the tangy cheesecake base.
For a more dessert-table look, top each cheesecake with a raspberry, a thin lemon slice, or a little whipped cream. These small changes make the mini lemon cheesecakes feel new each time you serve them.
Presentation tips
Presentation matters, especially when you are serving party desserts. If you use liners, peel them back right before serving for a neat look. If you bake directly in a greased pan, run a thin knife around the edges after cooling to help release them cleanly.
Place the cheesecakes on a white cake stand or a simple platter so the yellow glaze stands out. A little lemon zest sprinkled on top adds color and freshness.
Make-ahead options
These cheesecakes are ideal for busy schedules. You can bake the crusts and filling a day ahead, chill them overnight, and make the glaze separately. On serving day, just top and plate.
This make-ahead style is one reason mini lemon cheesecakes for parties are such a smart choice. You get a polished dessert without last-minute stress, and the flavor improves after chilling.
How to Store Mini Lemon Cheesecakes: Best Practices
Mini lemon cheesecakes store very well, which makes them perfect for planning ahead. Keep them covered in the refrigerator for 3 to 4 days, or up to 5 days in an airtight container. If possible, place parchment between layers so the glaze does not stick.
Refrigeration
Refrigeration is the best short-term storage method. Keep the cheesecakes chilled at all times, especially once the glaze is added. Since these are dairy-based desserts, they should not sit at room temperature for long.
Freezing
For longer storage, freeze the cheesecakes without glaze first. Place them on a tray until firm, then transfer them to freezer-safe bags or containers. They can stay frozen for up to 2 months. Thaw them in the refrigerator overnight before topping with glaze.
Reheating
These desserts do not need reheating. In fact, they taste best served cold. If you want a softer texture after freezing, let them sit in the refrigerator a little longer before serving, but avoid warming them in the microwave.
Meal prep considerations
If you are making desserts for a crowd, this recipe fits meal prep well. Bake the cheesecakes a day or two before the event, keep them chilled, and add the glaze just before serving. That keeps the crust crisp and the topping glossy.
Nutrition Snapshot for Mini Lemon Cheesecakes
Each serving of these Mini Lemon Cheesecakes contains about 307 calories. They also provide 31 grams of carbohydrates, 4 grams of protein, and 20 grams of fat, including 11 grams of saturated fat, 1 gram of polyunsaturated fat, and 5 grams of monounsaturated fat.
| Nutrient | Per Serving |
|---|---|
| Calories | 307 |
| Carbohydrates | 31 g |
| Protein | 4 g |
| Fat | 20 g |
| Saturated Fat | 11 g |
| Cholesterol | 84 mg |
| Sodium | 227 mg |
| Potassium | 76 mg |
| Sugar | 25 g |
| Vitamin A | 676 IU |
| Vitamin C | 3 mg |
| Calcium | 45 mg |
| Iron | 1 mg |
If you are watching portions, the mini size helps you enjoy a rich dessert without cutting a full cheesecake into slices. That makes them especially appealing for those who want a sweet treat in a smaller serving.
FAQs: Frequently Asked Questions About Mini Lemon Cheesecakes
How are mini lemon cheesecakes different from regular cheesecake?
Mini lemon cheesecakes differ from regular ones mainly in size, baking time, and ease of preparation. They bake faster—about 16-18 minutes versus over an hour for a full cheesecake—due to smaller volume and better heat distribution, reducing cracking risks. Use a greased muffin tin instead of a springform pan for 24 individual portions perfect for portion control and parties. The core layers stay the same: graham cracker crust, creamy cheesecake filling with lemon zest, and tangy lemon glaze on top. They cool quicker too, ready to chill overnight for the best texture. No water bath needed if pans are foil-wrapped, making them beginner-friendly while delivering the same bright citrus flavor in bite-sized form. (92 words)
How long do you bake mini lemon cheesecakes?
Bake mini lemon cheesecakes at 350°F for 16 minutes, then check doneness; add 1-2 more minutes if needed. They’re ready when edges are lightly browned, centers are slightly wobbly like Jell-O, and the glossy cream cheese surface dulls. Avoid overbaking to prevent cracks. Prep a greased muffin tin with crumb crust, fill with room-temperature cream cheese batter mixed with sugar, eggs, lemon zest, and juice. Use a water bath or foil-wrap pans for even cooking. Cool in the tin for 1 hour, then refrigerate before glazing. This yields 24 perfect bites with smooth texture. (98 words)
Can you put lemon curd on mini lemon cheesecakes?
Yes, lemon curd pairs perfectly with mini lemon cheesecakes, adding bright tang to the creamy base. This recipe uses a similar glaze made from lemon juice, zest, sugar, eggs, and butter, cooked into a thick, silky topping like curd but slightly less sweet. Spread it on chilled cheesecakes after overnight refrigeration for best adhesion. Traditional curd, often from Meyer lemons, works too—thicker and custard-like, ideal for scones or toast. The combo balances cheesecake’s tang with citrus punch. Make glaze while baking, cool both, then top for a glossy finish that holds up when serving. (96 words)
How do you make mini lemon cheesecakes without liners?
Grease a muffin tin generously with butter or nonstick spray—no paper liners needed. Press graham cracker crust firmly into each cup, add cheesecake batter, and bake as directed. As they cool, cheesecakes pull away from sides naturally. After 1 hour at room temp, gently run a thin knife around edges if stuck, then pop them out with a spoon. Transfer to a container for chilling. Liners complicate clean removal later, so oiling ensures smooth release while keeping crust intact. This method gives professional edges for your 24 mini lemon cheesecakes. (92 words)
How do you store mini lemon cheesecakes?
Store mini lemon cheesecakes in an airtight container in the fridge for up to 5 days. Layer with parchment paper to prevent sticking, especially after glazing. For longer storage, freeze unglazed cheesecakes on a tray for 2 hours, then transfer to freezer bags for up to 2 months—thaw overnight in fridge before topping. Avoid room temperature over 2 hours to prevent spoilage from dairy. They travel well chilled for parties. Label with dates for freshness. This keeps the creamy texture and lemon zing intact without sogginess. (85 words)
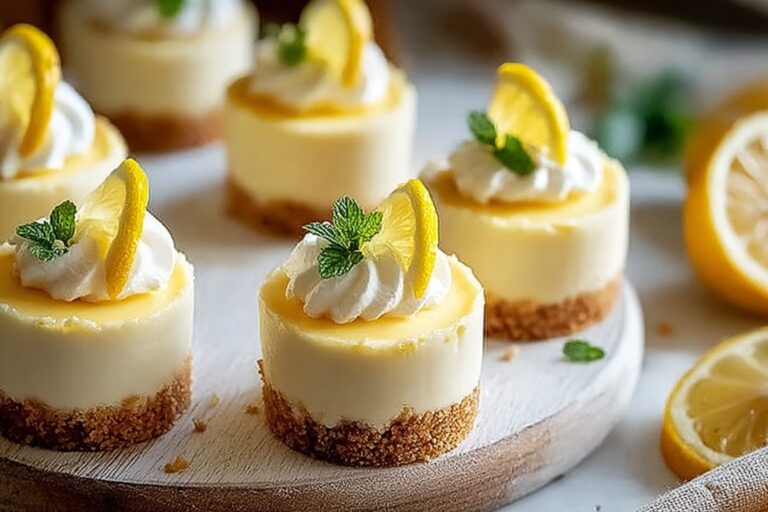
Mini Lemon Cheesecakes
🍋🧁 Savor mini lemon cheesecakes—creamy, tangy bites with buttery graham crust and shiny lemon glaze, ideal for parties and effortless entertaining!
🥛 Easy bake-and-chill recipe yields dozens of portable treats—zesty refreshment that’s make-ahead magic for showers, dinners, or potlucks.
- Total Time: 4 hours 48 minutes
- Yield: 24 servings
Ingredients
– 2 and 2/3 cups graham cracker crumbs
– 1/3 cup sugar
– 2/3 cup melted butter
– 24 ounces cream cheese, room temperature
– 1 and 1/4 cups sugar
– 3 eggs, room temperature
– 2 tablespoons lemon zest
– 3 tablespoons lemon juice
– 1 teaspoon vanilla
– 1 cup sugar
– 2 eggs, room temperature
– 1/4 cup lemon juice
– 3 tablespoons lemon zest
– 6 tablespoons melted butter
Instructions
1-First Step: Prepare the pan and oven Preheat your oven to 350 degrees F. Line a muffin pan with paper liners or spray the cups well with nonstick spray. If you are not using liners, make sure the pan is greased generously so the cheesecakes release cleanly later. Gather all ingredients before you begin. Since this recipe moves quickly once the filling is mixed, having everything measured out ahead of time makes the process much smoother.
2-Second Step: Make the crust In a mixing bowl, combine 2 and 2/3 cups graham cracker crumbs, 1/3 cup sugar, and 2/3 cup melted butter. Stir until the crumbs look evenly coated and hold together when pressed. Spoon the crumb mixture into the muffin cups and press it firmly into the bottoms. A small measuring spoon or the bottom of a glass works well for this step. Bake the crusts for 5 minutes, then remove the pan from the oven and let it cool slightly.
3-Third Step: Mix the cheesecake filling Beat 24 ounces cream cheese until smooth and creamy. Add 1 and 1/4 cups sugar and mix until well blended. Then add the 3 eggs, one at a time, along with 2 tablespoons lemon zest, 3 tablespoons lemon juice, and 1 teaspoon vanilla. Mix just until combined. Overmixing can add too much air to the batter, which may lead to cracks or a less silky texture.
4-Fourth Step: Fill and bake Spoon the filling over the crusts, dividing it evenly among the muffin cups. Fill each cup nearly to the top, but leave a little room for the batter to settle. Bake for 16 to 18 minutes at 350 degrees F. The centers should still look a little wobbly when you gently shake the pan. That slight jiggle means the cheesecakes are done and will finish setting as they cool. For the best texture, pull the cheesecakes from the oven while the centers are still soft and slightly wobbly.
5-Fifth Step: Cool before chilling Set the pan on a wire rack and let the mini cheesecakes cool for 1 hour at room temperature. This slow cooling helps reduce cracking and gives the filling time to settle. After that, transfer the pan to the refrigerator and chill for 4 hours or overnight. Overnight chilling gives the cleanest slices and the best flavor.
6-Sixth Step: Make the lemon glaze While the cheesecakes chill, prepare the glaze. In a saucepan, whisk together 2 eggs, 1 cup sugar, 1/4 cup lemon juice, and 3 tablespoons lemon zest. Add 6 tablespoons melted butter and stir over medium heat until the mixture thickens. Let the glaze cool completely, then refrigerate it until you are ready to use it. The chilled glaze spreads more easily and sets nicely on top of the cheesecakes.
7-Final Step: Assemble and serve Spoon or drizzle the chilled glaze over the mini cheesecakes. Serve them cold for the best taste and texture. These are wonderful on a dessert tray, at a baby shower, or alongside coffee after dinner. If you like easy breakfast or brunch baking too, try pairing dessert planning with something cozy like this cinnamon bread recipe for a comforting menu idea.
Last Step:
Please leave a rating and comment letting us know how you liked this recipe! This helps our business to thrive and continue providing free, high-quality recipes for you.Notes
🍋 Always use room temperature cream cheese and eggs to avoid cracks in filling.
💦 Bake in a water bath by placing muffin pan in larger pan with hot water for ultra-creamy texture.
❄️ Chill cheesecakes and glaze overnight for intensified lemon flavor and perfect set.
- Prep Time: 30 minutes
- Chill: 4 hours
- Cook Time: 18 minutes
- Category: Dessert
- Method: Bake
- Cuisine: American
- Diet: Vegetarian
Nutrition
- Serving Size: 1 mini cheesecake
- Calories: 307 kcal
- Sugar: 25g
- Sodium: 227mg
- Fat: 20g
- Saturated Fat: 11g
- Unsaturated Fat: 6g
- Trans Fat: 0g
- Carbohydrates: 31g
- Fiber: 0g
- Protein: 4g
- Cholesterol: 84mg