
Why You’ll Love This Mini Pavlovas With Fresh Fruit And Cream Recipe
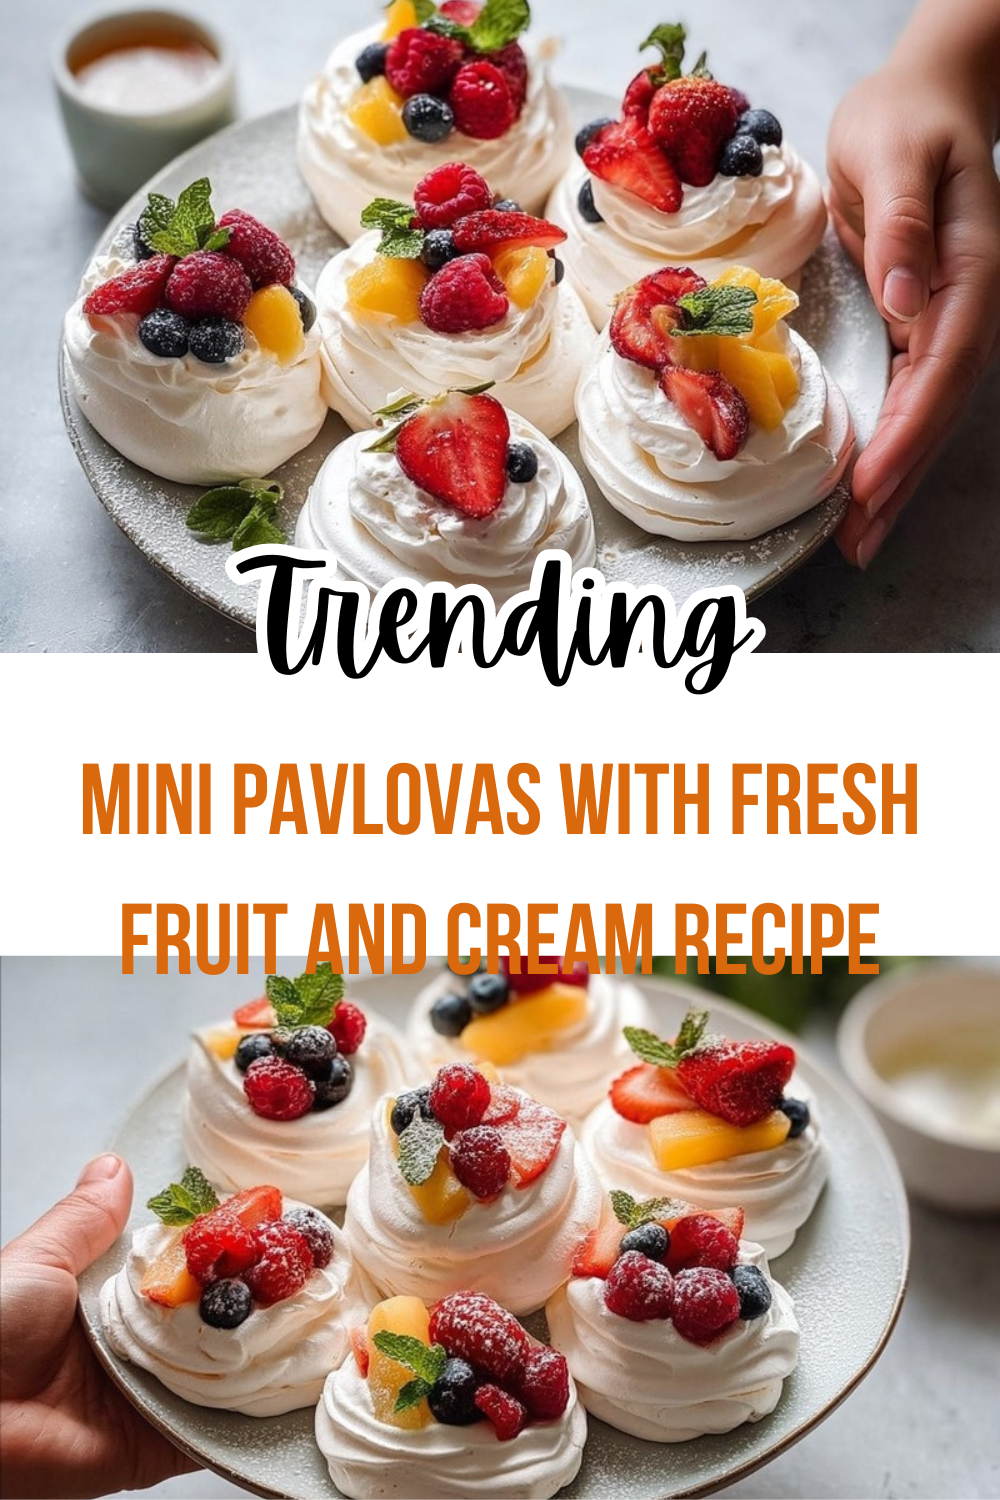
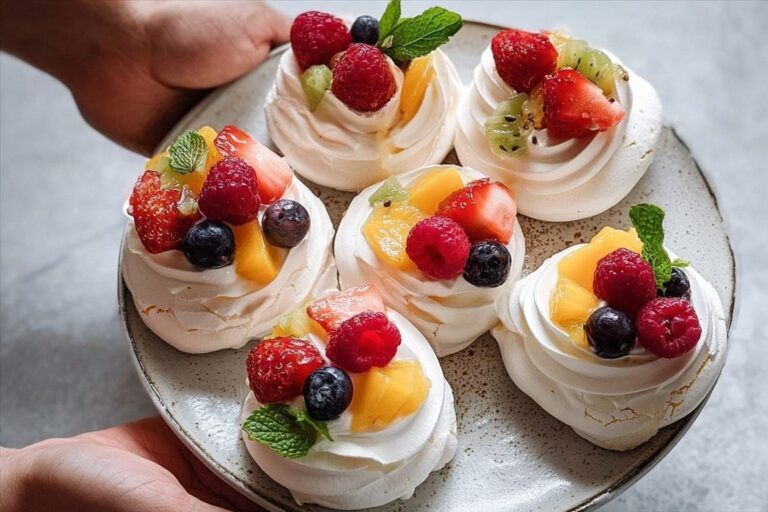
If you are looking for a dessert that feels fancy but is still easy enough for a busy weeknight, this Mini Pavlovas With Fresh Fruit And Cream Recipe is such a fun choice. The crisp meringue shell, soft marshmallowy center, fluffy cream, and juicy fruit make every bite feel light, sweet, and special. It is one of those desserts that looks like it came from a bakery, but it is really just a simple pavlova recipe you can make at home.
- Easy to make: This easy mini pavlovas recipe uses just a few basic ingredients and simple steps. Once the meringue bakes, most of the magic happens while it cools.
- Fresh and light: The egg white base and fruit topping keep these mini pavlovas feeling airy instead of heavy, which is great when you want a dessert that does not sit too rich.
- Flexible for different needs: You can swap in coconut cream, change up the fruit, or make the shells ahead of time for parties, holidays, or quick treats after dinner.
- Beautiful and tasty: The mix of cream and berries gives each bite a sweet-tart balance that feels classic, colorful, and perfect for guests.
For more berry inspiration, you can also check out the health benefits of berries while planning your toppings.
Mini pavlovas are also a lovely option for home cooks who want a dessert that works for birthdays, date nights, brunch tables, or a simple weekend treat. If you enjoy small-batch desserts like blueberry banana muffins, you will probably love how manageable this recipe feels.
Jump to:
- Why You’ll Love This Mini Pavlovas With Fresh Fruit And Cream Recipe
- Essential Ingredients for Mini Pavlovas With Fresh Fruit And Cream Recipe
- Main Ingredients
- Special Dietary Options
- How to Prepare the Perfect Mini Pavlovas With Fresh Fruit And Cream Recipe: Step-by-Step Guide
- First Step: Get the oven and tools ready
- Second Step: Whip the egg white
- Third Step: Add the sugar slowly
- Fourth Step: Shape the mini pavlovas
- Fifth Step: Bake low and slow
- Sixth Step: Let them cool slowly
- Seventh Step: Whip the cream
- Eighth Step: Add the fruit
- Final Step: Assemble and serve right away
- Dietary Substitutions to Customize Your Mini Pavlovas With Fresh Fruit And Cream Recipe
- Protein and Main Component Alternatives
- Vegetable, Sauce, and Seasoning Modifications
- Mastering Mini Pavlovas With Fresh Fruit And Cream Recipe: Advanced Tips and Variations
- Pro cooking techniques
- Flavor variations
- Presentation tips
- Make-ahead options
- How to Store Mini Pavlovas With Fresh Fruit And Cream Recipe: Best Practices
- Refrigeration
- Freezing
- Reheating
- Meal prep considerations
- FAQs: Frequently Asked Questions About Mini Pavlovas With Fresh Fruit And Cream Recipe
- How do you store mini pavlovas?
- Can you make mini pavlovas ahead of time?
- What fruits pair best with mini pavlovas?
- How do you know when mini pavlovas are done baking?
- Are mini pavlovas gluten-free?
- Mini Pavlovas With Fresh Fruit And Cream Recipe
- Ingredients
- Instructions
- Last Step:
- Notes
- Nutrition
- Did you make this recipe?
Essential Ingredients for Mini Pavlovas With Fresh Fruit And Cream Recipe
Here is the full ingredient list for 4 servings of berry meringue shells with cream and fruit. Every item below plays a role in the final texture and flavor, so it helps to measure everything before you start.
Main Ingredients
- 1 cold egg white – This is the base of the meringue shell and creates that crisp outside with a soft center.
- 1/8 teaspoon cream of tartar – Helps stabilize the egg white and gives the meringue better structure.
- 1/4 cup granulated sugar – Sweetens the meringue and helps form a shiny, stable shell.
- 1/4 cup cold heavy cream – Whips into a soft topping that balances the sweet meringue.
- 2 tablespoons powdered sugar – Sweetens and lightly thickens the whipped cream.
- 1/4 teaspoon vanilla extract – Adds warm flavor to the cream topping.
- 1 cup mixed berries, washed and chopped – Brings freshness, color, and a juicy finish to each pavlova.
Special Dietary Options
- Vegan: Use coconut cream instead of heavy cream. For the meringue shell, a traditional egg white pavlova will need a plant-based meringue method, since egg white is the main structure here.
- Gluten-free: This pavlova recipe is naturally gluten-free as written, but always check your vanilla extract and powdered sugar labels if you are cooking for someone with allergies.
- Low-calorie: Use a lighter hand with the whipped cream, top with extra berries, or try coconut cream whipped just until fluffy.
You can also swap in seasonal fruits like strawberries, raspberries, blueberries, peaches, pomegranate seeds, kiwi slices, or mandarin orange segments. If you like fruit-forward desserts, you may also enjoy apple oat muffins for another cozy, simple treat.
How to Prepare the Perfect Mini Pavlovas With Fresh Fruit And Cream Recipe: Step-by-Step Guide
Making mini pavlovas is mostly about patience and gentle handling. The batter comes together quickly, but the baking and cooling time matter a lot if you want that crisp shell and soft middle. Keep your bowl clean, your egg white cold at first, and your oven low and steady.
First Step: Get the oven and tools ready
Preheat your oven to 250°F. Line a baking sheet with parchment paper, and set out a clean mixing bowl, whisk or hand mixer, measuring spoons, and a spoon or piping bag. Make sure the bowl is completely dry and free of grease, because even a little oil can stop the egg white from whipping properly.
Second Step: Whip the egg white
Place the cold egg white in the bowl with the cream of tartar. Beat on medium speed until the egg white turns foamy and starts to hold soft peaks. At this stage, the mixture should look white and airy, not dry or grainy. This first whip gives the meringue its base.
Third Step: Add the sugar slowly
Sprinkle in the granulated sugar little by little, beating after each addition. This slow step helps the sugar dissolve and keeps the meringue smooth instead of gritty. Continue whipping until the mixture looks glossy and forms stiff peaks. If you lift the whisk, the peak should stand up without folding over.
Fourth Step: Shape the mini pavlovas
Spoon the meringue onto the parchment in 4 small rounds or nests. You can make a slight dip in the center of each one so the cream and fruit stay in place later. Keep the shape even, but do not worry if each shell is a little rustic. That handmade look is part of the charm.
Fifth Step: Bake low and slow
Bake the mini pavlovas for about 1 to 1.5 hours, depending on your oven and the size of the shells. They should feel firm on the outside and lightly dry to the touch. The color should stay pale, not brown. If they start to turn too dark, the oven may be running too hot.
Mini pavlovas should dry out gently in the oven, not rush through baking. A low temperature helps create that crisp outside and soft, marshmallow-like center everyone loves.
Sixth Step: Let them cool slowly
When the baking time is up, turn off the oven and crack the door open slightly. Leave the pavlovas inside until they are fully cool. This slow cooling helps prevent cracking and keeps the texture more stable. If you pull them out too fast, the temperature change can cause the shells to split.
Seventh Step: Whip the cream
While the shells cool, whip the cold heavy cream with the powdered sugar and vanilla extract. Mix until soft peaks form. You want the cream fluffy and scoopable, not overly stiff. If you are making the dessert ahead for a party, this is the point where you can chill the cream for a short time.
Eighth Step: Add the fruit
Wash and chop the mixed berries, then pat them dry so the pavlovas do not get soggy too quickly. Strawberries, raspberries, blueberries, peaches, pomegranate seeds, kiwi slices, and mandarin orange segments all work well. If you want a bright berry dessert, mixed berries are classic and colorful.
Final Step: Assemble and serve right away
Once the shells are cool, spoon or pipe the whipped cream into the center of each one. Top with the fresh fruit and serve immediately. Pavlovas taste best right after assembly, while the shell still has its crisp texture. If you want a little extra sparkle, dust the top with a tiny pinch of powdered sugar.
| Step | What to Do | Why It Matters |
|---|---|---|
| Preheat oven | Set to 250°F and line a baking sheet | Creates a steady, low baking environment |
| Whip egg white | Beat with cream of tartar until foamy | Builds structure for the meringue |
| Add sugar | Mix in slowly until glossy stiff peaks form | Keeps the shell stable and shiny |
| Bake | Bake 1 to 1.5 hours | Dries the outside while keeping the center soft |
| Cool | Leave in the oven with the door cracked | Helps avoid cracks |
| Top and serve | Add cream and fruit just before eating | Keeps the shell crisp |

Dietary Substitutions to Customize Your Mini Pavlovas With Fresh Fruit And Cream Recipe
Protein and Main Component Alternatives
The main structure of classic pavlova comes from egg white, so if you need a different setup, the best substitute depends on your goal. For the cream topping, coconut cream is the easiest swap for heavy cream. Chill it first, then whip it until fluffy. This works especially well if you want a dairy-free finish.
For the meringue shell itself, there is not a true one-to-one replacement for egg white in this exact recipe. That said, people who want a plant-based dessert sometimes use aquafaba, the liquid from chickpeas, as a vegan meringue base. The texture can be a little different, but it can still make lovely mini pavlovas when whipped properly.
Vegetable, Sauce, and Seasoning Modifications
Mini pavlovas are all about toppings, so this is where you can play with the recipe. Fresh fruit is the easiest change, and seasonal options keep the dessert feeling new all year. Strawberries and blueberries are great in spring and summer, while peaches, kiwi, pomegranate seeds, and mandarin orange segments make the plate look bright in cooler months.
If you want a sweeter finish, add a light drizzle of fruit syrup or a spoonful of fruit compote. For a more tart bite, use raspberries or add a tiny bit of lemon zest to the whipped cream. If you are serving guests with different needs, set out a topping bar so everyone can build their own mini pavlovas with fresh fruit and cream.
Mastering Mini Pavlovas With Fresh Fruit And Cream Recipe: Advanced Tips and Variations
Once you have made this pavlova recipe once or twice, it becomes easier to play around with texture and flavor. A few small details can make a big difference in how crisp the shells turn out and how pretty the final dessert looks on the plate.
Pro cooking techniques
Use a completely clean bowl and whisk, and make sure no yolk gets into the egg white. Even a tiny bit of fat can keep the meringue from whipping well. Add the sugar slowly so it dissolves fully, and stop whipping as soon as you get stiff, glossy peaks. For the best shape, keep the pavlovas small and evenly sized so they bake at the same speed.
Flavor variations
Try adding a little lemon zest to the cream for a brighter finish, or swap vanilla for almond extract if you want a softer, bakery-style flavor. You can also layer on different fruits depending on the season. A strawberry and blueberry mix gives a classic look, while kiwi and pomegranate seeds add a more playful color combo. For another simple sweet treat, you might like almond croissant bites for brunch or dessert platters.
Presentation tips
Serve the pavlovas on a white platter so the fruit colors stand out. Add the whipped cream with a spoon for a rustic look or pipe it for a neater finish. Finish with a few extra berries around the plate and a tiny dusting of powdered sugar. If you are serving for a special gathering, place each pavlova on a small dessert plate so guests can grab one easily.
Make-ahead options
You can bake the shells a day or two ahead and store them in an airtight container in a dry place. Whip the cream a few hours before serving, then chill it. Wash and cut the fruit closer to serving time so it stays fresh and bright. That makes this easy mini pavlovas recipe a great fit for parties, holidays, or busy weeknights.
How to Store Mini Pavlovas With Fresh Fruit And Cream Recipe: Best Practices
Mini pavlovas are best eaten soon after assembling, but you can still plan ahead with a little care. The key is keeping the shells dry and the toppings separate until you are ready to serve.
Refrigeration
Do not refrigerate the plain meringue shells, since moisture can make them soft and sticky. Instead, keep them in an airtight container in a cool, dry spot for up to 2 days. Once assembled with cream and fruit, the pavlovas should be eaten quickly, ideally within 1 to 2 hours.
Freezing
If you want to save the shells for later, freeze them in a single layer on a baking sheet until firm. Then move them to a freezer-safe bag or container. They can keep for about 1 month. Thaw at room temperature before adding the toppings.
Reheating
Do not reheat assembled pavlovas. Heat will soften the cream and can ruin the crisp shell. If a shell feels a little soft after storage, let it sit in a dry room for a few minutes to help it crisp up again.
Meal prep considerations
If you are making dessert for a crowd, store the shells, cream, and fruit separately. That way each part stays in its best texture until serving time. This method also makes hosting much easier because you can assemble everything right before guests arrive.
FAQs: Frequently Asked Questions About Mini Pavlovas With Fresh Fruit And Cream Recipe
How do you store mini pavlovas?
Mini pavlovas topped with whipped cream and fresh fruit should be enjoyed immediately for the best texture and flavor, as the cream softens the meringue quickly. Store plain meringue shells in an airtight container in a cool, dry place away from humidity, heat, or direct sunlight—they’ll stay crisp for up to 2 days. Avoid refrigerating the shells, as moisture can make them soggy. If you must chill assembled pavlovas briefly, cover loosely with plastic wrap and consume within 1-2 hours. For longer storage, freeze plain shells in a single layer on a baking sheet until solid, then transfer to a freezer bag for up to 1 month. Thaw at room temperature before topping. This keeps the signature crunchy exterior and marshmallowy center intact. (92 words)
Can you make mini pavlovas ahead of time?
Yes, prepare components separately to save time. Bake the meringue shells up to 2 days in advance and store in an airtight container in a cool, dry spot. Whip the cream up to 1 hour ahead, cover, and refrigerate—it holds its shape well with a touch of sugar and vanilla. Wash, dry, and slice fresh fruits like berries, kiwi, or mango just before assembly to prevent sogginess; store them in the fridge covered with a paper towel. Assemble right before serving by piping or spooning cream onto shells and adding fruit. This method ensures fresh taste without last-minute stress, perfect for parties. Turn off the oven after baking and let shells cool inside for crack-free results. (112 words)
What fruits pair best with mini pavlovas?
Fresh, juicy fruits complement the sweet meringue and creamy topping perfectly. Top with mixed berries like strawberries, raspberries, blueberries, and blackberries for vibrant color and tart balance—slice larger ones for even distribution. Kiwi slices add tropical tang, while passionfruit pulp drips sweetly over the cream. Mango or peaches bring summer freshness; use ripe but firm pieces to avoid excess moisture. For a citrus twist, try orange segments or pomegranate seeds. Avoid watery fruits like watermelon or pineapple, which can make shells soggy. Dust with powdered sugar or drizzle with lemon curd for extra zing. Prep fruits dry and add just before serving to keep everything crisp. Experiment seasonally for variety—berries are a classic crowd-pleaser. (108 words)
How do you know when mini pavlovas are done baking?
Bake mini pavlovas at 250°F (120°C) for 1-1.5 hours until the outsides are firm, crisp, and pale beige—gently tap the tops; they should sound hollow. The interiors remain soft and marshmallow-like, so avoid overbaking, which dries them out. Turn off the oven, crack the door, and let them cool completely inside (4-6 hours or overnight) to prevent cracks from sudden temperature changes. Test doneness by lifting one off the parchment—it should release easily without sticking. If underset, they may deflate; if golden-brown, they’re overdone. Use room-temperature egg whites for stable peaks, and a small amount of cornstarch or vinegar for structure. Perfect shells hold toppings without collapsing. (104 words)
Are mini pavlovas gluten-free?
Yes, traditional mini pavlovas are naturally gluten-free, made primarily from egg whites, sugar, cornstarch, and a stabilizer like vinegar or lemon juice—no flour involved. Double-check labels on cornstarch and vanilla extract for cross-contamination. They’re also dairy-free until you add whipped cream; opt for coconut cream for a vegan version. This makes them ideal for gluten-sensitive guests at gatherings. One batch yields about 24 minis, each around 100 calories without toppings. Serve with fresh fruit to keep them light. If adapting, ensure all tools are gluten-free cleaned. Pair with a note in your recipe for allergy-friendly baking confidence. (96 words)
Mini Pavlovas With Fresh Fruit And Cream Recipe
☁️🍓 Easy mini pavlovas—crisp meringue shells cradling fluffy whipped cream and juicy berries for light, elegant dessert bliss!
🥄 45-minute individual treats, gluten-free showstoppers—perfect for parties, tea time, or fresh fruit indulgence without heaviness.
- Total Time: 2 hours 15 minutes
- Yield: 4 servings
Ingredients
– 1 cold egg white
– 1/8 teaspoon cream of tartar
– 1/4 cup granulated sugar
– 1/4 cup cold heavy cream
– 2 tablespoons powdered sugar
– 1/4 teaspoon vanilla extract
– 1 cup mixed berries, washed and chopped
Instructions
1-First Step: Get the oven and tools ready Preheat your oven to 250°F. Line a baking sheet with parchment paper, and set out a clean mixing bowl, whisk or hand mixer, measuring spoons, and a spoon or piping bag. Make sure the bowl is completely dry and free of grease, because even a little oil can stop the egg white from whipping properly.
2-Second Step: Whip the egg white Place the cold egg white in the bowl with the cream of tartar. Beat on medium speed until the egg white turns foamy and starts to hold soft peaks. At this stage, the mixture should look white and airy, not dry or grainy. This first whip gives the meringue its base.
3-Third Step: Add the sugar slowly Sprinkle in the granulated sugar little by little, beating after each addition. This slow step helps the sugar dissolve and keeps the meringue smooth instead of gritty. Continue whipping until the mixture looks glossy and forms stiff peaks. If you lift the whisk, the peak should stand up without folding over.
4-Fourth Step: Shape the mini pavlovas Spoon the meringue onto the parchment in 4 small rounds or nests. You can make a slight dip in the center of each one so the cream and fruit stay in place later. Keep the shape even, but do not worry if each shell is a little rustic. That handmade look is part of the charm.
5-Fifth Step: Bake low and slow Bake the mini pavlovas for about 1 to 1.5 hours, depending on your oven and the size of the shells. They should feel firm on the outside and lightly dry to the touch. The color should stay pale, not brown. If they start to turn too dark, the oven may be running too hot.
6-Sixth Step: Let them cool slowly When the baking time is up, turn off the oven and crack the door open slightly. Leave the pavlovas inside until they are fully cool. This slow cooling helps prevent cracking and keeps the texture more stable. If you pull them out too fast, the temperature change can cause the shells to split.
7-Seventh Step: Whip the cream While the shells cool, whip the cold heavy cream with the powdered sugar and vanilla extract. Mix until soft peaks form. You want the cream fluffy and scoopable, not overly stiff. If you are making the dessert ahead for a party, this is the point where you can chill the cream for a short time.
8-Eighth Step: Add the fruit Wash and chop the mixed berries, then pat them dry so the pavlovas do not get soggy too quickly. Strawberries, raspberries, blueberries, peaches, pomegranate seeds, kiwi slices, and mandarin orange segments all work well. If you want a bright berry dessert, mixed berries are classic and colorful.
9-Final Step: Assemble and serve right away Once the shells are cool, spoon or pipe the whipped cream into the center of each one. Top with the fresh fruit and serve immediately. Pavlovas taste best right after assembly, while the shell still has its crisp texture. If you want a little extra sparkle, dust the top with a tiny pinch of powdered sugar.
Last Step:
Please leave a rating and comment letting us know how you liked this recipe! This helps our business to thrive and continue providing free, high-quality recipes for you.Notes
🥚 Ensure bowl/utensils grease-free—egg whites won’t whip properly otherwise.
🌡️ Bake low and slow; cool in oven to prevent cracks.
🍓 Use fresh, ripe berries; macerate in sugar for extra juiciness.
- Prep Time: 15 minutes
- Cool: 1 hour
- Cook Time: 1 hour
- Category: Dessert
- Method: Bake
- Cuisine: Australian
- Diet: Vegetarian, Gluten-Free
Nutrition
- Serving Size: 1 pavlova
- Calories: 180 kcal
- Sugar: 20g
- Sodium: 20mg
- Fat: 8g
- Saturated Fat: 5g
- Unsaturated Fat: 3g
- Trans Fat: 0g
- Carbohydrates: 25g
- Fiber: 1g
- Protein: 2g
- Cholesterol: 30mg