
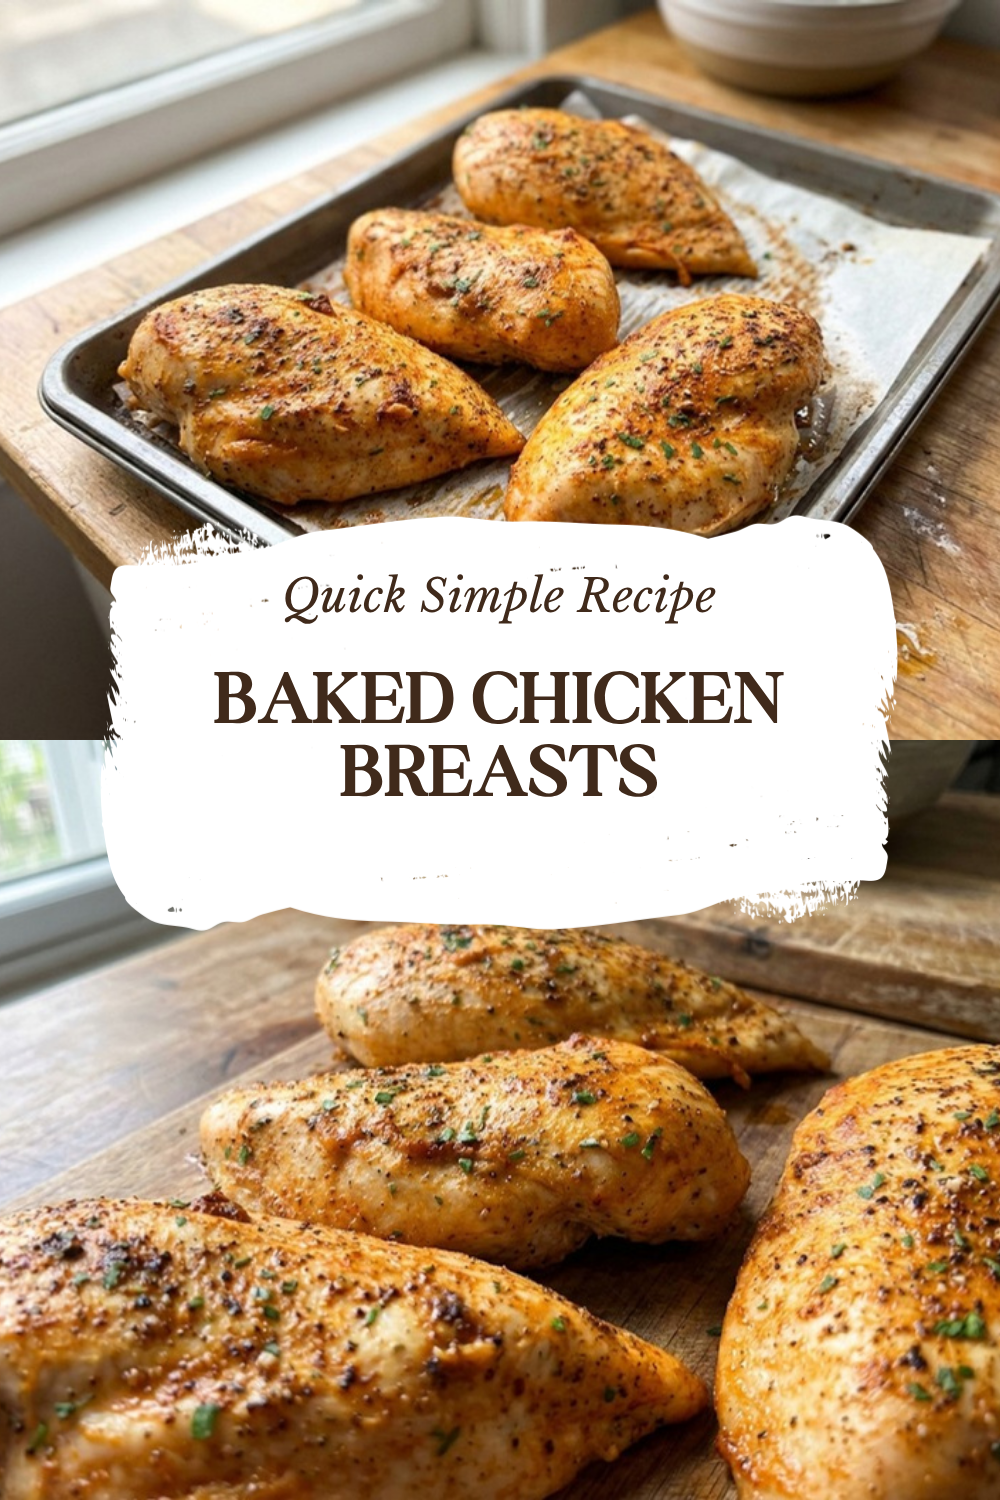
Why You’ll Love This Baked Chicken Breasts
Are you tired of dealing with dry and tough chicken that leaves you disappointed? This baked chicken breasts recipe is a real game-changer for home cooks who want simple, reliable results every time. We’ll break down why it’s so easy to whip up, making it perfect for busy parents or working professionals on a tight schedule. Plus, it delivers juicy, tender meat that feels like a treat without much effort.
- Ease of preparation: This recipe is straightforward and quick, with a total time of just 35 minutes from start to finish. You’ll only need basic kitchen tools and a few steps that anyone can follow, even if you’re new to cooking. That means less mess and more time to enjoy your meal with family or friends.
- Health benefits: Baked chicken breasts provide lean protein that’s great for staying fit and feeling full. Each serving is packed with nutrients and has minimal added fat, making it ideal for diet-conscious folks or students watching their intake. It’s a smart choice that supports your wellness goals without sacrificing flavor.
- Versatility: You can tweak this dish to fit all sorts of diets, from gluten-free to low-calorie options. It pairs well with sides like veggies or grains, and works for meals anytime, whether you’re a traveler packing lunch or a party host serving a crowd. This flexibility makes it a go-to recipe for many lifestyles.
- Distinctive flavor: The blend of seasonings like garlic powder and smoked paprika adds a smoky, savory kick that stands out. It’s not just plain chicken; it has a depth that elevates your plate, appealing to food enthusiasts who love experimenting. Brining the chicken keeps it moist, ensuring every bite is full of taste without needing fancy ingredients.
By focusing on this method, you’ll see how it turns ordinary chicken into something special. For more ideas on using chicken in your meals, check out our baked peaches recipe for complementary flavors. This approach not only saves time but also helps you create dishes that everyone will ask for again.
Jump to:
- Why You’ll Love This Baked Chicken Breasts
- Essential Ingredients for Baked Chicken Breasts
- Main Ingredients
- Special Dietary Options
- How to Prepare the Perfect Baked Chicken Breasts: Step-by-Step Guide
- First Step: Prepare the Brine
- Second Step: Preheat the Oven
- Third Step: Season the Chicken
- Fourth Step: Bake the Chicken
- Fifth Step: Rest and Serve
- Dietary Substitutions to Customize Your Baked Chicken Breasts
- Protein and Main Component Alternatives
- Vegetable, Sauce, and Seasoning Modifications
- Mastering Baked Chicken Breasts: Advanced Tips and Variations
- How to Store Baked Chicken Breasts: Best Practices
- FAQs: Frequently Asked Questions About Baked Chicken Breasts
- How long to bake chicken breasts in the oven?
- How do you make baked chicken breasts juicy?
- What seasonings work best on baked chicken breasts?
- How do you know when baked chicken breasts are done?
- How long do cooked chicken breasts last in the fridge?
- Baked Chicken Breasts
- Ingredients
- Instructions
- Last Step:
- Notes
- Nutrition
- Did you make this recipe?
Essential Ingredients for Baked Chicken Breasts
Gathering the right ingredients is key to making this baked chicken breasts recipe a success. Below, you’ll find a structured list of everything needed, with precise measurements and a quick explanation of each one’s role. This setup helps you prepare with ease and understand how each part contributes to the final dish.
Main Ingredients
- 4 boneless, skinless chicken breasts, pounded to even thickness – These form the base, providing lean protein that’s easy to cook and absorb flavors for juicy results.
- 1 tablespoon melted butter or olive oil – Adds moisture and helps with browning, giving a rich taste while keeping the chicken tender.
- 1 teaspoon kosher salt – Enhances the overall flavor and is crucial for the brine to lock in moisture and season the meat properly.
- 1/2 teaspoon freshly ground black pepper – Brings a subtle heat and depth, balancing the other seasonings without overpowering the dish.
- 1/2 teaspoon garlic powder – Infuses a savory garlic note that pairs well with the chicken, making it more aromatic and flavorful.
- 1/2 teaspoon smoked paprika – Offers a smoky, slightly sweet spice that creates a nice crust and adds color to the baked chicken.
- For brine: 1/4 cup kosher salt dissolved in 2 cups lukewarm water, plus 2 cups cold water or ice cubes – This mixture ensures the chicken stays juicy by drawing in moisture; the salt helps season it from the inside out.
Special Dietary Options
- Vegan: Swap the chicken breasts with plant-based substitutes like firm tofu or seitan, ensuring they are pounded to even thickness for similar results. Use olive oil instead of butter to keep it fully plant-based.
- Gluten-free: This recipe is naturally gluten-free as all ingredients listed are free of gluten. Just double-check your seasonings for any hidden additives.
- Low-calorie: Opt for olive oil over butter to cut down on fats, and reduce salt slightly if needed. Focus on the chicken’s lean profile for a lighter meal that still packs protein.
With this list, you’ll have exactly what you need for four servings. Remember, using fresh ingredients can make a big difference in the taste, as noted in resources like the health benefits of chicken.
How to Prepare the Perfect Baked Chicken Breasts: Step-by-Step Guide
Let’s dive into making baked chicken breasts that turn out juicy and tender every time. This guide walks you through each step with clear instructions, so you can follow along without stress. We’ll cover everything from prepping to baking, including tips on timing and temperature for the best outcome.
First Step: Prepare the Brine
Start by mixing the brine to ensure your chicken stays moist. Dissolve 1/4 cup kosher salt in 2 cups lukewarm water, then add 2 cups cold water or ice cubes to cool it down. Submerge the 4 boneless, skinless chicken breasts, pounded to even thickness, in this brine for 15 minutes or up to 6 hours in the fridge. Once done, rinse the chicken and pat it dry to remove excess salt this step is key for flavor balance.
Second Step: Preheat the Oven
Heat your oven to 450°F while the chicken brines. This high temperature helps sear the outside quickly, locking in juices. Make sure your baking sheet is ready; use a metal one for even heat distribution, as it’s safer for high temps. This preparation sets the stage for perfectly cooked chicken.
Third Step: Season the Chicken
After brining and drying the chicken, brush both sides with 1 tablespoon melted butter or olive oil. In a small bowl, combine 1 teaspoon kosher salt, 1/2 teaspoon freshly ground black pepper, 1/2 teaspoon garlic powder, and 1/2 teaspoon smoked paprika. Sprinkle this mixture evenly over both sides of the chicken breasts. This seasoning step adds flavor and helps create a tasty crust during baking.
Fourth Step: Bake the Chicken
Place the seasoned chicken breasts on a metal baking sheet or oven-safe dish. Slide it into the preheated 450°F oven and bake for 15-18 minutes. Use a thermometer to check that the internal temperature reaches 165°F in the thickest part it’s the best way to avoid overcooking. If you want a golden top, broil for 3-5 minutes at the end, but keep an eye on it to prevent burning.
Fifth Step: Rest and Serve
Once baked, take the chicken out and cover it loosely with foil. Let it rest for 5-10 minutes so the juices settle inside. This resting period makes the meat even more tender and flavorful. Now, slice and serve it with your favorite sides for a complete meal. The total prep time is about 20 minutes, cooking takes 15 minutes, and you’re done in 35 minutes flat.
This method works wonders for busy schedules, as it’s straightforward and delivers consistent results. For more baking inspiration, try our banana bread recipe to pair with your chicken. With these steps, you’ll master juicy baked chicken breasts in no time.

Dietary Substitutions to Customize Your Baked Chicken Breasts
Protein and Main Component Alternatives
If you need to switch things up, try swapping chicken for other proteins to suit your preferences. For instance, use turkey breasts instead, pounding them to even thickness for similar cooking times. Plant-based options like tofu can replace chicken, ensuring you brine them first for moisture. These changes keep the recipe adaptable while maintaining its core benefits.
Vegetable, Sauce, and Seasoning Modifications
Enhance your dish with different veggies by adding bell peppers or zucchini alongside the chicken for extra nutrition. For sauces, swap butter for a light lemon glaze if you want a fresher twist, or use herbs like rosemary in place of paprika for seasonal flavors. As noted in the proven health benefits of garlic, you can adjust garlic powder amounts for dietary needs, making it milder or bolder based on taste.
Mastering Baked Chicken Breasts: Advanced Tips and Variations
Once you’re comfortable with the basics, try these pro tips to take your baked chicken breasts to the next level. We’ll cover techniques that improve texture and flavor, plus ways to mix things up for fun meals. These ideas are great for food enthusiasts looking to experiment.
- Pro cooking techniques: Use a meat thermometer every time to hit that perfect 165°F, and always rest the chicken to keep it juicy. For even better results, pound the breasts uniformly to ensure they cook at the same rate.
- Flavor variations: Experiment with herbs like thyme or add a honey glaze for sweetness. You can also incorporate chili flakes for a spicy kick, customizing based on what you have on hand.
- Presentation tips: Slice the chicken at an angle and pair it with colorful sides for an appealing plate. Garnish with fresh herbs to make it look as good as it tastes.
- Make-ahead options: Prep the brine and seasonings in advance, then store the chicken in the fridge for up to a day. This is ideal for working professionals who need quick meals.
| Tip Category | Benefit |
|---|---|
| Brining | Ensures moisture retention |
| Seasoning | Boosts flavor profile |
How to Store Baked Chicken Breasts: Best Practices
Proper storage keeps your baked chicken breasts safe and tasty for later. Follow these guidelines to handle leftovers without losing quality. It’s simple and helps with meal prep for busy days.
- Refrigeration: Cool the chicken completely, then place it in an airtight container in the fridge for up to 4 days. This short-term method keeps it fresh for quick meals.
- Freezing: For longer storage, wrap portions in freezer bags and freeze for up to 3 months. Thaw overnight in the fridge to maintain texture and safety.
- Reheating: Warm it in the oven at 350°F for 10-15 minutes until it reaches 165°F. Use a microwave with a damp paper towel for faster results, but avoid drying it out.
- Meal prep considerations: Batch cook and divide into portions for easy grab-and-go. Label containers with dates to track freshness.
FAQs: Frequently Asked Questions About Baked Chicken Breasts
How long to bake chicken breasts in the oven?
Bake boneless, skinless chicken breasts at 450°F for 15-18 minutes, depending on thickness (about ½-inch thick per breast). Always use an instant-read thermometer to confirm the internal temperature reaches 165°F in the thickest part for food safety, per USDA guidelines. Pat chicken dry first, brush with oil or butter, season, and place on a lined baking sheet. Avoid overcooking to prevent dryness—start checking at 15 minutes. This high-heat method sears the outside while keeping the inside juicy. For thicker breasts (over 1 inch), add 2-3 minutes. Let rest 5 minutes post-bake to redistribute juices. Yields tender results every time. (92 words)
How do you make baked chicken breasts juicy?
Follow a simple 5-step process: brine, brush, rub, roast, and rest. Brine in saltwater (¼ cup salt per quart water) for 15 minutes to 6 hours in the fridge—this draws in moisture. Skip if pre-brined. Brush with melted butter or olive oil for flavor and crust. Rub with salt, pepper, garlic powder, and paprika. Roast at 450°F for 15-18 minutes to 165°F internal temp. Rest 5-10 minutes tented with foil so juices settle. This locks in moisture better than low-and-slow baking. Results in tender, flavorful chicken without a dry texture. (98 words)
What seasonings work best on baked chicken breasts?
Start with a reliable mix: 1 tsp each smoked paprika, garlic powder, onion powder, kosher salt, and black pepper per pound. Brush chicken with olive oil or butter first so seasonings stick. For variety, add Italian herbs, Cajun spice, lemon zest, or chili powder. Avoid wet marinades to prevent steaming—dry rubs crisp the exterior at 450°F. Taste-test on one breast before full batch. This combo delivers balanced savory flavor without overpowering the chicken. Pairs well with roasted veggies or salads. Customize based on your meal, like curry powder for Indian dishes. (92 words)
How do you know when baked chicken breasts are done?
The most accurate way is an instant-read thermometer: insert into the thickest part (avoid bone if any), aiming for 165°F per USDA safety standards. Visual cues include clear juices (not pink) and firm, opaque meat. At 450°F, it takes 15-18 minutes for 6-8 oz breasts—cut one open if no thermometer. Overcooking dries it out, so pull at 160°F and rest; carryover heat finishes it. Press test: springs back slightly when done. Always prioritize temp check to avoid undercooking risks like salmonella. (87 words)
How long do cooked chicken breasts last in the fridge?
Store baked chicken breasts in an airtight container in the fridge for up to 4 days (USDA recommends 3-4 for safety). Cool completely first to avoid condensation. For longer storage, freeze in freezer bags up to 3 months—thaw overnight in fridge. Reheat to 165°F in oven at 350°F for 10-15 minutes or microwave covered with damp paper towel. Label with date. Use leftovers in salads, wraps, soups, pasta, or casseroles. If any off smell, slime, or discoloration, discard immediately to prevent foodborne illness. (89 words)
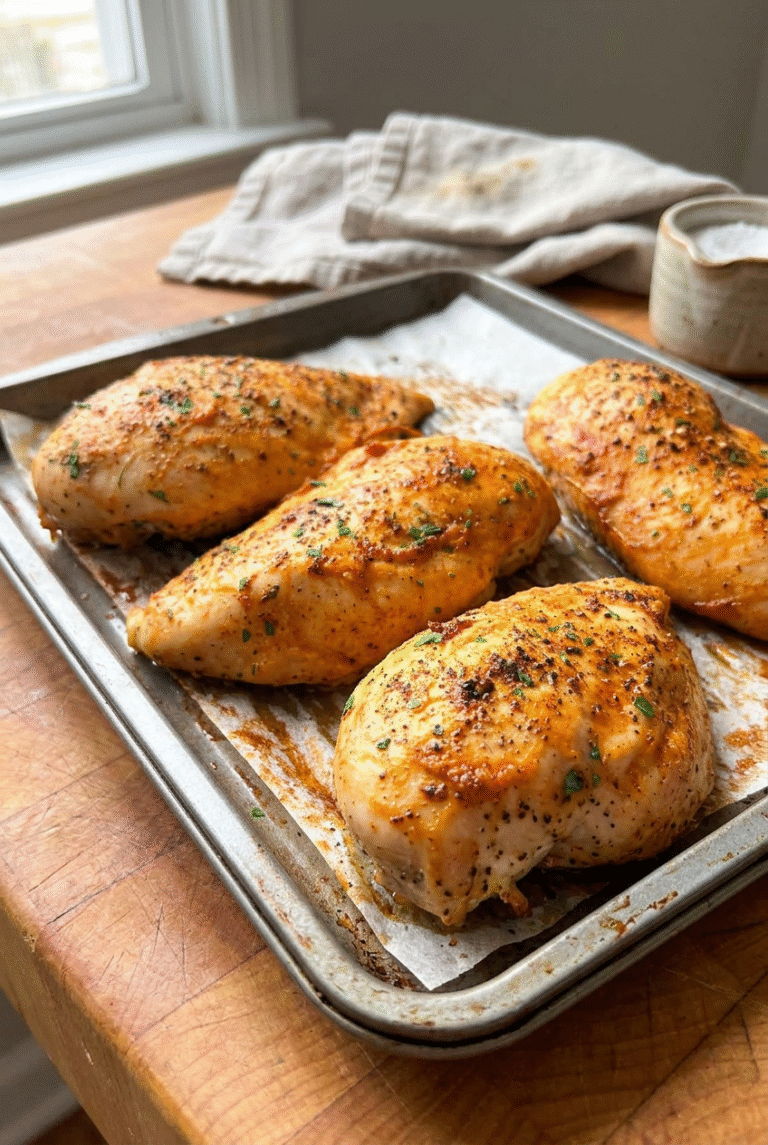
Baked Chicken Breasts
🍗 Achieve perfectly juicy and tender baked chicken breasts with this simple method that locks in moisture and flavor, ideal for healthy weeknight dinners.
🔥 Skip the hassle of grilling or frying – this foolproof recipe ensures consistent results every time, making it a must-try for easy meal prep!
- Total Time: 35 minutes
- Yield: 4 servings
Ingredients
– 4 boneless, skinless chicken breasts pounded to even thickness for base providing lean protein
– 1 tablespoon melted butter or olive oil for moisture and browning
– 1 teaspoon kosher salt for flavor and brine
– 1/2 teaspoon freshly ground black pepper for subtle heat and depth
– 1/2 teaspoon garlic powder for savory garlic note
– 1/2 teaspoon smoked paprika for smoky spice and crust
– 1/4 cup kosher salt for brine
– 2 cups lukewarm water for brine
– 2 cups cold water or ice cubes for brine
Instructions
1-First Step: Prepare the Brine Start by mixing the brine to ensure your chicken stays moist. Dissolve 1/4 cup kosher salt in 2 cups lukewarm water, then add 2 cups cold water or ice cubes to cool it down. Submerge the 4 boneless, skinless chicken breasts, pounded to even thickness, in this brine for 15 minutes or up to 6 hours in the fridge. Once done, rinse the chicken and pat it dry to remove excess salt this step is key for flavor balance.
2-Second Step: Preheat the Oven Heat your oven to 450°F while the chicken brines. This high temperature helps sear the outside quickly, locking in juices. Make sure your baking sheet is ready; use a metal one for even heat distribution, as it’s safer for high temps. This preparation sets the stage for perfectly cooked chicken.
3-Third Step: Season the Chicken After brining and drying the chicken, brush both sides with 1 tablespoon melted butter or olive oil. In a small bowl, combine 1 teaspoon kosher salt, 1/2 teaspoon freshly ground black pepper, 1/2 teaspoon garlic powder, and 1/2 teaspoon smoked paprika. Sprinkle this mixture evenly over both sides of the chicken breasts. This seasoning step adds flavor and helps create a tasty crust during baking.
4-Fourth Step: Bake the Chicken Place the seasoned chicken breasts on a metal baking sheet or oven-safe dish. Slide it into the preheated 450°F oven and bake for 15-18 minutes. Use a thermometer to check that the internal temperature reaches 165°F in the thickest part it’s the best way to avoid overcooking. If you want a golden top, broil for 3-5 minutes at the end, but keep an eye on it to prevent burning.
5-Fifth Step: Rest and Serve Once baked, take the chicken out and cover it loosely with foil. Let it rest for 5-10 minutes so the juices settle inside. This resting period makes the meat even more tender and flavorful. Now, slice and serve it with your favorite sides for a complete meal. The total prep time is about 20 minutes, cooking takes 15 minutes, and you’re done in 35 minutes flat.
Last Step:
Please leave a rating and comment letting us know how you liked this recipe! This helps our business to thrive and continue providing free, high-quality recipes for you.Notes
🧂 Brining the chicken is key to ensuring it stays juicy and tender throughout the baking process.
🌡️ Always use a meat thermometer to check for an internal temperature of 165°F for safe and perfect doneness.
😌 Allow the chicken to rest after baking to redistribute the juices, resulting in moister meat.
- Prep Time: 20 minutes
- Resting Time: 5-10 minutes
- Cook Time: 15-18 minutes
- Category: Main Course
- Method: Oven-Baked
- Cuisine: American
Nutrition
- Serving Size: 1 chicken breast
- Calories: 185
- Sugar: 0g
- Sodium: 800mg
- Fat: 5g
- Saturated Fat: 2g
- Unsaturated Fat: 3g
- Trans Fat: 0g
- Carbohydrates: 0g
- Fiber: 0g
- Protein: 31g
- Cholesterol: 105mg