Ingredients
– 1½ cups chocolate chip cookie crumbs for the crust
– 3 Tbsp unsalted butter for binding
– 2 Tbsp granulated sugar for sweetening
– 2 (8oz) packages cream cheese for the filling
– ⅔ cup granulated sugar for sweetness
– 2 tsp pure vanilla extract for flavor
– 2 large eggs for setting
– ¼ cup dulce de leche for caramel
– 2 (8oz) packages plant-based cream cheese alternative for vegan option
– 2 flax eggs for vegan option
– 2 Tbsp ground flaxseed for flax eggs
– 6 Tbsp water for flax eggs
– gluten-free chocolate chip cookie crumbs for gluten-free option
– low-fat cream cheese for low-calorie option
– ½ cup granulated sugar for low-calorie option
Instructions
1-First Step: Make the Crust
Preheat your oven to 325°F to get things started on the right note. Combine the 1½ cups chocolate chip cookie crumbs, 3 Tbsp melted unsalted butter, and 2 Tbsp granulated sugar in a bowl until it resembles wet sand. Press this mixture firmly into a greased 7-inch springform pan, making sure it covers the bottom evenly and goes up the sides about ¼ inch; this creates a sturdy base. Tightly wrap the pan’s bottom and sides in heavy-duty aluminum foil to prevent any water from seeping in during baking, then bake for 10 minutes until it’s golden brown and smells amazing. Let it cool completely before moving on, which helps the crust set properly. For a gluten-free version, use gluten-free cookie crumbs here to adapt easily.
2-Second Step: Make the Filling
Once the crust is cool, beat the 2 (8oz) packages of softened cream cheese, ⅔ cup granulated sugar, and 2 tsp pure vanilla extract in a mixing bowl for about 2 minutes until it’s super smooth and creamy. Don’t forget to scrape down the sides of the bowl to ensure everything mixes evenly. Add the 2 lightly beaten large eggs and beat on medium-low speed until the mixture is fully incorporated and looks fluffy, which usually takes another minute or so. For a low-calorie twist, consider using low-fat cream cheese at this stage to keep things light. Pour this luscious filling over the cooled crust, spreading it out evenly for the best results.
3-Third Step: Add the Dulce De Leche Swirl
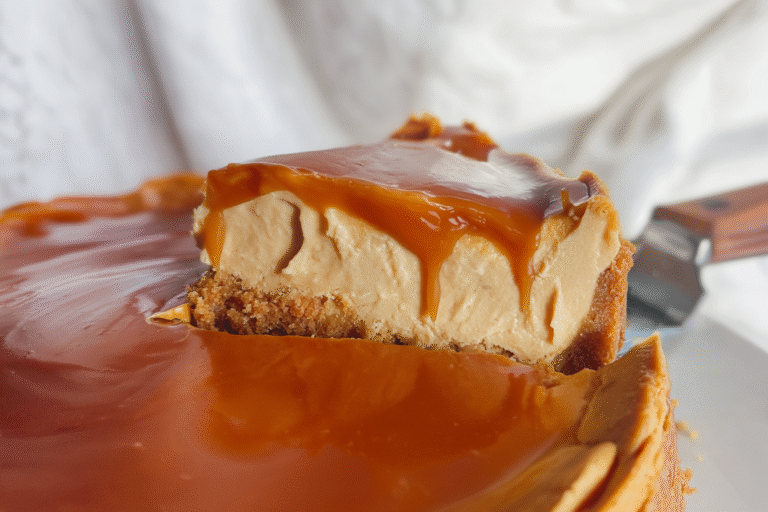
Now for the fun part: pour the ¼ cup of melted dulce de leche right on top of the filling in the pan. Use a knife to gently swirl it through the batter, creating those beautiful caramel ribbons that make this Dulce De Leche Cheesecake stand out. Be careful not to over-swirl, or you’ll lose the distinct layers; just a few passes will do. This step is where the magic happens, adding that extra burst of flavor. If you’re going vegan, substitute with a plant-based dulce de leche alternative for the same effect.
4-Fourth Step: Bake the Cheesecake
Place the springform pan inside a larger baking pan for the water bath, which is crucial for even baking and preventing cracks. Fill the outer pan with about 1 inch of hot water to create a gentle steam environment. Bake at 325°F for 45-50 minutes; you’re looking for the edges to turn golden brown and pull away from the side while the center still jiggles a bit. Keeping the oven door closed during this time is key to avoiding any cracks, so resist the urge to peek. For dietary preferences, ensure your ingredients align, like using flax eggs if needed, to maintain the texture.
5-Fifth Step: Cool the Cheesecake
Turn off the oven and crack the door slightly once baking is done, then let the cheesecake cool inside for about 1 hour; this gradual cooling helps prevent cracking and keeps it smooth. After that, remove it from the oven and let it cool completely at room temperature. Finally, pop it in the fridge for at least 4 hours or overnight to set fully before you slice into it. This resting time allows the flavors to meld, making each bite even better. Remember, if you’re prepping for a crowd, you can adapt this for larger batches with ease.
Last Step:
Please leave a rating and comment letting us know how you liked this recipe! This helps our business to thrive and continue providing free, high-quality recipes for you.Notes
🧀 Ensure cream cheese is room temperature for smooth batter; mix thoroughly until creamy.
🚪 Keep oven door closed during baking to prevent cracks. Center jiggle indicates doneness.
❄️ Completely cooled cheesecake freezes well (up to 1 month); wrap slices or whole cake tightly.
- Prep Time: 15 minutes
- Cooling: 5 hours
- Cook Time: 1 hour
- Category: Dessert
- Method: Baking
- Cuisine: Latin American
- Diet: Non-vegetarian
Nutrition
- Serving Size: 1 slice
- Calories: 558
- Sugar: 29g
- Sodium: 371mg
- Fat: 40.7g
- Saturated Fat: 24.6g
- Unsaturated Fat: 16.1g
- Trans Fat: 0g
- Carbohydrates: 41.5g
- Fiber: 1.5g
- Protein: 9.5g
- Cholesterol: 180mg