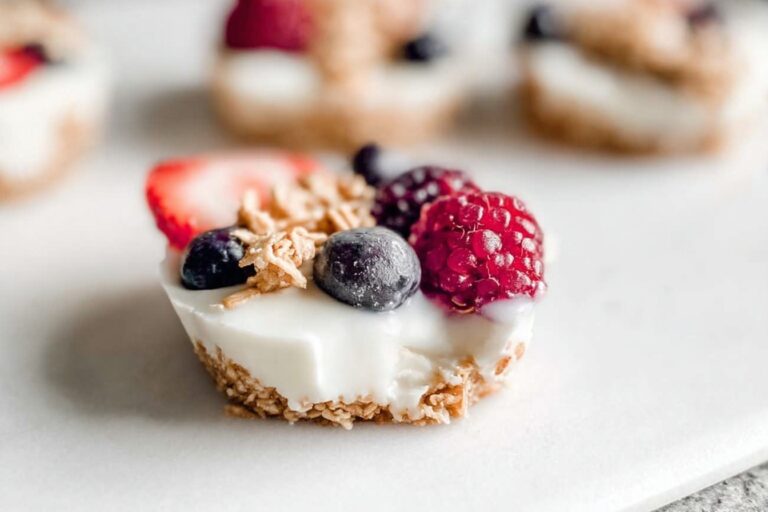
Ingredients
– 1/4 cup peanut butter or almond butter for holding the granola together and adding flavor
– 1 tablespoon honey or agave syrup for lightly sweetening the cups
– 3/4 cup granola for building the crunchy base and topping
– 1 cup whole milk Greek yogurt for making the filling thick and creamy
– 1/2 cup sliced berries or other fruit for adding fresh taste and bright color
– 1 tablespoon chopped walnuts for giving texture and a nutty finish
– Optional honey drizzle for adding a little shine and extra sweetness on top
Instructions
1-First Step: Gather and line your pan Start by setting out all your ingredients on the counter. This makes the process smooth and quick, which is especially helpful if you are making snacks with kids or trying to get prep done after work. Line a muffin tin with paper liners or use silicone muffin cups for easier removal. If you want the cups to pop out cleanly, silicone molds are a great choice.
2-Second Step: Mix the crunchy base In a medium bowl, stir together the 1/4 cup peanut butter or almond butter and 1 tablespoon honey or agave syrup until smooth. Add the 3/4 cup granola and 1 tablespoon chopped walnuts. Mix until everything is coated well. The mixture should look sticky enough to press together. If the mixture feels too dry, add a tiny bit more nut butter. If it feels too thick, a small spoonful of warm honey can help loosen it. This base gives the cups their shape and adds that satisfying crunch.
3-Third Step: Build the cup base Spoon the granola mixture into each liner, then press it down firmly with the back of a spoon. You want a thin layer that covers the bottom and rises slightly up the sides, like a mini crust. Pressing it well helps the cups hold together once chilled. Try to keep each base even so the cups set at the same rate. This also helps them look neat when served.
4-Fourth Step: Stir the yogurt filling In another bowl, spoon in 1 cup whole milk Greek yogurt. If you want a touch more sweetness, you can stir in a little of the honey from the optional drizzle or a tiny extra spoonful of honey or agave. Mix until smooth and creamy. Greek yogurt works so well here because it is thick and holds its shape better than regular yogurt. That means your cups will feel more stable and less watery after chilling.
5-Fifth Step: Add the yogurt layer Divide the yogurt evenly over the pressed granola bases. Use the back of a spoon to smooth the tops. Fill each cup almost to the top, but leave a little room for the fruit and garnish. At this stage, the cups already look appetizing. The white yogurt against the golden granola makes a pretty contrast.
6-Sixth Step: Top with fruit and finish Scatter 1/2 cup sliced berries or other fruit over the yogurt. Strawberries, blueberries, raspberries, peaches, and kiwi all work well. Add a light drizzle of honey on top if you want a sweeter finish. The fruit is more than decoration. It adds freshness, color, and a juicy bite that balances the creamy yogurt and crunchy base.
7-Seventh Step: Chill until firm Place the muffin tin or molds in the freezer for about 2 to 3 hours, or until the cups are firm enough to lift out cleanly. If you are short on time, give them at least 90 minutes, though a longer freeze gives the best texture. Before serving, let them sit at room temperature for 3 to 5 minutes so they soften slightly. This makes them easier to bite into and gives the best flavor.
8-Final Step: Serve and enjoy Carefully remove the cups from the liners or molds. Serve them cold and enjoy right away. These are perfect for breakfast on the go, an afternoon snack, or a simple dessert after dinner. For another fun recipe with a sweet and nutty feel, try peanut butter and jelly pancakes.
Last Step:
Please leave a rating and comment letting us know how you liked this recipe! This helps our business to thrive and continue providing free, high-quality recipes for you.Notes
🧊 Line muffin tin well—easily pop out frozen treats without sticking.
🍓 Use ripe berries; frozen works too for year-round freshness.
❄️ Store in freezer bag up to 2 weeks—grab-and-go healthy dessert ready.
- Prep Time: 10 minutes
- Freeze: 2 hours
- Category: Dessert
- Method: No Cook
- Cuisine: American
- Diet: Vegetarian
Nutrition
- Serving Size: 1 cup
- Calories: 220 kcal
- Sugar: 8g
- Sodium: 100mg
- Fat: 12g
- Saturated Fat: 3g
- Unsaturated Fat: 9g
- Trans Fat: 0g
- Carbohydrates: 18g
- Fiber: 2g
- Protein: 8g
- Cholesterol: 5mg