
Why You’ll Love This Lemon Curd
If you love bright citrus flavor, this Lemon Curd is about to become a favorite in your kitchen. It comes together with simple pantry ingredients, and the result is smooth, rich, and sweet-tart in the best way. According to the Cleveland Clinic, lemons offer useful nutrients and plant compounds, which makes fresh lemon juice a smart choice for adding flavor to your recipes: learn more about the benefits of lemons.
- Easy to make: This lemon curd recipe uses a short stovetop method, so you do not need any fancy tools or baking skills. It is a great choice for busy parents, students, and working professionals who want a quick homemade treat.
- Bright and flavorful: Fresh lemon juice and lemon zest give this Lemon Curd a clean, lively flavor that tastes fresh, not heavy. The balance of sweetness and tartness makes every spoonful pop.
- Useful in many recipes: You can spread it on toast, spoon it over yogurt, fill cakes and tarts with it, or layer it into parfaits. It also pairs well with breakfast, snacks, and desserts.
- Fits many lifestyles: This recipe is naturally gluten-free, and it can be adapted for different needs with simple swaps. That makes it handy for party hosts, food lovers, and anyone cooking for a mixed crowd.
One batch of lemon curd can turn a basic breakfast or dessert into something special with very little effort.
Jump to:
- Why You’ll Love This Lemon Curd
- Essential Ingredients for Lemon Curd
- Main Ingredients
- Special Dietary Options
- Ingredient Notes for Best Results
- How to Prepare the Perfect Lemon Curd: Step-by-Step Guide
- First Step: Gather and prep your ingredients
- Second Step: Whisk the base mixture
- Third Step: Cook gently over medium-low heat
- Fourth Step: Add the butter
- Fifth Step: Strain for extra smoothness
- Sixth Step: Cool and chill
- Final Step: Serve and enjoy
- Dietary Substitutions to Customize Your Lemon Curd
- Protein and Main Component Alternatives
- Vegetable, Sauce, and Seasoning Modifications
- Mastering Lemon Curd: Advanced Tips and Variations
- Pro cooking techniques
- Flavor variations
- Presentation tips
- Make-ahead options
- How to Store Lemon Curd: Best Practices
- Refrigeration
- Freezing
- Reheating
- Meal prep considerations
- FAQs: Frequently Asked Questions About Lemon Curd
- What is lemon curd and what is it used for?
- How do you make lemon curd at home?
- How long does homemade lemon curd last in the fridge?
- Can you freeze lemon curd?
- Can I make lemon curd with other citrus fruits?
- Lemon Curd
- Ingredients
- Instructions
- Last Step:
- Notes
- Nutrition
- Did you make this recipe?
Essential Ingredients for Lemon Curd
This homemade Lemon Curd uses just a few ingredients, but each one matters. For the smoothest texture and best flavor, use fresh lemons and good-quality butter. The ingredients below are listed exactly as needed for this recipe.
Main Ingredients
- 4 large egg yolks – These create the rich, custard-like base and help the curd thicken gently on the stove.
- 2/3 cup granulated sugar – Sugar balances the tart lemon flavor and gives the curd its classic sweet finish.
- 1 tablespoon lemon zest – Lemon zest adds a strong citrus aroma and deeper lemon taste.
- 1/3 cup fresh lemon juice – Fresh juice is the star of the recipe and gives the curd its bright, tangy flavor.
- 1/8 teaspoon salt – A small amount of salt sharpens the flavor and keeps the sweetness from tasting flat.
- 6 tablespoons unsalted butter, softened and cut into 6 pieces – Butter adds silky texture, richness, and a glossy finish.
Special Dietary Options
- Vegan: Swap the egg yolks for a plant-based lemon custard made with cornstarch, coconut cream, and dairy-free butter. The texture will be a little different, but still creamy.
- Gluten-free: This recipe is naturally gluten-free as written, so there is no need for extra substitutions.
- Low-calorie: You can reduce the sugar slightly or use a lower-calorie sweetener that works for cooking, though the texture may change a bit.
Ingredient Notes for Best Results
| Ingredient | Why It Matters | Helpful Tip |
|---|---|---|
| Egg yolks | Create the smooth custard texture | Use fresh eggs for the best flavor and color |
| Lemon juice | Gives the curd its bold citrus taste | Freshly squeezed juice tastes better than bottled |
| Butter | Makes the curd glossy and rich | Add it slowly for a silky finish |
If you want the brightest flavor, always use fresh lemons rather than bottled juice.
How to Prepare the Perfect Lemon Curd: Step-by-Step Guide
Making Lemon Curd at home is much easier than it sounds. The key is gentle heat, steady whisking, and a little patience. Once you get the rhythm, you will have a smooth, shiny curd that tastes far better than anything from a jar. If you enjoy simple breakfast bakes, this also pairs nicely with blueberry banana muffins for a sweet brunch spread.
First Step: Gather and prep your ingredients
Before you begin, separate the egg yolks and measure everything out. This recipe moves fairly quickly once the pan goes on the stove, so it helps to have the sugar, lemon zest, lemon juice, salt, and butter ready. Cut the butter into pieces so it melts evenly. Set out a whisk, a medium saucepan, and a heatproof bowl for the finished curd.
Second Step: Whisk the base mixture
In a medium saucepan, whisk together the 4 large egg yolks, 2/3 cup granulated sugar, 1 tablespoon lemon zest, 1/3 cup fresh lemon juice, and 1/8 teaspoon salt. Whisk until the mixture looks smooth and well blended. At this stage, the sugar should start dissolving into the lemon juice. This step is important because it helps the curd cook evenly later.
Third Step: Cook gently over medium-low heat
Place the saucepan over medium-low heat. Stir constantly with a whisk or silicone spatula, making sure to reach the corners of the pan. Keep the heat gentle so the egg yolks do not scramble. After a few minutes, the mixture will begin to thicken. This is where patience pays off.
The curd should reach a consistency that lightly coats the back of a spoon. If you have a kitchen thermometer, aim for about 170°F. Do not let it boil. A boil can make the curd grainy or curdled, which is the opposite of that smooth, creamy texture you want.
Fourth Step: Add the butter
Once the mixture thickens, remove the pan from the heat. Add the 6 tablespoons unsalted butter, softened and cut into 6 pieces, one piece at a time. Whisk each piece in before adding the next. This helps the butter melt evenly and gives the lemon curd its glossy finish. The texture should become velvety and rich.
Fifth Step: Strain for extra smoothness
For the silkiest result, strain the warm curd through a fine-mesh sieve into a clean bowl. This removes any tiny bits of cooked egg or zest that might remain. While this step is optional, it is especially helpful if you want a polished, bakery-style finish. If you are making the curd for guests, this extra step makes a big difference.
Sixth Step: Cool and chill
Press a piece of plastic wrap directly onto the surface of the curd to keep a skin from forming. Let it cool at room temperature for a short time, then refrigerate it for at least 2 hours until fully chilled. As it cools, the curd will thicken more and take on that spoonable texture everyone loves.
Final Step: Serve and enjoy
Once chilled, give the lemon curd a quick stir and use it right away or store it in a jar. Spoon it over pancakes, waffles, scones, yogurt, or cake layers. It also works well as a filling for tart shells and cookies. For a weekend breakfast spread, it tastes especially good with almond croissant bites.
Keep the heat low and stir often. Gentle cooking is the secret to smooth lemon curd.

Dietary Substitutions to Customize Your Lemon Curd
One reason people love Lemon Curd is how flexible it can be. While the classic version uses egg yolks, sugar, lemon, salt, and butter, there are easy ways to adapt it for different eating styles or ingredient needs.
Protein and Main Component Alternatives
If you need an egg-free version, use a plant-based custard base made with cornstarch, coconut milk, lemon juice, lemon zest, sugar, and dairy-free butter. This is the best route for vegan cooks. If you want a lighter option, some cooks replace part of the butter with a small amount of plant-based spread, though the flavor may be less rich.
For those who do not want dairy, swap the butter for a vegan butter stick made for baking. Choose one that melts smoothly and does not have a strong savory taste. If you are making dessert for a mixed group, this can be a helpful way to keep the recipe more inclusive.
Vegetable, Sauce, and Seasoning Modifications
While lemon curd is usually made as written, you can adjust the citrus profile with other fruit juices. Lime, orange, grapefruit, or blood orange all work well in place of lemon juice. If you like a deeper, more floral flavor, try adding a little extra zest. A tiny splash of vanilla can soften the sharp citrus edge, though it will change the classic taste.
For a lower-sugar version, reduce the sugar slightly, but keep in mind that sugar helps with both texture and flavor. If you cut it too much, the curd may taste too tart and may not thicken as smoothly. For a fun brunch spread, serve different fruit curds beside breakfast breads like homemade cinnamon bread.
Mastering Lemon Curd: Advanced Tips and Variations
Once you have the basic method down, you can start making Lemon Curd like a pro. A few small changes can improve the texture, flavor, and presentation in a big way. These tips are especially helpful if you plan to make it often for family breakfasts, dessert trays, or gifts.
Pro cooking techniques
Use a heavy-bottomed saucepan so the mixture heats evenly. Thin pans can create hot spots and cook the eggs too fast. Stir constantly from the moment the pan goes on the heat until the curd is finished. If you are nervous about scrambling the eggs, use a double boiler for more control. A thermometer also helps because you can pull the curd from the heat right around 170°F.
Flavor variations
You can keep the same method and switch the citrus for something new. Lime curd is tart and bright, orange curd is sweeter and softer, and grapefruit curd has a slightly bitter edge that works well in baked desserts. For a more interesting finish, stir in a pinch of cardamom, a little vanilla, or extra zest. If you want ideas for serving, this dessert guide from lemon curd dessert ideas offers more inspiration.
Presentation tips
Serve the curd in a small glass jar or white bowl so the sunny yellow color stands out. Top it with thin lemon slices, fresh berries, or a little grated zest. For brunch, pair it with scones, muffins, or toast on a pretty platter. It also looks beautiful piped into tart shells or layered in dessert cups.
Make-ahead options
This recipe is great for planning ahead. Make it one or two days before a gathering, then chill it until serving time. You can also portion it into small containers for lunchbox treats or quick dessert toppings during the week. Since it keeps well in the fridge, it is a smart choice for busy homes.
How to Store Lemon Curd: Best Practices
Proper storage keeps your Lemon Curd smooth, fresh, and safe to eat. Because it contains eggs and butter, it needs to stay chilled after cooking. Luckily, it stores well and can also be frozen for later use.
Refrigeration
Store lemon curd in an airtight jar or container in the refrigerator for up to 2 weeks. Keep it below 40°F and always use a clean spoon when scooping it out. If you notice an off smell, mold, or separation, throw it away.
Freezing
You can freeze lemon curd for up to 3 months. Let it cool fully first, then place it in freezer-safe containers, silicone molds, or small bags. Leave a little space at the top for expansion. Thaw it in the fridge overnight before using, then stir well to bring back the smooth texture.
Reheating
If the curd feels too firm after chilling or freezing, let it sit at room temperature for a short time. Avoid microwaving unless you do it very gently, since high heat can cause separation. A slow warm-up gives you the best texture.
Meal prep considerations
For meal prep, divide the curd into small jars so you can grab just what you need. This works well for breakfast toppings, dessert filling, or small gifts. It is also helpful if you want to make several flavors at once for a holiday tray or brunch board.
FAQs: Frequently Asked Questions About Lemon Curd
What is lemon curd and what is it used for?
Lemon curd is a smooth, tangy-sweet custard made from fresh lemon juice, zest, sugar, eggs, and butter. It’s cooked gently on the stovetop until thickened, creating a versatile spread with a bright citrus flavor. Use it as a filling for tarts, pies, cakes, or crepes; spread it on scones, toast, or pancakes; or swirl it into yogurt, cheesecakes, or ice cream. It’s also great in thumbprint cookies or as a topping for pavlova. One batch yields about 2 cups, perfect for multiple uses. Store in an airtight jar in the fridge for up to 2 weeks. For best results, strain through a sieve after cooking to remove any bits for extra silkiness. This simple ingredient elevates desserts and breakfasts alike.
How do you make lemon curd at home?
To make lemon curd, whisk together 3/4 cup fresh lemon juice, 1 tablespoon zest, 3/4 cup sugar, 3 large eggs, and 1/2 cup unsalted butter (cut into pieces) in a saucepan. Cook over medium-low heat, stirring constantly with a whisk, for 8-10 minutes until it thickens to coat the back of a spoon (about 170°F). Avoid boiling to prevent curdling. Remove from heat, strain into a bowl, and press plastic wrap directly on the surface to avoid a skin. Chill for 2 hours. Yields 2 cups. Tips: Use room-temperature eggs for smoothness, and a double boiler if you’re new to it. This method takes 20 minutes total and beats store-bought versions in taste.
How long does homemade lemon curd last in the fridge?
Homemade lemon curd lasts 1-2 weeks in the fridge when stored in an airtight container or jar. The eggs and butter make it perishable, so always keep it chilled below 40°F. Check for spoilage by smell (sour or off odor) or appearance (mold or separation). For longer storage, freeze it in portions: spoon into ice cube trays or freezer bags, leaving headspace for expansion. It freezes well for up to 3 months—thaw overnight in the fridge and stir before use. Label with dates for tracking. Pro tip: Portion into small jars for easy gifting or single-use servings. Proper storage keeps its creamy texture and zesty flavor intact.
Can you freeze lemon curd?
Yes, lemon curd freezes beautifully for up to 3 months, extending its usability beyond fridge life. Cool completely, then portion into freezer-safe containers, silicone molds, or zipped bags, flattening for space. Leave 1/2-inch headspace to allow expansion. Thaw in the fridge overnight or at room temp for 1-2 hours, then stir vigorously to restore smoothness—any ice crystals will melt in. Avoid microwaving to prevent separation. Frozen curd works perfectly in baking (no thawing needed) or as a pie filling. One 2-cup batch can yield 16 tablespoon-sized portions. This method saves time and reduces waste, ideal for holiday prep or bulk making.
Can I make lemon curd with other citrus fruits?
Yes, swap lemons for limes, oranges, grapefruits, or blood oranges using the same recipe—just adjust sugar slightly for tartness (e.g., add 1-2 tbsp more for grapefruit). For pineapple curd, use 3/4 cup juice instead of lemon juice and omit zest. Cranberry version: blend 1 cup cooked cranberries with 1/2 cup lemon juice, strain, and proceed. Cooking time stays the same, but taste-test for balance. Yields the same creamy texture. Examples: Lime curd for key lime pie, orange for marmalade tarts. Always use fresh juice for best flavor. This flexibility lets you create seasonal variations without new recipes, perfect for experimenting in cakes or pastries.
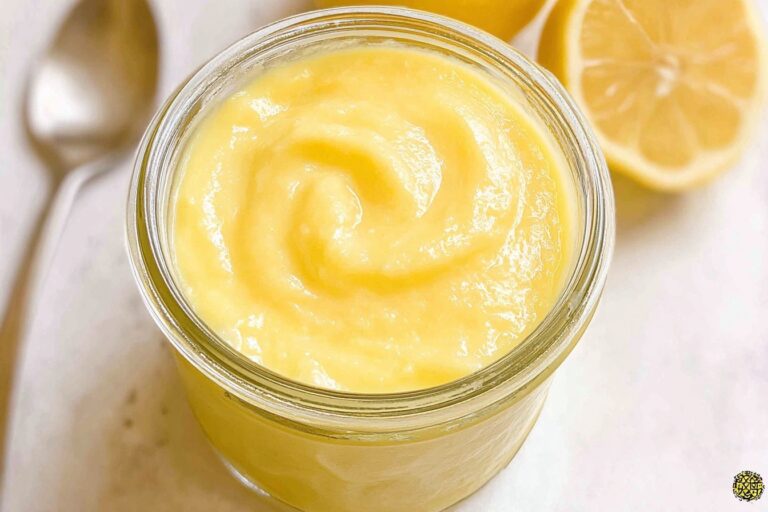
Lemon Curd
🍋 Indulge in silky, vibrant homemade lemon curd bursting with fresh citrus flavor, perfect for topping scones, cakes, or yogurt.
🧈 This easy stovetop recipe yields a tangy delight that’s smoother and brighter than any store-bought version!
- Total Time: 2 hours 20 minutes
- Yield: 1 1/2 cups (12 servings)
Ingredients
– 4 large egg yolks
– 2/3 cup granulated sugar
– 1 tablespoon lemon zest
– 1/3 cup fresh lemon juice
– 1/8 teaspoon salt
– 6 tablespoons unsalted butter, softened and cut into 6 pieces
Instructions
1-First Step: Gather and prep your ingredients Before you begin, separate the egg yolks and measure everything out. This recipe moves fairly quickly once the pan goes on the stove, so it helps to have the sugar, lemon zest, lemon juice, salt, and butter ready. Cut the butter into pieces so it melts evenly. Set out a whisk, a medium saucepan, and a heatproof bowl for the finished curd.
2-Second Step: Whisk the base mixture In a medium saucepan, whisk together the 4 large egg yolks, 2/3 cup granulated sugar, 1 tablespoon lemon zest, 1/3 cup fresh lemon juice, and 1/8 teaspoon salt. Whisk until the mixture looks smooth and well blended. At this stage, the sugar should start dissolving into the lemon juice. This step is important because it helps the curd cook evenly later.
3-Third Step: Cook gently over medium-low heat Place the saucepan over medium-low heat. Stir constantly with a whisk or silicone spatula, making sure to reach the corners of the pan. Keep the heat gentle so the egg yolks do not scramble. After a few minutes, the mixture will begin to thicken. This is where patience pays off. The curd should reach a consistency that lightly coats the back of a spoon. If you have a kitchen thermometer, aim for about 170°F. Do not let it boil. A boil can make the curd grainy or curdled, which is the opposite of that smooth, creamy texture you want.
4-Fourth Step: Add the butter Once the mixture thickens, remove the pan from the heat. Add the 6 tablespoons unsalted butter, softened and cut into 6 pieces, one piece at a time. Whisk each piece in before adding the next. This helps the butter melt evenly and gives the lemon curd its glossy finish. The texture should become velvety and rich.
5-Fifth Step: Strain for extra smoothness For the silkiest result, strain the warm curd through a fine-mesh sieve into a clean bowl. This removes any tiny bits of cooked egg or zest that might remain. While this step is optional, it is especially helpful if you want a polished, bakery-style finish. If you are making the curd for guests, this extra step makes a big difference.
6-Sixth Step: Cool and chill Press a piece of plastic wrap directly onto the surface of the curd to keep a skin from forming. Let it cool at room temperature for a short time, then refrigerate it for at least 2 hours until fully chilled. As it cools, the curd will thicken more and take on that spoonable texture everyone loves.
7-Final Step: Serve and enjoy Once chilled, give the lemon curd a quick stir and use it right away or store it in a jar. Spoon it over pancakes, waffles, scones, yogurt, or cake layers. It also works well as a filling for tart shells and cookies. For a weekend breakfast spread, it tastes especially good with almond croissant bites.
Last Step:
Please leave a rating and comment letting us know how you liked this recipe! This helps our business to thrive and continue providing free, high-quality recipes for you.Notes
🍋 Use fresh lemons for the best flavor and brightest color in your curd.
🔥 Whisk constantly and cook gently over medium-low heat to prevent curdling or scrambling the eggs.
❄️ Press plastic wrap directly onto the surface before chilling to avoid a rubbery skin forming.
- Prep Time: 10 minutes
- Chilling Time: 2 hours
- Cook Time: 10 minutes
- Category: Dessert
- Method: Stovetop
- Cuisine: British
- Diet: Vegetarian, Gluten-Free
Nutrition
- Serving Size: 2 tablespoons
- Calories: 120 kcal
- Sugar: 12g
- Sodium: 50mg
- Fat: 8g
- Saturated Fat: 5g
- Trans Fat: 0g
- Carbohydrates: 12g
- Fiber: 0g
- Protein: 1g
- Cholesterol: 100mg