

Why You’ll Love This Oreo Cheesecake Cookie Cups
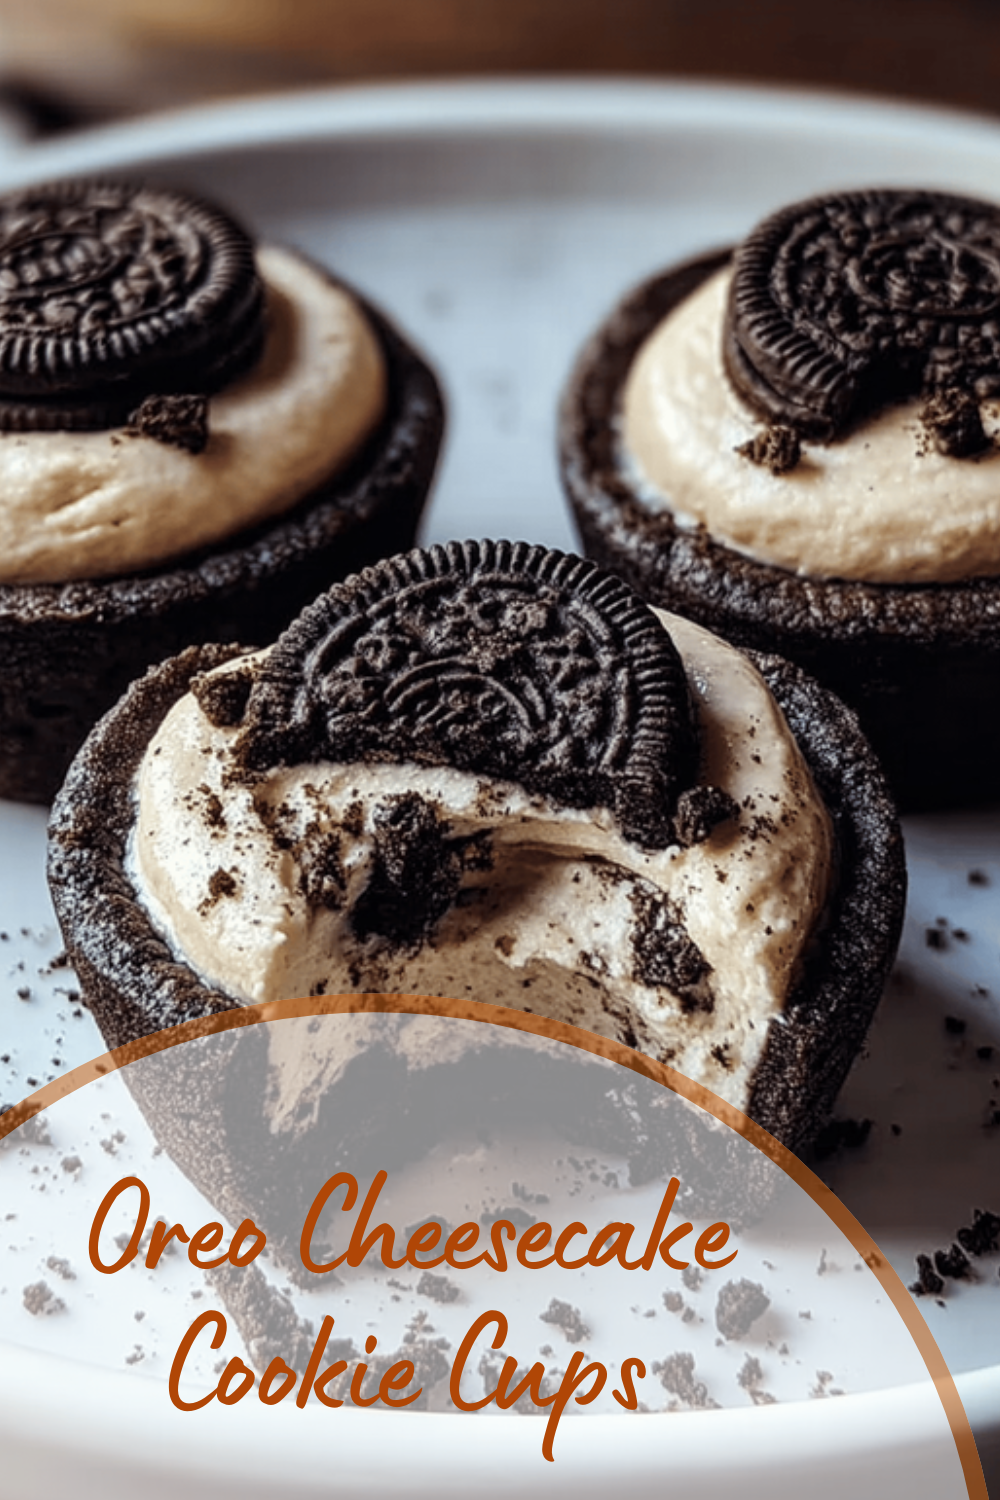
Oreo cheesecake cookie cups combine the best of two worlds: the creamy goodness of cheesecake and the satisfying crunch of cookies. This recipe is simple enough for busy parents or students yet delivers a treat that food enthusiasts will rave about. Whether you’re a baking beginner or a pro, these delightful bites offer a versatile option for parties or quick desserts that everyone in the family can enjoy.
First, let’s talk about how easy this recipe is to prepare. As a home cook myself, I appreciate recipes that don’t require a ton of fancy tools or ingredients, and these Oreo cheesecake cookie cups fit the bill perfectly. You’ll be amazed at how quickly they come together, leaving you more time to relax and enjoy the moment with friends or family.
Plus, they come with some great health benefits that make them a smarter choice for diet-conscious individuals. By using real ingredients like cream cheese and eggs, you get a balance of nutrients without going overboard on sugar, promoting a guilt-free indulgence. This makes the Oreo cheesecake cookie cups recipe a hit for wellness-focused folks who still want to treat themselves.
- The ease of preparation means you can whip up a batch in under an hour, perfect for those hectic days.
- Health benefits include balanced nutrition from wholesome dairy, which provides protein and calcium.
- Versatility allows for simple swaps, like using vegan options, to suit various dietary needs.
- The distinctive flavor blends creamy filling with a crunchy Oreo base for a truly unique taste.
To make it even more exciting, this Oreo cheesecake cookie cups recipe adapts seamlessly to different preferences. Baking enthusiasts might experiment with add-ins, while party hosts can scale it up for gatherings. If you’re looking for more baking ideas, check out my almond croissant bites for another easy treat that pairs well with coffee.
Jump to:
- Why You’ll Love This Oreo Cheesecake Cookie Cups
- Essential Ingredients for Oreo Cheesecake Cookie Cups
- Chocolate Cookie Cups Ingredients
- Cheesecake Filling Ingredients
- How to Prepare the Perfect Oreo Cheesecake Cookie Cups: Step-by-Step Guide
- Dietary Substitutions to Customize Your Oreo Cheesecake Cookie Cups
- Mastering Oreo Cheesecake Cookie Cups: Advanced Tips and Variations
- Nutritional Information Table
- How to Store Oreo Cheesecake Cookie Cups: Best Practices
- FAQs: Frequently Asked Questions About Oreo Cheesecake Cookie Cups
- How do I make Oreo Cheesecake Cookie Cups at home?
- Can I use regular cream cheese for Oreo Cheesecake Cookie Cups?
- How long can Oreo Cheesecake Cookie Cups be stored?
- Can I make Oreo Cheesecake Cookie Cups ahead of time for a party?
- Are Oreo Cheesecake Cookie Cups kid-friendly?
- Oreo Cheesecake Cookie Cups
- Ingredients
- Instructions
- Last Step:
- Notes
- Nutrition
- Did you make this recipe?
Essential Ingredients for Oreo Cheesecake Cookie Cups
Getting the ingredients right is key to nailing this Oreo cheesecake cookie cups recipe. I’ll walk you through everything you need, focusing on precise measurements to make your baking straightforward. By using these items, you’ll create a dessert that’s both creamy and crunchy, appealing to a wide range of tastes.
Start with the basics for the chocolate cookie cups, which form the sturdy base. These help build that irresistible structure we all love in cookie cups. Then, move on to the cheesecake filling for that smooth, luscious center that makes every bite special.
Chocolate Cookie Cups Ingredients
- 2 cups all-purpose flour
- 1/4 cup black cocoa powder (sifted)
- 1/4 cup Dutch-processed cocoa powder (sifted)
- 1 teaspoon baking soda
- 1/2 teaspoon salt
- 1 cup unsalted butter (at room temperature)
- 1/2 cup granulated sugar
- 1 cup packed brown sugar
- 2 large eggs (at room temperature)
- 1 teaspoon vanilla extract
Cheesecake Filling Ingredients
- 1 cup heavy whipping cream (chilled)
- 8 ounces full-fat cream cheese (softened)
- 1/2 cup granulated sugar
- 3/4 cup cookie crumbs
These ingredients ensure a comprehensive recipe that’s easy to follow. For special dietary options, you can swap in plant-based cream cheese and coconut cream for a vegan version, or use gluten-free alternatives for the flour and cookies. This way, the Oreo cheesecake cookie cups stay delicious while fitting various lifestyles.
How to Prepare the Perfect Oreo Cheesecake Cookie Cups: Step-by-Step Guide
Diving into this Oreo cheesecake cookie cups recipe is a fun adventure, and I’ll guide you through each step to make it stress-free. Whether you’re a newbie or have baked before, following these instructions will help you create tasty treats that impress. Let’s break it down so you can enjoy the process and the results.
First, preheat your oven to 350 degrees F and spray two regular muffin tins with cooking spray. This gets everything ready for baking without any sticking issues. Once that’s done, whisk together 2 cups all-purpose flour, 1/4 cup black cocoa powder (sifted), 1/4 cup Dutch-processed cocoa powder (sifted), 1 teaspoon baking soda, and 1/2 teaspoon salt in a bowl, then set it aside.
Next, in another bowl, beat 1 cup unsalted butter (at room temperature) with 1/2 cup granulated sugar and 1 cup packed brown sugar on medium-high speed until it’s light and fluffy, which takes about 2-3 minutes. Reduce the speed and add 2 large eggs (one at a time) along with 1 teaspoon vanilla extract, beating until everything combines smoothly.
Now, add the flour mixture to the butter mix and stir until just combined. Use a large cookie scoop (about 3 tablespoons) to scoop the dough into the muffin tins and press it down to flatten. Bake for 10-13 minutes until mostly set but still soft in the middle. Right after removing from the oven, press down the center with a small jar to create a well, then cool in the pans for 10 minutes, loosen by twisting slightly, cool for 5 more minutes, and finally remove to a wire rack to cool completely.
For the filling, whip 1 cup heavy whipping cream (chilled) until stiff peaks form using a cold whisk and bowl. In a separate bowl, beat 8 ounces full-fat cream cheese (softened) with 1/2 cup granulated sugar until smooth, then add 3/4 cup cookie crumbs and beat until combined. Fold the whipped cream into this mixture gently. Pipe the filling into the cooled cookie cups and refrigerate for 1-2 hours until set. For an extra touch, sprinkle with more cookie crumbs before serving chilled.
The whole process takes about 1 hour and 40 minutes, yielding around 20 cookie cups. Remember, baking times might vary, so keep an eye on them for the best outcome. This step-by-step guide for Oreo cheesecake cookie cups ensures you get that creamy filling and crunchy crust just right.

Dietary Substitutions to Customize Your Oreo Cheesecake Cookie Cups
Making Oreo cheesecake cookie cups your own is simple with a few smart swaps, especially if you have specific dietary needs. This section covers how to adapt the recipe while keeping that creamy filling and crunchy crust intact. Whether you’re vegan or watching calories, these changes make it accessible for everyone.
For protein and main components, swap regular cream cheese with vegan cream cheese to keep things plant-based. Nut-based options like cashew cream cheese work great for a dairy-free twist, adding a subtle flavor boost. These substitutions help maintain the rich texture that makes Oreo cheesecake cookie cups so appealing.
When it comes to vegetables, sauces, and seasonings, try adding fruit sauces like raspberry for a fresh pop. Incorporating spices such as cinnamon or nutmeg can warm up the flavor profile nicely. For gluten sensitivity, replace Oreo crumbs with gluten-free cookie crumbs to keep the recipe inclusive. Together, these tweaks let you tailor the Oreo cheesecake cookie cups to your taste without losing any deliciousness.
Mastering Oreo Cheesecake Cookie Cups: Advanced Tips and Variations
Once you’ve got the basics down, leveling up your Oreo cheesecake cookie cups recipe can be a blast. Here are some advanced tips to refine your skills and add flair. These ideas come from my own kitchen experiments, and they make the dessert even more enjoyable for baking enthusiasts.
Pro cooking techniques include chilling the cheesecake filling overnight to make it firmer and help flavors blend better. Using a food processor for finer Oreo crumbs ensures a consistent texture that elevates the overall experience. For flavor variations, toss in espresso powder for a mocha vibe or switch vanilla extract for almond to add a nutty note that surprises your taste buds.
Presentation is key for party hosts, so garnish with fresh berries or a chocolate sauce drizzle to make them look party-ready. If you’re into meal prepping, make the bases and filling ahead, then assemble later for busy days. These tips for Oreo cheesecake cookie cups help you create variations that wow your guests. For more inspiration, check out my cinnamon bread recipe, which pairs perfectly for a cozy treat.
Nutritional Information Table
| Nutrient | Amount per Serving |
|---|---|
| Calories | 314 kcal |
| Carbohydrates | 34 g |
| Protein | 3 g |
| Fat | 18 g |
| Saturated Fat | 11 g |
| Cholesterol | 71 mg |
| Sodium | 185 mg |
| Potassium | 94 mg |
| Fiber | 1 g |
| Sugar | 21 g |
| Vitamin A | 640 IU |
| Vitamin C | 0.1 mg |
| Calcium | 38 mg |
| Iron | 1.1 mg |
This recipe offers a balanced treat that fits into many diets, as shared in resources like cream cheese nutrition details.
How to Store Oreo Cheesecake Cookie Cups: Best Practices
Storing your Oreo cheesecake cookie cups properly keeps them fresh and tasty, which is great for make-ahead meals. Follow these simple tips to enjoy them over several days without losing that creamy texture. It’s all about maintaining quality so you can savor the flavor anytime.
Keep them in the refrigerator in an airtight container for up to 3-4 days to lock in freshness. For longer storage, freeze them individually wrapped in a freezer-safe container, and they’ll last up to 2 months. When you’re ready to eat, thaw in the fridge overnight and serve cold to preserve the crunch.
If you’re prepping for the week, package in single servings for easy access. These methods ensure your Oreo cheesecake cookie cups stay delicious, making them ideal for busy schedules or unexpected guests. Remember, they taste best straight from the fridge, adding to their appeal for quick desserts.
FAQs: Frequently Asked Questions About Oreo Cheesecake Cookie Cups
How do I make Oreo Cheesecake Cookie Cups at home?
To make Oreo Cheesecake Cookie Cups, start by crushing Oreo cookies and pressing the crumbs evenly into the bottoms and sides of a mini muffin tin to form the crust. Bake the crusts for about 5 minutes at 350°F (175°C). While they cool, prepare the cheesecake filling by mixing cream cheese, sugar, vanilla extract, and an egg until smooth. Spoon the filling into the Oreo crusts and bake for an additional 12-15 minutes. Once cooled, refrigerate for at least 2 hours before serving. This process creates bite-sized, creamy cheesecake cups with a crunchy Oreo base.
Can I use regular cream cheese for Oreo Cheesecake Cookie Cups?
Yes, regular full-fat cream cheese works best for Oreo Cheesecake Cookie Cups because it provides a rich, creamy texture. Avoid using low-fat or whipped cream cheese as these can affect the consistency and taste of the filling. Make sure the cream cheese is softened to room temperature before mixing; this ensures a smooth batter without lumps and helps the cheesecake bake evenly.
How long can Oreo Cheesecake Cookie Cups be stored?
Oreo Cheesecake Cookie Cups should be stored in an airtight container in the refrigerator. They will stay fresh for up to 4 days. If you want to keep them longer, you can freeze the cups for up to 2 months. To thaw, place them in the refrigerator overnight. Proper storage maintains the creamy texture of the cheesecake filling and the crunchiness of the Oreo crust.
Can I make Oreo Cheesecake Cookie Cups ahead of time for a party?
Definitely! Oreo Cheesecake Cookie Cups are ideal make-ahead treats. Prepare the cups up to two days in advance and store them covered in the refrigerator. This allows the cheesecake to set fully and improves flavor. Just add any fresh toppings like whipped cream or crushed Oreos right before serving for the best presentation and texture.
Are Oreo Cheesecake Cookie Cups kid-friendly?
Yes, Oreo Cheesecake Cookie Cups are a kid-friendly dessert because they are small, easy to handle, and sweet with familiar flavors. However, keep in mind they contain cream cheese and eggs, so they should be given in moderation. For younger children or those with allergies, you can substitute the egg in the cheesecake filling with a suitable egg replacer to make them safer.
Oreo Cheesecake Cookie Cups
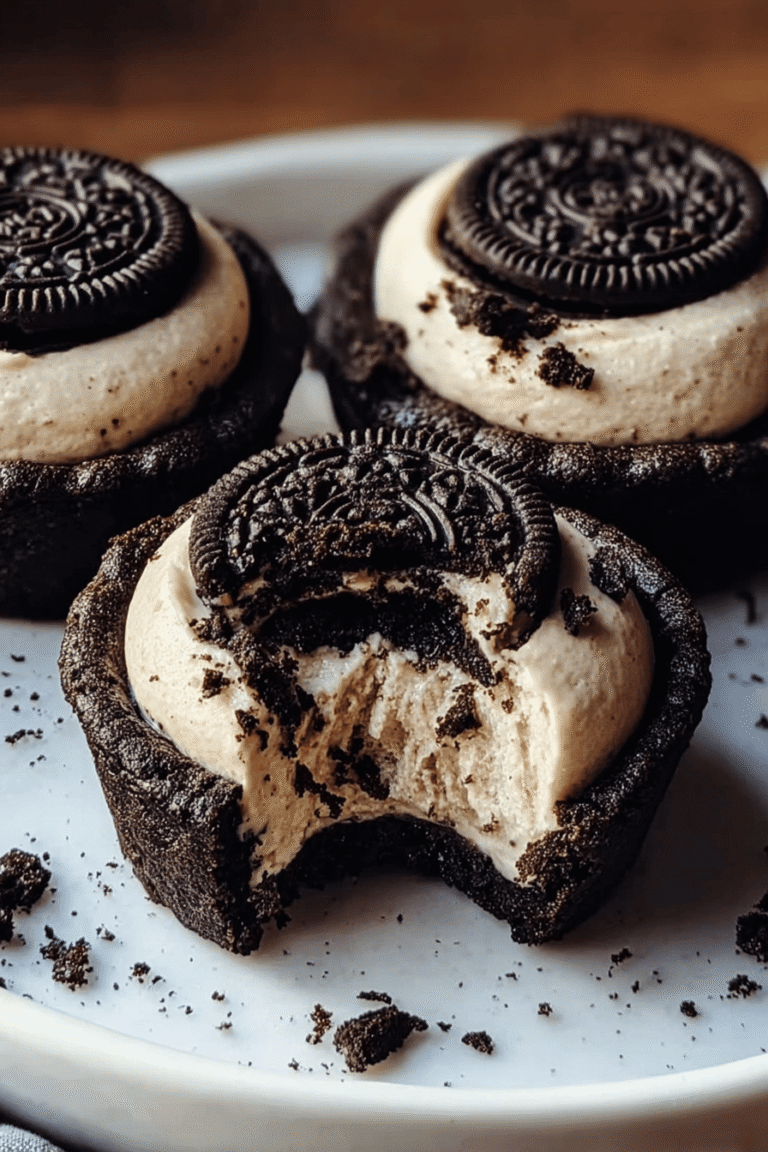
🍪 Oreo Cheesecake Cookie Cups offer a delicious combo of creamy filling and a crunchy, chocolatey crust that’s irresistible.
❄️ These bite-sized treats are perfect for chilling and serving at parties or as a special dessert for family and friends.
- Total Time: 1 hour 40 minutes
- Yield: 20 cookie cups 1x
Ingredients
2 cups all-purpose flour
1/4 cup black cocoa powder (sifted)
1/4 cup Dutch-processed cocoa powder (sifted)
1 teaspoon baking soda
1/2 teaspoon salt
1 cup unsalted butter (at room temperature)
1/2 cup granulated sugar
1 cup packed brown sugar
2 large eggs (at room temperature)
1 teaspoon vanilla extract
1 cup heavy whipping cream (chilled)
8 ounces full-fat cream cheese (softened)
1/2 cup granulated sugar
3/4 cup cookie crumbs
Instructions
1-First, preheat your oven to 350 degrees F and spray two regular muffin tins with cooking spray. This gets everything ready for baking without any sticking issues.
2-Once that’s done, whisk together 2 cups all-purpose flour, 1/4 cup black cocoa powder (sifted), 1/4 cup Dutch-processed cocoa powder (sifted), 1 teaspoon baking soda, and 1/2 teaspoon salt in a bowl, then set it aside.
3-Next, in another bowl, beat 1 cup unsalted butter (at room temperature) with 1/2 cup granulated sugar and 1 cup packed brown sugar on medium-high speed until it’s light and fluffy, which takes about 2-3 minutes. Reduce the speed and add 2 large eggs (one at a time) along with 1 teaspoon vanilla extract, beating until everything combines smoothly.
4-Now, add the flour mixture to the butter mix and stir until just combined. Use a large cookie scoop (about 3 tablespoons) to scoop the dough into the muffin tins and press it down to flatten. Bake for 10-13 minutes until mostly set but still soft in the middle. Right after removing from the oven, press down the center with a small jar to create a well, then cool in the pans for 10 minutes, loosen by twisting slightly, cool for 5 more minutes, and finally remove to a wire rack to cool completely.
5-For the filling, whip 1 cup heavy whipping cream (chilled) until stiff peaks form using a cold whisk and bowl. In a separate bowl, beat 8 ounces full-fat cream cheese (softened) with 1/2 cup granulated sugar until smooth, then add 3/4 cup cookie crumbs and beat until combined. Fold the whipped cream into this mixture gently. Pipe the filling into the cooled cookie cups and refrigerate for 1-2 hours until set. For an extra touch, sprinkle with more cookie crumbs before serving chilled.
Last Step:
Please leave a rating and comment letting us know how you liked this recipe! This helps our business to thrive and continue providing free, high-quality recipes for you.Notes
🍫 Use both black cocoa and Dutch-processed cocoa powder for authentic chocolate flavor and color.
🍪 Make cookie crumbs by crushing plain cookies if preferred.
❄️ Freeze cookie cups in airtight containers for 1-2 months, or refrigerate up to 5 days; best served cold.
- Prep Time: 1 hour 30 minutes
- Cook Time: 10 minutes
- Category: Dessert
- Method: Baking and Whipping
- Cuisine: American
Nutrition
- Serving Size: 1 cookie cup
- Calories: 314
- Sugar: 21g
- Sodium: 185mg
- Fat: 18g
- Saturated Fat: 11g
- Carbohydrates: 34g
- Fiber: 1g
- Protein: 3g
- Cholesterol: 71mg