
Why You’ll Love This Pea Salad
Pea Salad is one of those recipes that feels almost too easy for how good it tastes. It comes together fast, uses simple ingredients, and brings that creamy, salty, sweet crunch that keeps people going back for “just one more spoonful.” If you need a side dish that works for spring dinners, potlucks, Easter brunch, or a weeknight meal, this one checks all the boxes.
Easy to make in a hurry
- Fast prep: This Pea Salad takes only 15 minutes to make before chilling, which is great for busy parents, students, and working professionals.
- No cooking required for the peas: Since frozen green peas are already flash-steamed, you only need to thaw them and mix everything together.
- Simple mixing method: The dressing comes together in one small bowl, then the rest is just folding ingredients together.
Fresh, creamy, and satisfying
- Balanced flavor: The sweet peas, tangy vinegar, creamy dressing, crisp bacon, and sharp cheese all work together beautifully.
- Comforting texture: You get tender peas, crunchy onion, chewy bacon, and little bites of cheese in every spoonful.
- Great side dish for big meals: It pairs well with ham, chicken, beef, or pork, so it fits plenty of menus.
Flexible for different eating styles
You can tweak this Pea Salad recipe depending on what you have in the fridge or how you like your sides. Swap the cheese, leave out the bacon, or lighten the dressing a bit if you want a different balance. That kind of flexibility makes it a handy recipe for home cooks who like options.
Perfect for make-ahead plans
This salad actually tastes better after it chills for a few hours, which makes life easier when you are cooking for guests. It is a smart choice for holidays, picnics, and meal prep because the flavors have time to mingle without much effort on your part.
Cold, creamy, and a little bit crunchy, Pea Salad is the kind of side dish that quietly steals the spotlight from the main course.
For more easy crowd-pleasers, you might also like our easy bacon recipes and our spring side dish ideas.
Jump to:
- Why You’ll Love This Pea Salad
- Easy to make in a hurry
- Fresh, creamy, and satisfying
- Flexible for different eating styles
- Perfect for make-ahead plans
- Essential Ingredients for Pea Salad
- Main Ingredients
- Special dietary options
- How to Prepare the Perfect Pea Salad: Step-by-Step Guide
- First step: thaw and prep the ingredients
- Second step: make the dressing
- Third step: coat the peas
- Fourth step: add the mix-ins
- Fifth step: chill before serving
- Final step: finish and serve
- Dietary Substitutions to Customize Your Pea Salad
- Protein and main component alternatives
- Vegetable, sauce, and seasoning modifications
- Mastering Pea Salad: Advanced Tips and Variations
- Pro cooking techniques
- Flavor variations
- Presentation tips
- Make-ahead options
- How to Store Pea Salad: Best Practices
- Refrigeration
- Freezing
- Reheating
- Meal prep considerations
- FAQs: Frequently Asked Questions About Pea Salad
- Can I use frozen peas in pea salad?
- What kind of cheese goes best in pea salad?
- Why is my pea salad dry and how do I fix it?
- Can you make pea salad ahead of time?
- What should I serve with pea salad?
- Pea Salad
- Ingredients
- Instructions
- Last Step:
- Notes
- Nutrition
- Did you make this recipe?
Essential Ingredients for Pea Salad
Here is everything you need for this classic Pea Salad recipe. Each ingredient plays a simple but important role, from the creamy dressing to the crisp bacon and fresh herbs. If you want the best texture, try to thaw the peas almost completely before mixing.
Main Ingredients
- 1/3 cup sour cream – Gives the dressing its creamy, tangy base.
- 1 Tbsp mayonnaise – Adds richness and helps the dressing cling to the peas.
- Salt and pepper, to taste – Brings the flavors into balance.
- 1 Tbsp white vinegar – Adds a bright, lightly sharp note that keeps the salad from tasting too heavy.
- 4 cups frozen green peas, almost totally thawed – The star of the dish, bringing sweet flavor and a tender bite.
- 8 slices bacon, cooked until crisp and chopped – Adds smoky, salty crunch.
- 1/2 small red onion, halved and sliced very thin – Gives a little bite and freshness.
- 6 oz cheddar or American cheese, cut into small cubes – Adds creamy, savory richness in every bite.
- 3 Tbsp minced fresh parsley, plus more for serving – Adds color and a fresh herbal finish.
Special dietary options
- Vegan: Use vegan mayo, dairy-free sour cream, plant-based bacon, and vegan cheese cubes.
- Gluten-free: This recipe is naturally gluten-free, but always check labels on bacon and mayonnaise.
- Low-calorie: Use light sour cream, reduced-fat mayo, and less cheese for a lighter version.
| Ingredient | Purpose in Pea Salad | Easy swap |
|---|---|---|
| Sour cream | Creates a creamy dressing | Greek yogurt |
| Mayonnaise | Adds body and richness | Light mayo |
| Frozen peas | Sweet, tender base | Fresh blanched peas |
| Bacon | Smoky crunch | Turkey bacon or plant bacon |
| Cheese | Salty, savory bites | Monterey Jack or sharp cheddar |
For a bit more background on peas and why they work so well in dishes like this, you can read about the health benefits of peas and more nutrition details from this green peas guide.
How to Prepare the Perfect Pea Salad: Step-by-Step Guide
This Pea Salad recipe is wonderfully straightforward, but a few small details make a big difference. If you thaw the peas well, season the dressing properly, and give the salad time to chill, the final result will be creamy, crisp, and full of flavor.
First step: thaw and prep the ingredients
Start with 4 cups of frozen green peas that are almost totally thawed. They should still feel cool, but not icy. Place them in a colander and let them drain well so extra water does not thin out the dressing later. While the peas thaw, cook the bacon until crisp, chop it, thinly slice the red onion, cube the cheese, and mince the parsley.
Second step: make the dressing
In a small bowl, mix together the 1/3 cup sour cream, 1 Tbsp mayonnaise, 1 Tbsp white vinegar, and salt and pepper to taste. Stir until the dressing looks smooth and creamy. This dressing should taste slightly tangy and well seasoned, since it will coat a lot of peas. If you like a punchier flavor, add a little more pepper.
Third step: coat the peas
Spoon about two-thirds of the dressing over the peas and stir gently until the peas are coated. Use a soft folding motion so the peas stay whole and do not turn mushy. The goal is to coat every pea without smashing them. If you are making this for guests with different tastes, this is a good point to taste the mixture and adjust the salt or pepper.
Fourth step: add the mix-ins
Now gently stir in the chopped bacon, sliced red onion, cheese cubes, and 3 Tbsp minced fresh parsley. Keep the mixing light so the cheese stays intact and the bacon does not crumble too much. Each add-in gives the salad a new layer of texture. The bacon brings salt and crunch, the onion adds bite, the cheese gives creamy richness, and the parsley keeps everything tasting bright.
Fifth step: chill before serving
Cover the bowl tightly with plastic wrap and refrigerate for 2 to 4 hours before serving. This rest time helps the flavors settle together. It also gives the dressing a chance to slightly soften the peas and blend with the bacon and onion. If you need to make the salad ahead for a party, this chilling step is your friend.
Final step: finish and serve
When you are ready to serve the Pea Salad, take it out of the fridge and stir in the remaining dressing to your liking. If it seems a little dry, add the rest of the dressing or just enough to bring back the creaminess you want. Sprinkle with more parsley on top for a fresh, pretty finish. Serve chilled or let it sit at room temperature for about 30 minutes so the flavors open up a bit.
Tip from my own kitchen: if a salad sits overnight and looks a little tight, a spoonful of extra dressing usually brings it right back to life.
Total time for the recipe is about 15 minutes of prep, plus chilling. There is no cooking time for the peas themselves, which makes this a great option when the oven is already busy with something else.

Dietary Substitutions to Customize Your Pea Salad
Protein and main component alternatives
If you want to adjust the recipe for dietary reasons or just use what you have, Pea Salad is very forgiving. Swap the bacon for turkey bacon, plant-based bacon, or leave it out entirely for a vegetarian version. You can also use cubed ham or diced chicken if you want a heartier salad for dinner. For the cheese, sharp cheddar brings a bolder flavor, while Monterey Jack offers a softer, milder bite.
Vegetable, sauce, and seasoning modifications
The base recipe works well as written, but there are plenty of ways to change it up. Try adding chopped celery for extra crunch, or swap red onion for green onions if you want a milder flavor. If you prefer a lighter dressing, use Greek yogurt in place of some of the sour cream, or replace part of the mayo with plain yogurt. Fresh dill, chives, or a little extra parsley can also give the salad a different personality without changing the whole recipe.
For a lower-calorie version, cut back on the cheese and bacon a little, then lean on the herbs and vinegar for more flavor. If you need a dairy-free option, use plant-based sour cream and cheese. That way, you still get a creamy salad with the same fun mix of textures.
Mastering Pea Salad: Advanced Tips and Variations
Pro cooking techniques
A few small habits can make your Pea Salad even better. Drain the peas well after thawing, because extra moisture is the fastest way to end up with a watery bowl. Also, keep the bacon crisp by adding it close to serving time if you are making the salad ahead. If you want a cleaner texture, slice the onion very thin so it blends in instead of overpowering each bite.
Flavor variations
Sharp cheddar gives the salad a classic taste, but Monterey Jack makes it softer and creamier. You can also add a pinch of garlic powder or a little smoked paprika if you want the dressing to taste a touch deeper. Some cooks like to add chopped hard-boiled eggs or diced celery for extra body, though the classic version is lovely on its own.
Presentation tips
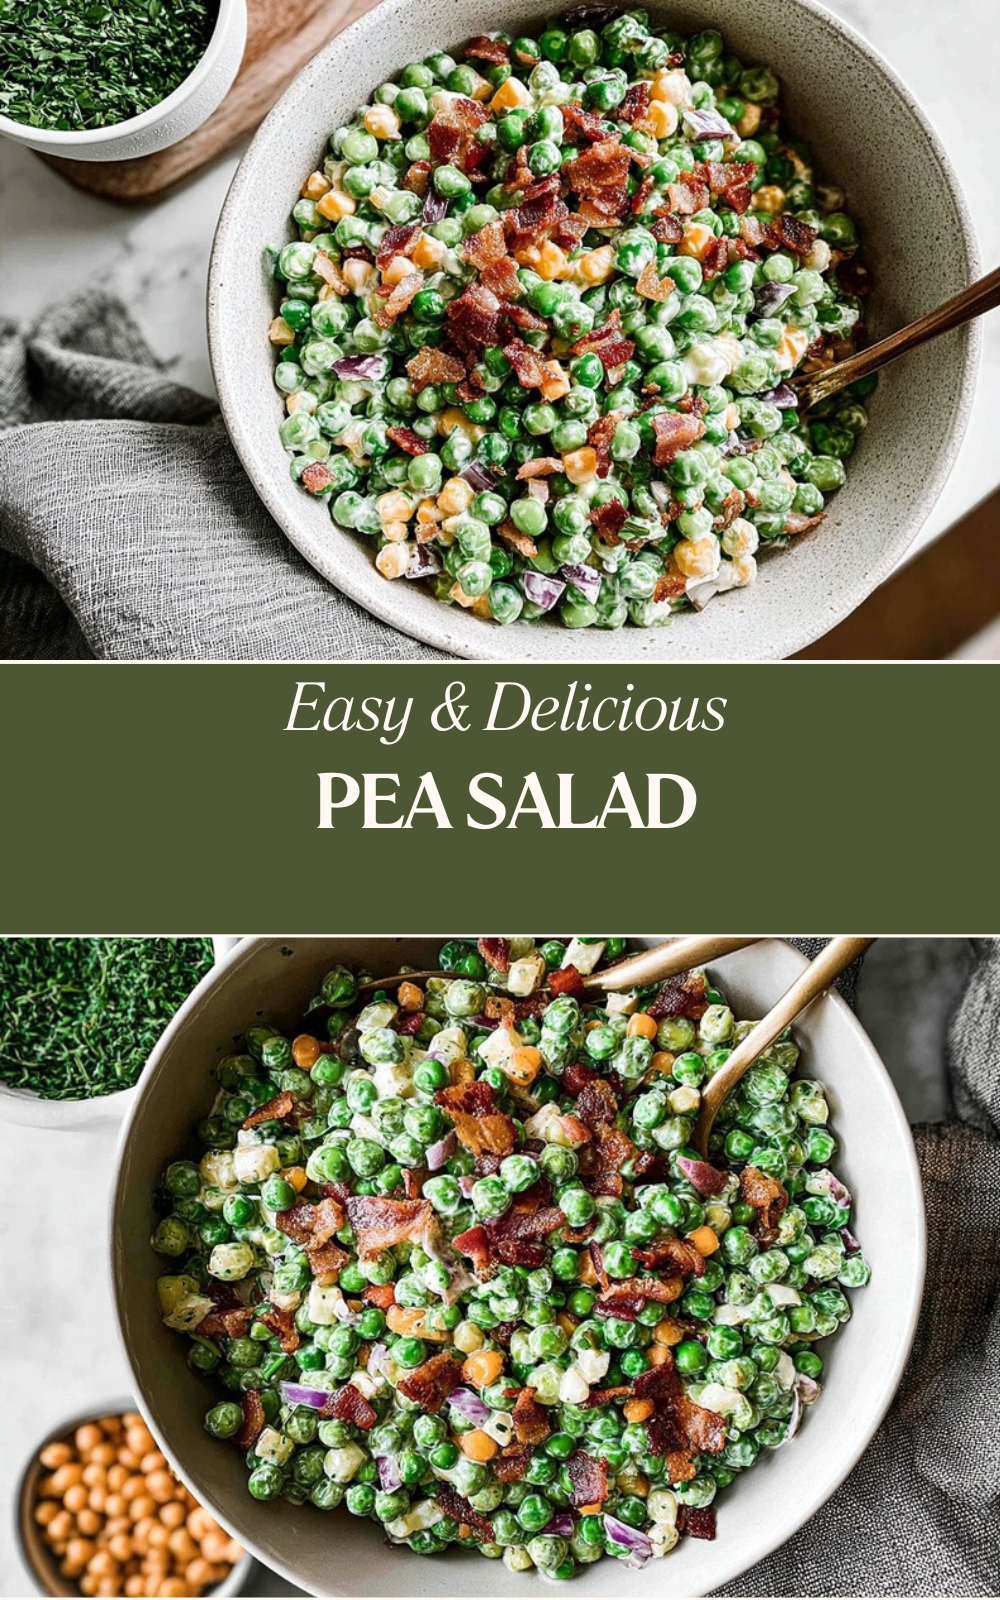
For a simple pretty finish, spoon the salad into a shallow serving bowl and top it with extra parsley. A few small bacon pieces on top make it look especially inviting. If you are serving at a holiday table, use a white bowl so the bright green peas and red onion really pop.
Make-ahead options
This is a strong make-ahead dish for busy schedules. You can mix the peas, onion, cheese, parsley, and dressing up to two days ahead, then add the bacon right before serving to keep it crisp. If the salad looks dry after chilling, just stir in a little extra dressing. That little trick keeps the texture creamy without making it heavy.
How to Store Pea Salad: Best Practices
Refrigeration
Store Pea Salad in an airtight container in the refrigerator for up to 2 days. Since the dressing can absorb into the peas over time, give it a quick stir before serving. If needed, add a spoonful of extra dressing or a tiny splash of vinegar to wake up the flavor.
Freezing
Freezing is not a good idea for this salad. The peas can get soft and the creamy dressing may separate after thawing. For best texture, make only what you plan to serve within a couple of days.
Reheating
This salad is meant to be served cold, so reheating is not needed. If it has been chilled for a while, let it sit at room temperature for about 30 minutes before serving. That short rest helps the flavors taste fuller and makes the dressing feel less stiff.
Meal prep considerations
If you are prepping for a potluck, holiday meal, or picnic, make the salad ahead without the bacon and stir that in later. This keeps the crunchy bits from softening too soon. It is a helpful strategy for anyone juggling side dishes while the main course is still on the stove.
FAQs: Frequently Asked Questions About Pea Salad
Can I use frozen peas in pea salad?
Yes, frozen peas work perfectly in pea salad and are often preferred for convenience. They are typically flash-frozen after being briefly steamed, preserving their crisp texture and nutrients. No additional cooking is needed—just measure out the amount called for in your recipe (usually 16-20 ounces for 6-8 servings), place them in a colander, and run under cold water for 5 minutes to thaw. Drain well and pat dry with paper towels to avoid excess moisture. This method keeps the peas tender yet firm. Fresh peas can be used too, but blanch them first in boiling water for 1-2 minutes, then ice bath. Frozen peas save time and are available year-round, making them ideal for quick assembly. Pro tip: Buy petite frozen peas for a smaller, more uniform bite.
What kind of cheese goes best in pea salad?
Sharp cheddar is a top choice for pea salad, adding a bold, tangy flavor that balances the sweet peas and creamy dressing—grate 1 cup (about 4 ounces) for a standard batch. Milder options like Monterey Jack or Colby melt smoothly and provide creaminess without overpowering. Some traditional recipes use cubed American cheese for its classic, nostalgic taste. Avoid strong blues or goat cheese unless experimenting. Dice or shred the cheese into 1/4-inch pieces for even distribution. For 6-8 servings, mix in just before chilling to prevent sogginess. This ingredient boosts protein (about 7g per serving) and makes the salad more satisfying. Test combinations: cheddar with bacon for smoky notes, or Jack for a lighter profile. Always use block cheese over pre-shredded to avoid anti-caking agents.
Why is my pea salad dry and how do I fix it?
Pea salad often dries out because the dressing soaks into the peas, bacon, and onions during refrigeration, similar to pasta salad. To fix it, reserve 1/3 of the dressing (typically a mayo-sour cream mix with sugar and vinegar) and stir in before serving. Start with 2/3 when assembling for 6-8 servings: 1/2 cup mayo, 1/4 cup sour cream, 1 tbsp sugar, 1 tbsp vinegar, salt, and pepper. Chill covered for 2+ hours, then taste and add more if needed. Letting it sit at room temperature 20-30 minutes before serving loosens the dressing naturally. For extra creaminess, double the dressing or add a splash of milk. Dryness also comes from watery peas—thaw and dry thoroughly. This keeps it fresh-tasting up to 2 days in the fridge.
Can you make pea salad ahead of time?
Yes, pea salad is perfect for making ahead—it tastes better after flavors meld. Prepare up to 2 days in advance for 6-8 servings: mix thawed peas, diced cheddar, red onion, celery (if using), and dressing. Cover tightly and refrigerate. Hold off on bacon (4-6 slices, cooked crisp and crumbled) until 30 minutes before serving to keep it crunchy—stir in last. This prevents sogginess from moisture buildup. Total prep takes 15 minutes, plus chill time. It holds well for potlucks or holidays, staying fresh in the fridge at 40°F or below. For best texture, don’t freeze; peas get mushy upon thawing. Re-stir before serving and adjust seasoning. Nutrition bonus: high in fiber (4g per serving) from peas, supporting digestion during big meals. Link to full recipe for exact steps.
What should I serve with pea salad?
Pea salad pairs well with grilled meats like baked ham, roast chicken, pork chops, or burgers—its cool crunch cuts richness. Ideal for Easter, picnics, potlucks, or BBQs serving 6-8 as a side (1/2 cup each). Bright green peas and bacon make it festive for spring holidays; try with deviled eggs or rolls. For summer, match with fried chicken or ribs. Vegetarian? Skip bacon and add nuts. One batch (20 oz peas) stretches alongside mains, providing vitamin C (20% DV per serving) and color contrast. Serve chilled or room temp after 30 minutes out of fridge. Avoid heavy starches like potatoes nearby. Popular at Southern gatherings, it’s a crowd-pleaser. See our grilled ham recipe or picnic sides guide for more pairing ideas and full menus.
Pea Salad
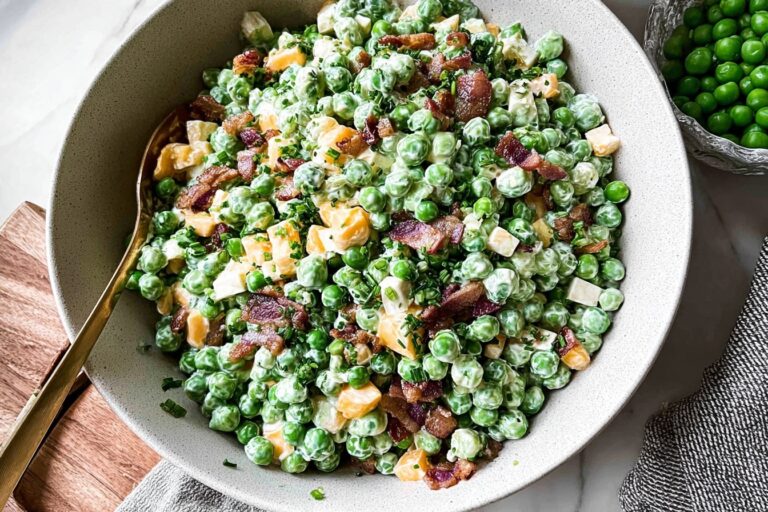
🥗 Crisp, creamy pea salad loaded with bacon, cheese, and fresh flavors – a crowd-pleasing side dish that’s quick to prep and perfect for potlucks or BBQs!
🌱 Nutrient-packed with peas for fiber and protein, this refreshing salad brings tangy crunch and savory goodness to any meal!
- Total Time: 2 hours 25 minutes to 4 hours 25 minutes
- Yield: 8 servings
Ingredients
– 1/3 cup sour cream for creamy, tangy base
– 1 Tbsp mayonnaise for richness
– Salt and pepper, to taste for balancing flavors
– 1 Tbsp white vinegar for bright, lightly sharp note
– 4 cups frozen green peas, almost totally thawed for sweet flavor and tender bite
– 8 slices bacon, cooked until crisp and chopped for smoky, salty crunch
– 1/2 small red onion, halved and sliced very thin for bite and freshness
– 6 oz cheddar or American cheese, cut into small cubes for creamy, savory richness
– 3 Tbsp minced fresh parsley, plus more for serving for color and fresh herbal finish
Instructions
1-First step: thaw and prep the ingredients Start with 4 cups of frozen green peas that are almost totally thawed. They should still feel cool, but not icy. Place them in a colander and let them drain well so extra water does not thin out the dressing later. While the peas thaw, cook the bacon until crisp, chop it, thinly slice the red onion, cube the cheese, and mince the parsley.
2-Second step: make the dressing In a small bowl, mix together the 1/3 cup sour cream, 1 Tbsp mayonnaise, 1 Tbsp white vinegar, and salt and pepper to taste. Stir until the dressing looks smooth and creamy. This dressing should taste slightly tangy and well seasoned, since it will coat a lot of peas. If you like a punchier flavor, add a little more pepper.
3-Third step: coat the peas Spoon about two-thirds of the dressing over the peas and stir gently until the peas are coated. Use a soft folding motion so the peas stay whole and do not turn mushy. The goal is to coat every pea without smashing them. If you are making this for guests with different tastes, this is a good point to taste the mixture and adjust the salt or pepper.
4-Fourth step: add the mix-ins Now gently stir in the chopped bacon, sliced red onion, cheese cubes, and 3 Tbsp minced fresh parsley. Keep the mixing light so the cheese stays intact and the bacon does not crumble too much. Each add-in gives the salad a new layer of texture. The bacon brings salt and crunch, the onion adds bite, the cheese gives creamy richness, and the parsley keeps everything tasting bright.
5-Fifth step: chill before serving Cover the bowl tightly with plastic wrap and refrigerate for 2 to 4 hours before serving. This rest time helps the flavors settle together. It also gives the dressing a chance to slightly soften the peas and blend with the bacon and onion. If you need to make the salad ahead for a party, this chilling step is your friend.
6-Final step: finish and serve When you are ready to serve the Pea Salad, take it out of the fridge and stir in the remaining dressing to your liking. If it seems a little dry, add the rest of the dressing or just enough to bring back the creaminess you want. Sprinkle with more parsley on top for a fresh, pretty finish. Serve chilled or let it sit at room temperature for about 30 minutes so the flavors open up a bit.
Last Step:
Please leave a rating and comment letting us know how you liked this recipe! This helps our business to thrive and continue providing free, high-quality recipes for you.Notes
🥶 Use frozen peas and thaw just enough – they stay crisp without cooking!
🍖 Add chopped bacon right before serving to maintain maximum crunch.
⏰ Prep up to 2 days ahead; flavors deepen, just stir in extra dressing if dry.
- Prep Time: 15 minutes
- Chill Time: 2 to 4 hours
- Cook Time: 10 minutes
- Category: Salad
- Method: No Cook
- Cuisine: American
- Diet: Gluten-Free
Nutrition
- Serving Size: 3/4 cup
- Calories: 250
- Sugar: 4 grams
- Sodium: 450 milligrams
- Fat: 20 grams
- Saturated Fat: 7 grams
- Unsaturated Fat: 12 grams
- Trans Fat: 0 grams
- Carbohydrates: 12 grams
- Fiber: 3 grams
- Protein: 10 grams
- Cholesterol: 35 milligrams