
Why You’ll Love This Rice Pudding
Imagine ending your day with a warm, comforting bowl of homemade rice pudding that feels like a gentle hug on a cool evening. This creamy stovetop rice pudding recipe is a simple delight that brings together everyday ingredients to create something special, perfect for busy families or anyone craving a classic treat. As a staple in many kitchens, it’s easy to see why this rice pudding stands out among rice pudding recipes for its straightforward appeal and versatile nature.
One of the best parts of this recipe is how quickly it comes together, making it ideal for anyone from students to working professionals looking for a fast dessert. Let’s dive into what makes this creamy rice pudding so irresistible, using ingredients you likely have on hand for a satisfying meal or snack. By incorporating natural flavors like cinnamon and vanilla, it delivers that classic creamy rice pudding vibe without any fuss.
- Ease of preparation: This stovetop rice pudding recipe requires just a few basic steps and minimal tools, making it perfect for home cooks of all levels. With only about 5 minutes of prep and 35-45 minutes of cooking, you can whip it up on a weeknight without spending hours in the kitchen. It’s a go-to option for busy parents or students who want a homemade treat without the hassle, turning simple ingredients into a creamy delight effortlessly.
- Health benefits: Packed with nutrients from whole milk and short-grain rice, this rice pudding offers a balance of protein, carbs, and a touch of calcium, making it a smarter choice for diet-conscious individuals. Each serving provides around 250 calories, with benefits from cinnamon that can support digestion and blood sugar control, as noted in sources like the benefits of cinnamon. It’s a comforting way to enjoy a dessert that fits into various wellness routines, especially for those watching their intake while still indulging.
- Versatility: Whether you’re serving it warm for a cozy family dinner or chilled for a summer gathering, this rice pudding adapts to any occasion. It’s easy to modify for dietary needs, like using coconut milk for a dairy-free version, appealing to travelers or newlyweds experimenting in the kitchen. This flexibility makes it a favorite among food enthusiasts and party hosts who want a dish that everyone can enjoy.
- Distinctive flavor: The natural infusion of a cinnamon stick and vanilla creates a warm, aromatic profile that sets this classic rice pudding apart from store-bought options. Made with just 5 basic ingredients, it highlights the creamy texture from rice starch, offering a homemade stovetop rice pudding that’s richly flavored and customizable with add-ins like golden raisins. This easy creamy rice pudding recipe brings a touch of nostalgia while feeling fresh and exciting every time.
Moving from these highlights, you’ll find that this recipe not only satisfies your sweet tooth but also fits seamlessly into your daily routine. Now, let’s explore the key elements that make this dish possible by looking at the essential ingredients.
Jump to:
- Why You’ll Love This Rice Pudding
- Essential Ingredients for Rice Pudding
- Main Ingredients
- Special Dietary Options
- How to Prepare the Perfect Rice Pudding: Step-by-Step Guide
- First Step: Gather and Prepare Your Ingredients
- Second Step: Combine the Ingredients in the Pan
- Third Step: Bring to a Simmer and Cook
- Fourth Step: Monitor and Adjust
- Fifth Step: Finish and Cool
- Sixth Step: Serve and Enjoy
- Dietary Substitutions to Customize Your Rice Pudding
- Protein and Main Component Alternatives
- Vegetable, Sauce, and Seasoning Modifications
- Mastering Rice Pudding: Advanced Tips and Variations
- How to Store Rice Pudding: Best Practices
- FAQs: Frequently Asked Questions About Rice Pudding
- Can I make rice pudding ahead of time?
- How do I store rice pudding in the fridge?
- Can rice pudding be frozen?
- What type of rice is best for rice pudding?
- How long does homemade rice pudding last?
- Rice Pudding
- Ingredients
- Instructions
- Last Step:
- Notes
- Nutrition
- Did you make this recipe?
Essential Ingredients for Rice Pudding
Gathering the right ingredients is key to making a perfect creamy stovetop rice pudding, and this section breaks it down for you. Each item plays a specific role in creating that smooth, comforting texture we all love. Below is a comprehensive list of everything you need, pulled directly from the recipe for clarity and ease.
Main Ingredients
- 4½ cups whole milk – This forms the creamy base, providing richness and helping to soften the rice during cooking for that signature pudding consistency.
- 1½ cups water – Added to balance the milk and prevent scorching, it helps achieve the right liquid ratio for tender rice without making the mixture too thick.
- ¾ cup granulated sugar (adjustable for sweetness) – Sweetens the pudding to your taste, allowing you to control the level of sweetness based on preferences or dietary needs.
- 1 cinnamon stick (3 to 4 inches long) – Infuses a warm, spicy flavor throughout the dish, enhancing the overall taste and aroma from the start of cooking.
- 1 cup Arborio rice or Bomba rice (short grain rice preferred) – Provides the starch needed for creaminess, turning simple rice into a luxurious pudding when simmered slowly.
- 1 teaspoon vanilla bean paste or vanilla extract – Adds a deep, sweet note that rounds out the flavors, making the pudding feel homemade and inviting.
- ⅔ cup golden raisins (optional) – Offers a chewy, sweet burst for extra texture, though you can skip them if you prefer a smoother pudding.
- Vegan: Swap the whole milk for an equal amount of coconut milk to maintain creaminess and add a subtle tropical twist, ensuring the pudding remains dairy-free without losing its comforting quality.
- Gluten-free: This recipe is naturally gluten-free as long as you use certified gluten-free rice and vanilla, making it safe for anyone avoiding gluten while still enjoying the classic flavors.
- Low-calorie: Reduce the sugar to ½ cup or use a low-calorie sweetener, and opt for low-fat milk to lower the calorie count per serving, ideal for diet-conscious individuals watching their intake.
- Total Time: 40-50 minutes
- Yield: 6-8 servings
- Prep Time: 5 minutes
- Cook Time: 35-45 minutes
- Category: Dessert
- Method: Stovetop
- Cuisine: American
- Serving Size: 1 serving
- Calories: 250
- Sugar: 26g
- Sodium: 62mg
- Fat: 5g
- Saturated Fat: 3g
- Unsaturated Fat: 2g
- Trans Fat: 0g
- Carbohydrates: 46g
- Fiber: 1g
- Protein: 6g
- Cholesterol: 14mg
Special Dietary Options
For those with specific needs, here are ways to adapt this rice pudding recipe. These changes keep the dish delicious while accommodating different lifestyles.
With these ingredients in hand, you’re set for success. Next, we’ll walk through the steps to bring this creamy stovetop rice pudding to life in your own kitchen.
How to Prepare the Perfect Rice Pudding: Step-by-Step Guide
Creating a batch of creamy rice pudding at home is simpler than you might think, and this guide will walk you through it like we’re chatting in your kitchen. Start with fresh ingredients and a heavy-bottomed saucepan to ensure even cooking and prevent sticking. This homemade stovetop rice pudding comes together in about 40-50 minutes, offering a rewarding process that fills your home with delightful aromas.
First Step: Gather and Prepare Your Ingredients
Begin by assembling all your ingredients on the counter to make the process smooth and fun. Measure out 4½ cups of whole milk, 1½ cups of water, ¾ cup of granulated sugar, 1 cinnamon stick, 1 cup of Arborio rice, 1 teaspoon of vanilla extract, and ⅔ cup of golden raisins if you’re using them. This mise en place helps avoid any mid-cooking scrambles, especially if you’re a busy parent juggling multiple tasks. Double-check measurements for the best results in your creamy rice pudding.
Second Step: Combine the Ingredients in the Pan
In a heavy-bottomed saucepan, add the 4½ cups of whole milk, 1½ cups of water, ¾ cup of granulated sugar, the cinnamon stick, and 1 cup of Arborio rice. Stir everything well to mix, ensuring the rice is evenly distributed. This step builds the flavor base, with the cinnamon infusing from the start for that classic touch. Set your stovetop to medium-high heat and keep an eye on it as you bring it to a simmer.
Third Step: Bring to a Simmer and Cook
Once combined, bring the mixture to an intense simmer over medium-high heat, stirring often to prevent the rice from sticking. After it reaches a simmer, reduce the heat to a steady simmer and continue cooking for 35-45 minutes. Stir frequently during this time the rice will absorb the liquid and release starch, creating a creamy texture. If you’re new to making rice pudding, this step is where the magic happens, transforming basic ingredients into something truly special.
Fourth Step: Monitor and Adjust
As the mixture cooks, check the rice for tenderness every 10 minutes or so. You’ll want the rice to be soft but still have some liquid left for that perfect creamy consistency. If it thickens too quickly, add a splash of milk to loosen it up. This method relies on the rice’s natural starch for creaminess, so no eggs are needed, and it’s ready when the mixture coats the back of a spoon. Remember, the total cook time is 35-45 minutes, so plan accordingly for your schedule.
Fifth Step: Finish and Cool
Once the rice is tender, remove the pan from the heat and discard the cinnamon stick. Stir in the 1 teaspoon of vanilla extract and the ⅔ cup of golden raisins if desired, blending them in for even distribution. This adds the final flavor notes that make this classic rice pudding stand out. Transfer the pudding to ramekins or a serving dish and let it cool slightly before serving warm, or cover and refrigerate it for up to a day for a chilled treat.
Sixth Step: Serve and Enjoy
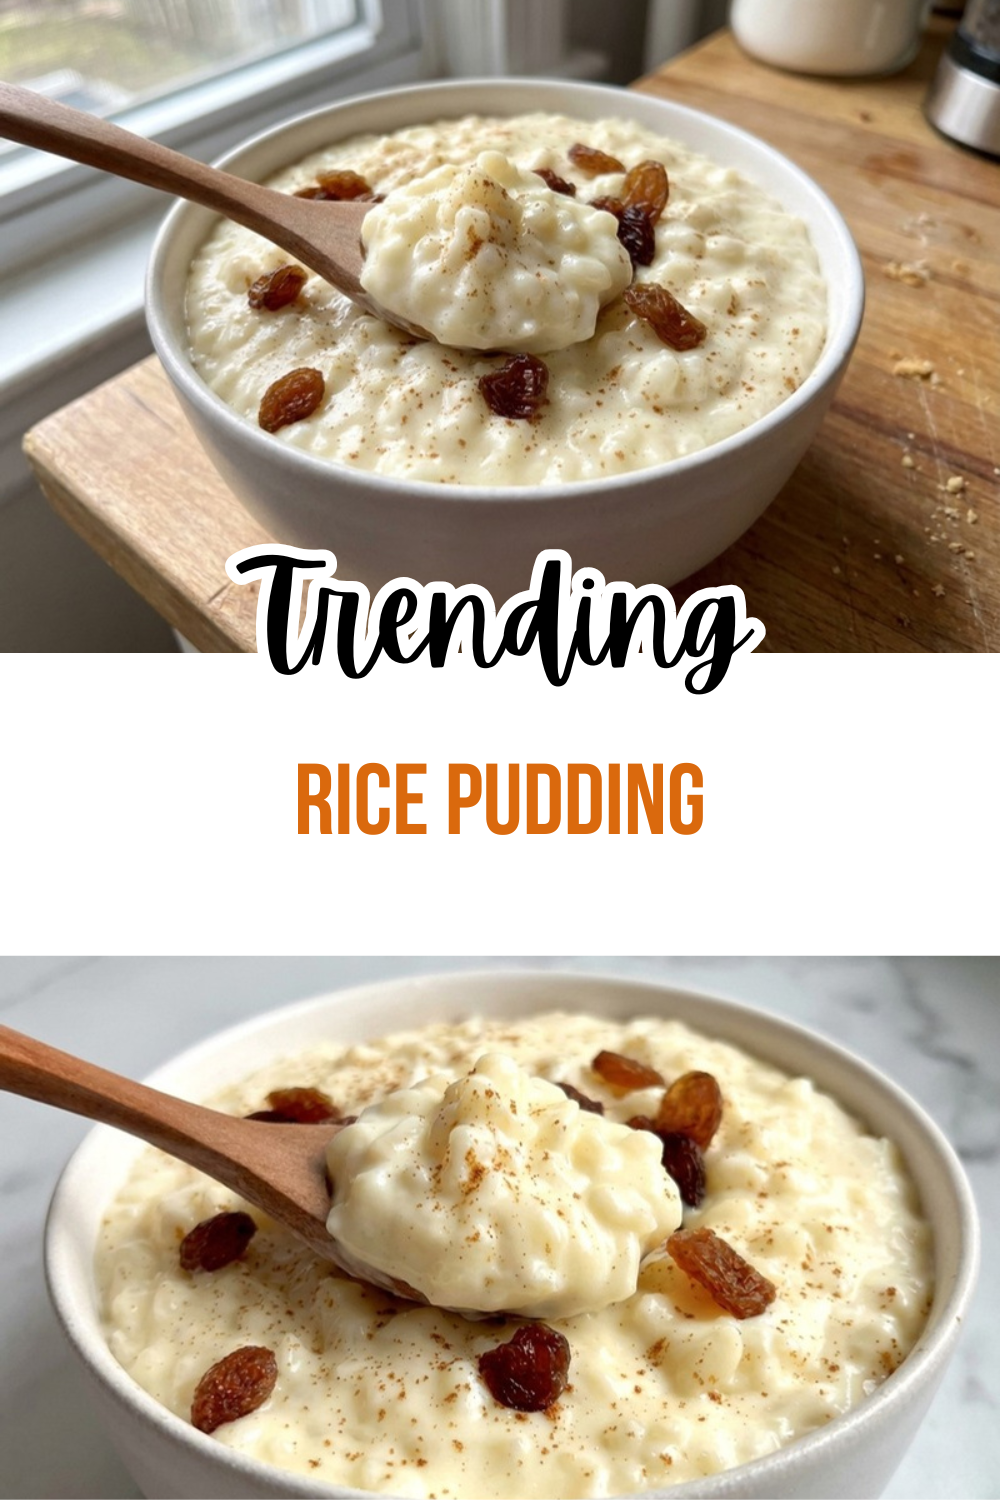
Top each serving with a sprinkle of grated cinnamon for extra zest, and dish it out to your family or guests. This rice pudding yields about 6-8 servings, each around 250 calories, making it a light dessert option. For the best experience, serve it warm on a chilly evening or cold as a refreshing snack. If you’re looking for more ideas, check out our cinnamon bread recipe for another cozy twist on flavors similar to this one.
Nutritional Information per serving: 250 kcal | Carbohydrates: 46g | Protein: 6g | Fat: 5g | Saturated Fat: 3g | Polyunsaturated Fat: 1g | Monounsaturated Fat: 1g | Cholesterol: 14mg | Sodium: 62mg | Potassium: 204mg | Fiber: 1g | Sugar: 26g | Vitamin A: 225 IU | Vitamin C: 1mg | Calcium: 166mg | Iron: 1mg. For more on rice’s health perks, visit the health benefits of rice.

Dietary Substitutions to Customize Your Rice Pudding
Protein and Main Component Alternatives
If you need to swap out the main elements, consider using brown rice instead of Arborio for a nuttier flavor and more fiber, which works well for those seeking a heartier version. For a protein boost, add a handful of nuts or seeds after cooking, or substitute with plant-based milk alternatives like almond milk to keep it light. These changes help make the rice pudding accessible for various dietary needs, ensuring everyone can enjoy a creamy treat.
Vegetable, Sauce, and Seasoning Modifications
Feel free to incorporate fruits like diced apples for a fresh twist, or swap the cinnamon for nutmeg to match seasonal tastes. For sauces, try drizzling with a light honey glaze instead of extra sugar, and adjust seasonings with a pinch of cardamom for an exotic flair. These tweaks allow you to adapt the recipe based on what’s in your pantry or your preferences.
Mastering Rice Pudding: Advanced Tips and Variations
Taking your rice pudding to the next level involves some clever techniques that enhance flavor and texture. Pro cooking techniques, like stirring every few minutes, ensure even creaminess without constant attention. For flavor variations, experiment with adding citrus zest or swapping sugar for honey. Presentation tips include layering in glasses for a fancy look, and make-ahead options let you prep in advance for busy days. If you enjoy baked goods, our apple oat muffins offer a complementary recipe for variety.
How to Store Rice Pudding: Best Practices
Proper storage keeps your rice pudding fresh and safe to eat. For refrigeration, cool it to room temperature then cover tightly and chill for up to 2 days. When freezing, portion into containers and store for up to 3 months, noting that texture might soften. For reheating, warm gently on the stove with a bit of milk to maintain quality. Consider meal prep by making batches ahead for quick treats during the week.
FAQs: Frequently Asked Questions About Rice Pudding
Can I make rice pudding ahead of time?
Yes, you can make rice pudding up to 1 day in advance for the best flavor and texture. Prepare it as directed, then cool it completely before covering and refrigerating. The rice will absorb most of the liquid overnight, so when reheating, stir in 2-4 tablespoons of milk per cup of pudding to restore its creamy consistency. Gently warm it on the stovetop over low heat for 5-7 minutes, stirring constantly, or microwave in 30-second intervals, stirring between each. Avoid boiling to prevent curdling. This method keeps it tasting fresh without sogginess. For parties, portion into individual servings for quick reheating. Always check for off smells or mold before serving.
How do I store rice pudding in the fridge?
Store rice pudding properly to keep it safe and tasty for up to 2 days. First, let it cool to room temperature (no more than 2 hours to avoid bacteria growth), then transfer to an airtight container or cover tightly with plastic wrap directly on the surface to prevent a skin from forming. Refrigerate at 40°F (4°C) or below. Before eating, stir well as it may thicken. If it separates, whisk in a splash of cold milk. Discard if it smells sour, looks discolored, or has visible mold. For best results, label the container with the date made. This simple process maintains creaminess and minimizes waste.
Can rice pudding be frozen?
Yes, rice pudding freezes well for up to 3 months, though texture may soften slightly upon thawing due to rice starch changes. Cool completely, then spoon into freezer-safe bags or containers, leaving ½-inch headspace for expansion. Flatten bags for easy stacking. Thaw overnight in the fridge (8-12 hours), then stir vigorously and add 1-2 tablespoons milk per cup to loosen. Reheat gently on the stovetop or microwave as described above. Avoid refreezing thawed pudding. For portion control, freeze in single-serve sizes. Pro tip: Add-ins like raisins hold up better than fresh fruit, which can become mushy.
What type of rice is best for rice pudding?
Short-grain or medium-grain rice works best for creamy rice pudding, as it releases more starch for that signature pudding texture. Arborio (used in risotto) is ideal for extra creaminess without constant stirring—use 1 cup rice to 4 cups milk. Sushi rice or pudding rice are great alternatives. Avoid long-grain like jasmine or basmati, which stay firm and separate. Rinse rice briefly to remove excess starch if you prefer less thickness. Cooking tip: Simmer uncovered on low heat for 30-40 minutes until tender, stirring every 5 minutes. This choice ensures smooth, velvety results every time, mimicking traditional recipes.
How long does homemade rice pudding last?
Homemade rice pudding lasts 2 days in the fridge when stored correctly in an airtight container after full cooling. Freezing extends it to 3 months. Consume within these times for peak freshness—beyond that, dairy can spoil, risking foodborne illness. Signs it’s gone bad: sour smell, sliminess, or off taste. A typical batch (4 servings) provides about 250 calories per serving with whole milk, sugar, and cinnamon. To extend usability, make smaller batches or portion immediately. Track with dates on containers. For safety, reheat to 165°F (74°C). This keeps your dessert safe and delicious.
Rice Pudding
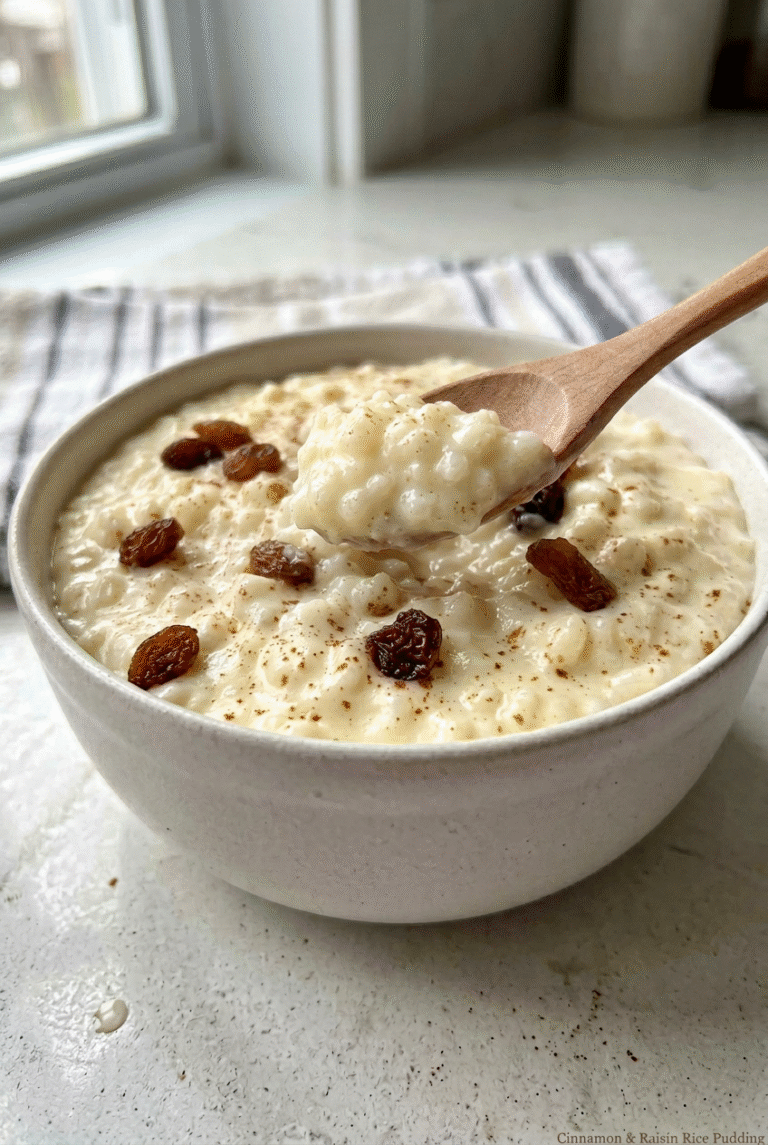
🍚 Enjoy the soothing, creamy comfort of this classic rice pudding, made with simple ingredients for a nostalgic treat that’s perfect warm or chilled.
🥛 Discover why this stovetop recipe is a timeless favorite, offering velvety texture and subtle cinnamon-vanilla flavors that bring warmth to any dessert table.
Ingredients
– 4½ cups whole milk for creamy base
– 1½ cups water for balancing milk and preventing scorching
– ¾ cup granulated sugar (adjustable for sweetness) for sweetness
– 1 cinnamon stick (3 to 4 inches long) for warm spicy flavor
– 1 cup Arborio rice or Bomba rice (short grain rice preferred) for creaminess
– 1 teaspoon vanilla bean paste or vanilla extract for deep sweet note
– ⅔ cup golden raisins (optional) for extra texture
Instructions
1-First Step: Gather and Prepare Your Ingredients Begin by assembling all your ingredients on the counter to make the process smooth and fun. Measure out 4½ cups of whole milk, 1½ cups of water, ¾ cup of granulated sugar, 1 cinnamon stick, 1 cup of Arborio rice, 1 teaspoon of vanilla extract, and ⅔ cup of golden raisins if you’re using them. This mise en place helps avoid any mid-cooking scrambles, especially if you’re a busy parent juggling multiple tasks. Double-check measurements for the best results in your creamy rice pudding.
2-Second Step: Combine the Ingredients in the Pan In a heavy-bottomed saucepan, add the 4½ cups of whole milk, 1½ cups of water, ¾ cup of granulated sugar, the cinnamon stick, and 1 cup of Arborio rice. Stir everything well to mix, ensuring the rice is evenly distributed. This step builds the flavor base, with the cinnamon infusing from the start for that classic touch. Set your stovetop to medium-high heat and keep an eye on it as you bring it to a simmer.
3-Third Step: Bring to a Simmer and Cook Once combined, bring the mixture to an intense simmer over medium-high heat, stirring often to prevent the rice from sticking. After it reaches a simmer, reduce the heat to a steady simmer and continue cooking for 35-45 minutes. Stir frequently during this time the rice will absorb the liquid and release starch, creating a creamy texture. If you’re new to making rice pudding, this step is where the magic happens, transforming basic ingredients into something truly special.
4-Fourth Step: Monitor and Adjust As the mixture cooks, check the rice for tenderness every 10 minutes or so. You’ll want the rice to be soft but still have some liquid left for that perfect creamy consistency. If it thickens too quickly, add a splash of milk to loosen it up. This method relies on the rice’s natural starch for creaminess, so no eggs are needed, and it’s ready when the mixture coats the back of a spoon. Remember, the total cook time is 35-45 minutes, so plan accordingly for your schedule.
5-Fifth Step: Finish and Cool Once the rice is tender, remove the pan from the heat and discard the cinnamon stick. Stir in the 1 teaspoon of vanilla extract and the ⅔ cup of golden raisins if desired, blending them in for even distribution. This adds the final flavor notes that make this classic rice pudding stand out. Transfer the pudding to ramekins or a serving dish and let it cool slightly before serving warm, or cover and refrigerate it for up to a day for a chilled treat.
6-Sixth Step: Serve and Enjoy Top each serving with a sprinkle of grated cinnamon for extra zest, and dish it out to your family or guests. This rice pudding yields about 6-8 servings, each around 250 calories, making it a light dessert option. For the best experience, serve it warm on a chilly evening or cold as a refreshing snack. If you’re looking for more ideas, check out our cinnamon bread recipe for another cozy twist on flavors similar to this one.
Last Step:
Please leave a rating and comment letting us know how you liked this recipe! This helps our business to thrive and continue providing free, high-quality recipes for you.Notes
🍚 Rely on the natural starch from short-grain rice like Arborio to create that signature creamy texture without needing eggs.
🌿 Add the cinnamon stick at the beginning to allow it to infuse the full depth of flavor throughout the cooking process.
🥛 If reheating, stir in a splash of milk to restore the creamy consistency, as it may thicken upon cooling.