
Why You’ll Love This Strawberry Jello Mold
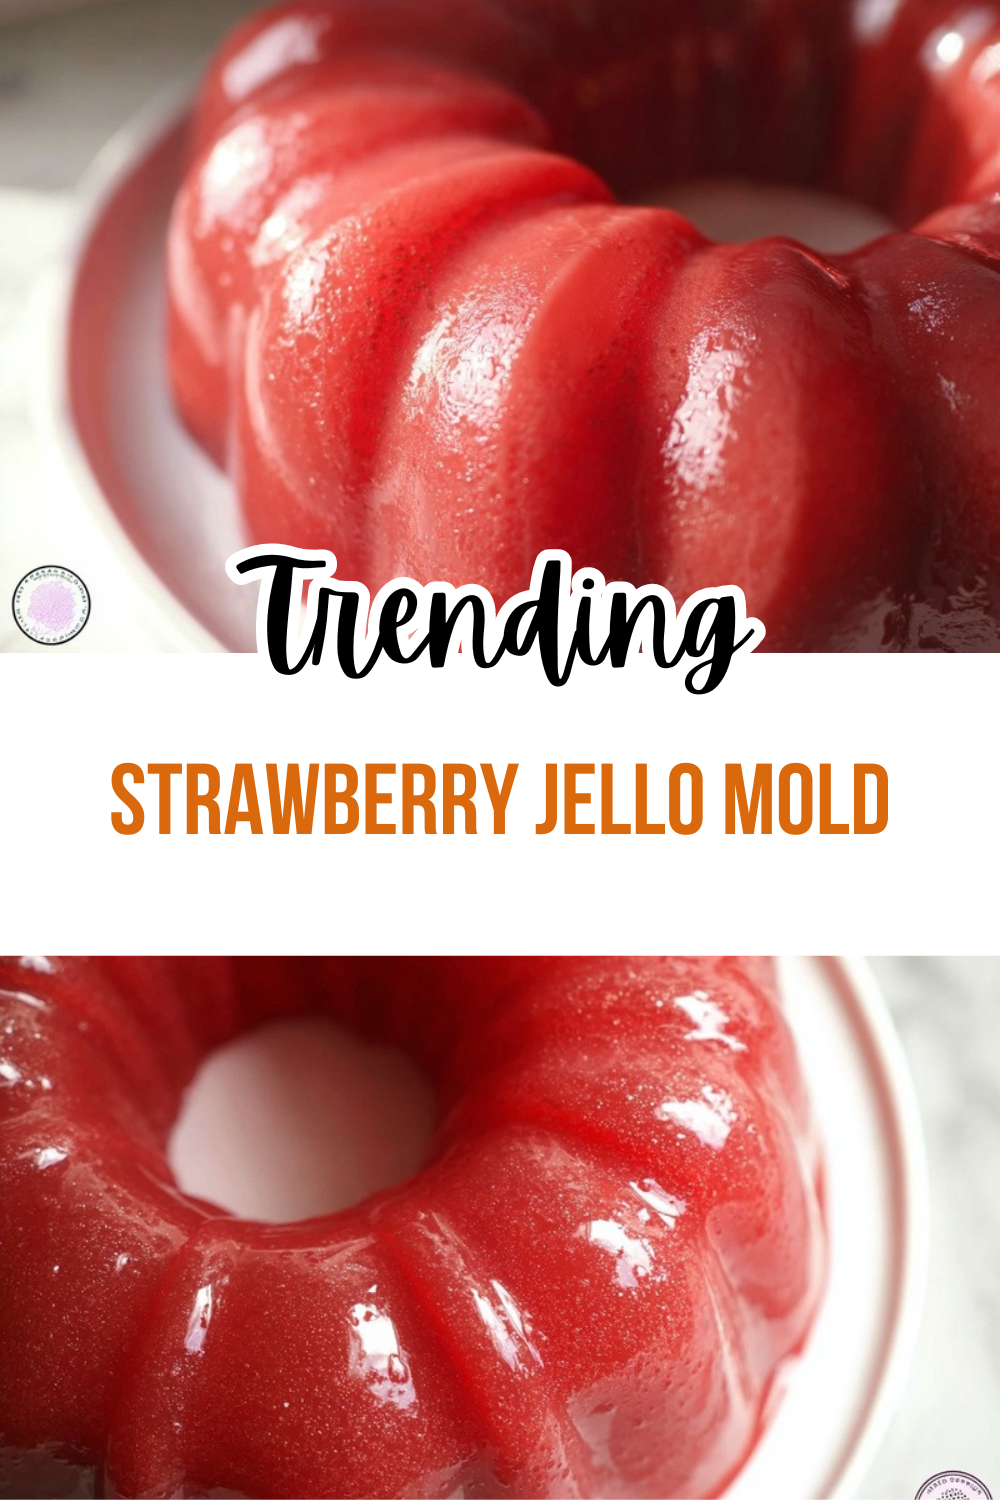
If you are looking for a pretty, old-school dessert that is quick to make and fun to serve, this Strawberry Jello Mold checks every box. It has that classic sweet-tart flavor, a creamy finish, and a glossy look that makes it perfect for family dinners, holiday tables, and potlucks. If you want a vintage treat that still feels fresh, this one is a keeper.
For a little extra recipe inspiration, you can also browse this classic strawberry Jell-O mold version and compare styles. It is a nice way to see how many fun twists this dessert can take.
- Easy to prepare: This Strawberry Jello Mold uses a short ingredient list and simple mixing steps. You only need a bowl, a whisk, and a mold or serving dish. Most of the time is hands-off while the dessert chills in the fridge.
- Great for busy schedules: Since it needs time to set, you can make it ahead of time and forget about it until serving. That makes it a smart pick for parties, holidays, and weeknight treats when you do not want to fuss in the kitchen.
- Comforting and lighter-feeling: Jello-based desserts are often lighter than cakes or pies. If you want a sweet treat without a heavy finish, this creamy Strawberry Jello Mold can fit the moment nicely.
- Bright flavor and pretty color: The strawberry gelatin and jellied cranberry sauce bring a bold berry flavor and a lovely color that looks beautiful on the table. The sour cream smooths everything out and adds a creamy bite that makes each spoonful more interesting.
Tip: This dessert is especially handy for potlucks because it looks fancy, slices neatly, and serves a crowd without much effort.
If you enjoy easy make-ahead recipes like this, you might also like these blueberry banana muffins for easy mornings or these cozy apple oat muffins for another simple homemade treat.
Jump to:
- Why You’ll Love This Strawberry Jello Mold
- Essential Ingredients for Strawberry Jello Mold
- Special Dietary Options
- How to Prepare the Perfect Strawberry Jello Mold: Step-by-Step Guide
- First Step: Dissolve the gelatin
- Second Step: Add the cold water
- Third Step: Mix in the cranberry sauce
- Fourth Step: Cool the mixture a bit more
- Fifth Step: Whisk in the sour cream
- Sixth Step: Pour into the mold
- Seventh Step: Chill until set
- Final Step: Unmold and serve
- Dietary Substitutions to Customize Your Strawberry Jello Mold
- Protein and Main Component Alternatives
- Vegetable, Sauce, and Seasoning Modifications
- Mastering Strawberry Jello Mold: Advanced Tips and Variations
- Pro cooking techniques
- Flavor variations
- Presentation tips
- Make-ahead options
- How to Store Strawberry Jello Mold: Best Practices
- Refrigeration
- Freezing
- Reheating
- Meal prep considerations
- FAQs: Frequently Asked Questions About Strawberry Jello Mold
- Strawberry Jello Mold
- Ingredients
- Instructions
- Last Step:
- Notes
- Nutrition
- Did you make this recipe?
Essential Ingredients for Strawberry Jello Mold
Here is everything you need for this creamy Strawberry Jello Mold. Keep the measurements exact so the dessert sets properly and the texture turns out smooth.
- 6 ounce package strawberry gelatin – Gives the mold its classic strawberry flavor, bright color, and firm set.
- 2 cups boiling water – Dissolves the gelatin fully so the mixture blends evenly.
- 1 cup ice cold water – Helps cool the gelatin mixture so it is ready for the next step.
- 15 ounce can jellied cranberry sauce – Adds a sweet-tart berry note and helps create the vintage mold texture.
- 1 cup sour cream – Brings the creamy layer that softens the fruit flavor and makes the dessert rich and smooth.
- Whipped cream for serving, optional – Adds a light, fluffy topping if you want a little extra sweetness at the table.
Special Dietary Options
- Vegan: Use plant-based gelatin alternatives and a dairy-free sour cream substitute. Choose a vegan whipped topping if desired.
- Gluten-free: This recipe is naturally gluten-free as written, but always check the labels on your gelatin and whipped topping just to be safe.
- Low-calorie: Use a sugar-free strawberry gelatin, a light sour cream or yogurt substitute, and skip the whipped cream topping.
| Ingredient | What It Does | Easy Swap |
|---|---|---|
| Strawberry gelatin | Sets the mold and gives it strawberry flavor | Sugar-free gelatin |
| Jellied cranberry sauce | Adds tang and body | Whole cranberry sauce, if you prefer texture |
| Sour cream | Makes it creamy and smooth | Plain Greek yogurt or dairy-free sour cream |
How to Prepare the Perfect Strawberry Jello Mold: Step-by-Step Guide
First Step: Dissolve the gelatin
Start by pouring the 6 ounce package strawberry gelatin into a large heat-safe mixing bowl. Add 2 cups boiling water and whisk until the gelatin fully dissolves. This usually takes about 2 minutes, and you should not see any granules left in the bowl.
If you want a firmer slice for a party platter, make sure the gelatin is completely dissolved before moving on. A smooth base gives you the best final texture in your Strawberry Jello Mold.
Second Step: Add the cold water
Next, stir in 1 cup ice cold water. This cools the mixture and helps it move toward the setting stage. Give it a good stir so the temperature drops evenly throughout the bowl.
Using ice cold water matters here because it helps stop the gelatin from staying too warm. If the base is too hot, the sour cream can melt too quickly when you add it later.
Third Step: Mix in the cranberry sauce
Open the 15 ounce can jellied cranberry sauce and add it to the bowl. Whisk or stir firmly until the sauce starts breaking down and blends into the gelatin mixture. Some small bits may remain, and that is okay if you like a little texture.
This is the point where the dessert starts to get that classic holiday-style flavor. The cranberry brings a sweet-tart note that works really well with the strawberry gelatin.
Fourth Step: Cool the mixture a bit more
Let the bowl sit for several minutes so the mixture cools but does not start setting. You want it cool enough to handle the sour cream smoothly, but still fluid enough to mix well. If you add the sour cream too soon while the liquid is very hot, it may thin out more than you want.
For the best Strawberry Jello Mold, the mixture should feel lukewarm, not hot. A little patience here gives you a better final texture.
Fifth Step: Whisk in the sour cream
Add 1 cup sour cream and whisk until the mixture looks creamy and evenly blended. This is what gives the mold its signature pale pink look and smooth taste. Keep whisking until you no longer see large streaks of sour cream.
If you want a lighter finish, you can stir a little more gently and leave a few small swirls. That gives a pretty marbled look, though the classic version is fully mixed through.
Sixth Step: Pour into the mold
Once the mixture is smooth, pour it into your mold, loaf pan, ring mold, or decorative serving dish. Tap the dish lightly on the counter to release air bubbles. This helps the Strawberry Jello Mold set with a clean, even shape.
If you do not have a mold, a medium glass bowl works too. The dessert will still look lovely once unmolded or scooped.
Seventh Step: Chill until set
Place the mold in the refrigerator and chill until firm, usually at least 4 hours, though overnight is even better. Do not rush this step. The dessert needs enough time to set completely so it holds together when sliced or unmolded.
Keep the dish level in the fridge so the top stays even. If you are making this for a party, chilling it overnight is the easiest route.
Final Step: Unmold and serve
When the Strawberry Jello Mold is fully set, loosen the edges with a thin spatula or dip the bottom of the mold briefly in warm water if needed. Invert it onto a serving plate and lift the mold away carefully. If you are serving it directly from the dish, just cut or spoon out portions.
Top with whipped cream for serving, optional if you want a soft, creamy finish. The whipped cream pairs nicely with the sweet berry flavor and gives each serving a little extra charm.
Best result: Let the mold chill overnight if you can. The flavor settles, the texture firms up, and the slices look cleaner.

Dietary Substitutions to Customize Your Strawberry Jello Mold
Protein and Main Component Alternatives
Even though this recipe is not a protein-heavy dish, you can still tweak the creamy part of the Strawberry Jello Mold to fit different needs. If you want a lighter version, swap the sour cream for plain Greek yogurt. It will add a tangy taste and still keep the dessert creamy.
For a dairy-free version, choose a plant-based sour cream substitute. Coconut-based or almond-based options can work well, though the flavor may change a bit. If you need a sugar-free dessert, use sugar-free strawberry gelatin and a reduced-sugar cranberry sauce if you can find one.
Vegetable, Sauce, and Seasoning Modifications
This recipe is naturally simple, so small changes make a big difference. If you prefer a more textured dessert, use whole cranberry sauce instead of jellied cranberry sauce. That gives you more fruit bits and a less smooth finish.
You can also add a little more tang by serving the mold with plain whipped cream or a spoonful of yogurt on top. For a sweeter party version, add fresh sliced strawberries as a garnish right before serving. If you want a softer flavor, use a mild whipped topping instead of whipped cream.
For more easy mix-and-match recipe ideas, take a look at these peanut butter and jelly pancakes or whole grain peanut butter banana bread muffins for simple family-friendly options.
Mastering Strawberry Jello Mold: Advanced Tips and Variations
Pro cooking techniques
One of the best ways to improve your Strawberry Jello Mold is to pay attention to temperature. Make sure the gelatin mixture is cool before adding the sour cream. That keeps the texture smooth and helps the dessert set nicely. A whisk works well, but a hand mixer on low speed can help blend the sour cream faster if your mixture is thick.
If you want a cleaner unmolded shape, lightly grease the mold with a tiny bit of neutral oil and wipe away most of it with a paper towel. That makes it easier to release once the dessert has chilled.
Flavor variations
You can give this recipe a fun twist by changing the topping or garnish. Fresh strawberries, chopped mint, or a spoonful of berry compote all work nicely. If you like a stronger tart taste, add a little extra cranberry on the side when serving.
For a holiday feel, serve the mold with sugared cranberries. For a summer feel, add fresh sliced strawberries around the base of the plate. The creamy berry flavor works in both settings.
Presentation tips
A pretty serving plate makes the Strawberry Jello Mold look even better. A ring mold gives it a classic shape, while a glass bowl gives it a simple, homey look. If you are serving guests, pipe or spoon whipped cream around the edge of the plate for a polished finish.
Fresh berries can also help the color pop. Even a few strawberry slices on the side make the dessert feel special without much extra work.
Make-ahead options
This dessert is a great make-ahead recipe because it needs chill time anyway. You can prepare it the day before and let it set overnight. That makes it perfect for busy parents, party hosts, and anyone planning a holiday meal.
Make-ahead tip: Prepare the mold the night before, then garnish right before serving so the top stays fresh and pretty.
How to Store Strawberry Jello Mold: Best Practices
Refrigeration
Store leftover Strawberry Jello Mold covered in the refrigerator for up to 3 to 4 days. Keep it in the same dish if possible, or transfer slices to an airtight container. The texture stays best when it is kept cold and covered.
Freezing
Freezing is not the best choice for this dessert. Gelatin can change texture after thawing and become watery or rubbery. If you must freeze it, wrap it tightly and thaw in the refrigerator, but expect some texture loss.
Reheating
This dessert should not be reheated. Jello molds are meant to be served cold. If it gets too soft, chill it again until firm before serving.
Meal prep considerations
If you are making this for a big event, prepare it a day ahead and keep it covered until needed. You can also portion leftovers into small containers for quick treats later in the week. For more details on gelatin nutrition and serving ideas, you can also check this guide to Jello nutrition facts and benefits.
FAQs: Frequently Asked Questions About Strawberry Jello Mold
Print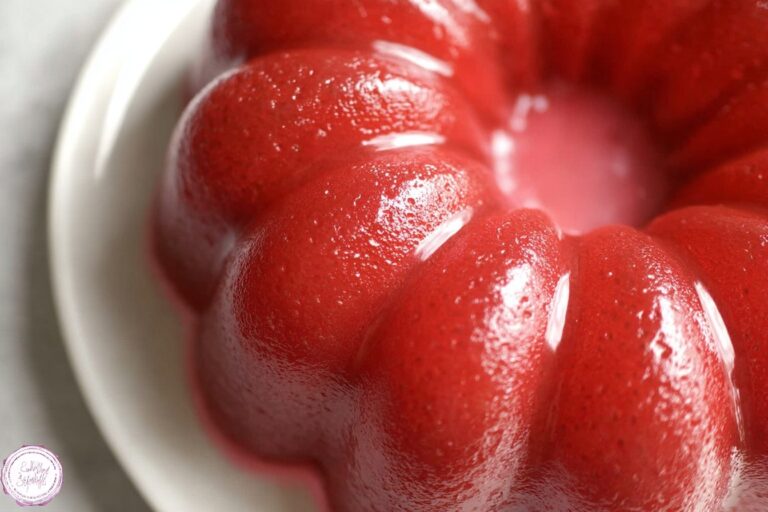
Strawberry Jello Mold
🍓 Revel in the nostalgic jiggle of creamy strawberry layers blended with tart cranberry for a cool, refreshing dessert explosion!
🧊 No-bake ease with minimal effort – ideal for potlucks, holidays, or summer parties where it wows every crowd!
- Total Time: 4 hours 20 minutes
- Yield: 8-10 servings
Ingredients
– 6 ounce package strawberry gelatin for classic strawberry flavor, bright color, and firm set
– 2 cups boiling water to dissolve the gelatin fully so the mixture blends evenly
– 1 cup ice cold water to help cool the gelatin mixture so it is ready for the next step
– 15 ounce can jellied cranberry sauce for sweet-tart berry note and vintage mold texture
– 1 cup sour cream for creamy layer that softens the fruit flavor and makes the dessert rich and smooth
– Whipped cream for serving, optional for light, fluffy topping
Instructions
1-First Step: Dissolve the gelatin Start by pouring the 6 ounce package strawberry gelatin into a large heat-safe mixing bowl. Add 2 cups boiling water and whisk until the gelatin fully dissolves. This usually takes about 2 minutes, and you should not see any granules left in the bowl. If you want a firmer slice for a party platter, make sure the gelatin is completely dissolved before moving on. A smooth base gives you the best final texture in your Strawberry Jello Mold.
2-Second Step: Add the cold water Next, stir in 1 cup ice cold water. This cools the mixture and helps it move toward the setting stage. Give it a good stir so the temperature drops evenly throughout the bowl. Using ice cold water matters here because it helps stop the gelatin from staying too warm. If the base is too hot, the sour cream can melt too quickly when you add it later.
3-Third Step: Mix in the cranberry sauce Open the 15 ounce can jellied cranberry sauce and add it to the bowl. Whisk or stir firmly until the sauce starts breaking down and blends into the gelatin mixture. Some small bits may remain, and that is okay if you like a little texture. This is the point where the dessert starts to get that classic holiday-style flavor. The cranberry brings a sweet-tart note that works really well with the strawberry gelatin.
4-Fourth Step: Cool the mixture a bit more Let the bowl sit for several minutes so the mixture cools but does not start setting. You want it cool enough to handle the sour cream smoothly, but still fluid enough to mix well. If you add the sour cream too soon while the liquid is very hot, it may thin out more than you want. For the best Strawberry Jello Mold, the mixture should feel lukewarm, not hot. A little patience here gives you a better final texture.
5-Fifth Step: Whisk in the sour cream Add 1 cup sour cream and whisk until the mixture looks creamy and evenly blended. This is what gives the mold its signature pale pink look and smooth taste. Keep whisking until you no longer see large streaks of sour cream. If you want a lighter finish, you can stir a little more gently and leave a few small swirls. That gives a pretty marbled look, though the classic version is fully mixed through.
6-Sixth Step: Pour into the mold Once the mixture is smooth, pour it into your mold, loaf pan, ring mold, or decorative serving dish. Tap the dish lightly on the counter to release air bubbles. This helps the Strawberry Jello Mold set with a clean, even shape. If you do not have a mold, a medium glass bowl works too. The dessert will still look lovely once unmolded or scooped.
7-Seventh Step: Chill until set Place the mold in the refrigerator and chill until firm, usually at least 4 hours, though overnight is even better. Do not rush this step. The dessert needs enough time to set completely so it holds together when sliced or unmolded. Keep the dish level in the fridge so the top stays even. If you are making this for a party, chilling it overnight is the easiest route.
8-Final Step: Unmold and serve When the Strawberry Jello Mold is fully set, loosen the edges with a thin spatula or dip the bottom of the mold briefly in warm water if needed. Invert it onto a serving plate and lift the mold away carefully. If you are serving it directly from the dish, just cut or spoon out portions. Top with whipped cream for serving, optional if you want a soft, creamy finish. The whipped cream pairs nicely with the sweet berry flavor and gives each serving a little extra charm.
Last Step:
Please leave a rating and comment letting us know how you liked this recipe! This helps our business to thrive and continue providing free, high-quality recipes for you.Notes
❄️ Chill each layer for 15-20 minutes until partially set before adding the next to keep layers distinct and beautiful.
🧀 Use room temperature sour cream for seamless blending into the gelatin without lumps.
🛢️ Spray the mold lightly with cooking spray and dip in warm water for effortless, perfect unmolding every time.
- Prep Time: 20 minutes
- Chill Time: 4 hours
- Cook Time: 0 minutes
- Category: Desserts
- Method: No-Bake
- Cuisine: American
- Diet: Vegetarian, Gluten-Free
Nutrition
- Serving Size: 1 slice
- Calories: 190 kcal
- Sugar: 35g
- Sodium: 60mg
- Fat: 6g
- Saturated Fat: 4g
- Unsaturated Fat: 2g
- Trans Fat: 0g
- Carbohydrates: 38g
- Fiber: 1g
- Protein: 2g
- Cholesterol: 20mg