
Why You’ll Love This No-Bake Twix Cheesecake
If you love the caramel, biscuit, and chocolate combo in a Twix bar, this No-Bake Twix Cheesecake is going to hit the spot fast. It has that same sweet, creamy, crunchy feel, but it comes together without turning on the oven. That makes it a great pick for busy parents, students, party hosts, and anyone who wants a dessert that looks fancy but stays easy.
- Easy to make: You only need about 30 minutes of hands-on prep, then the fridge does the rest. The biscuit base is pressed straight into an 8-inch springform tin, so there is no baking stress.
- Rich and satisfying: Full-fat cream cheese, double cream, caramel sauce, and milk chocolate make every slice feel like a proper treat. It is a dessert that feels indulgent without needing a long ingredient list.
- Great for sharing: This recipe serves 12 slices, so it works well for birthdays, family dinners, potlucks, and holiday tables. It also slices neatly once chilled.
- Easy to adapt: You can swap in gluten-free biscuits, use salted caramel for a deeper flavor, or make small individual cheesecakes for parties.
This dessert gives you the best part of a candy bar in a creamy cheesecake form, with no baking and no fuss.
For more sweet ideas that are easy to serve for a crowd, you might also like these apple oat muffins for a cozy snack or these almond croissant bites for a fun brunch table.
If you enjoy learning what makes chocolate such a beloved dessert ingredient, this article from Mayo Clinic Press is a helpful read: science-backed benefits of chocolate.
Jump to:
- Why You’ll Love This No-Bake Twix Cheesecake
- Essential Ingredients for No-Bake Twix Cheesecake
- Main Ingredients
- Special Dietary Options
- How to Prepare the Perfect No-Bake Twix Cheesecake: Step-by-Step Guide
- First Step: Make the biscuit base
- Second Step: Mix the cheesecake filling
- Third Step: Build the cheesecake layer
- Fourth Step: Add the caramel topping
- Fifth Step: Make the chocolate ganache
- Final Step: Chill, decorate, and serve
- Dietary Substitutions to Customize Your No-Bake Twix Cheesecake
- Protein and Main Component Alternatives
- Vegetable, Sauce, and Seasoning Modifications
- Mastering No-Bake Twix Cheesecake: Advanced Tips and Variations
- Pro cooking techniques
- Flavor variations
- Presentation tips
- Make-ahead options
- How to Store No-Bake Twix Cheesecake: Best Practices
- FAQs: Frequently Asked Questions About No-Bake Twix Cheesecake
- What size pan do I need for no-bake Twix cheesecake?
- How many people does no-bake Twix cheesecake serve?
- How do I store no-bake Twix cheesecake?
- Can I freeze no-bake Twix cheesecake?
- Why is my no-bake Twix cheesecake runny and how do I fix it?
- No-Bake Twix Cheesecake
- Ingredients
- Instructions
- Last Step:
- Notes
- Nutrition
- Did you make this recipe?
Essential Ingredients for No-Bake Twix Cheesecake
Every layer in this recipe has a job. The biscuit base gives you that shortcake crunch, the filling stays creamy and smooth, and the caramel and chocolate bring in the classic Twix flavor. Below is a clear ingredient list so you can gather everything before starting.
Main Ingredients
- 250 g shortcake biscuits – These make the base and give the cheesecake its crumbly, cookie-style bottom.
- 75 g unsalted butter, melted – This binds the biscuit crumbs together so the crust holds its shape.
- 500 g full-fat cream cheese – This is the main body of the filling and gives the cheesecake its rich texture.
- 75 g icing sugar or powdered sugar – This adds sweetness and helps the filling taste balanced.
- 300 ml double cream or heavy cream – This thickens the filling and helps it set nicely in the fridge.
- 2 tbsp caramel sauce or dulce de leche – Mixed into the filling for that signature Twix-style caramel flavor.
- 100 g milk chocolate – Used for the ganache topping, giving the cheesecake its chocolate finish.
- 100 ml double cream or heavy cream – Heated and poured over the chocolate to make a smooth ganache.
- 4 tbsp caramel sauce or dulce de leche – Spread over the top before the ganache for an extra caramel layer.
Special Dietary Options
- Vegan: Use vegan biscuits, plant-based butter, dairy-free cream cheese, coconut whipping cream, vegan caramel sauce, and dairy-free chocolate.
- Gluten-free: Swap the shortcake biscuits for gluten-free cookies or graham-style biscuits that suit your diet.
- Low-calorie: Use a light cream cheese, reduced-sugar caramel, and a smaller amount of chocolate topping for a lighter version.
If you want a cheesecake-style base or dessert technique reference, this no-bake guide from Sally’s Baking Addiction is a useful companion read: trusted no-bake cheesecake tips.
How to Prepare the Perfect No-Bake Twix Cheesecake: Step-by-Step Guide
This recipe is simple, but the chilling times matter a lot. Take your time with each stage, and the result will be a clean, creamy cheesecake with neat layers and a proper set.
First Step: Make the biscuit base
Crush the 250 g shortcake biscuits until you get fine crumbs. You can use a food processor or place them in a zip-top bag and roll over them with a rolling pin. Pour the crumbs into a bowl, then add the 75 g melted unsalted butter. Mix well until every crumb looks coated and slightly damp.
Press the mixture into the base of an 8-inch springform tin. Use the back of a spoon or the bottom of a glass to pack it down firmly. This helps the crust hold together when you slice it later. Once the base is even, chill it for 30 minutes to 1 hour.
Second Step: Mix the cheesecake filling
In a large bowl, combine the 500 g full-fat cream cheese and 75 g icing sugar or powdered sugar. Start mixing on low speed, then move to medium until the mixture looks smooth. If your cream cheese is at room temperature, it will blend much more easily and avoid lumps.
Next, add the 300 ml double cream or heavy cream. Whisk until the filling turns thick and smooth. It should look fluffy and hold its shape, but it should not be overbeaten. Once it is ready, stir in the 2 tbsp caramel sauce or dulce de leche. The caramel should swirl through the filling evenly.
For the best texture, stop whisking as soon as the filling is thick and smooth. Overbeating can make the cheesecake too loose or grainy later.
Third Step: Build the cheesecake layer
Take the chilled biscuit base out of the fridge. Spoon or pour the cheesecake filling over the crust and spread it evenly with a spatula. Smooth the top so it looks level. At this point, the cheesecake needs a long chill so it can firm up properly.
Place it back in the fridge for at least 6 hours. If you have time, let it sit overnight. That longer chill gives the best texture and makes slicing much easier. The center should feel set, with just a slight wobble when you move the pan gently.
Fourth Step: Add the caramel topping
Once the cheesecake has set, spread the 4 tbsp caramel sauce or dulce de leche over the top. Leave a small gap around the edge so the caramel does not spill over the sides. This makes the cheesecake look neater and gives the chocolate ganache room to sit nicely on top.
If you like a richer flavor, salted caramel works very well here. It adds a deeper, grown-up taste and balances the sweetness of the chocolate layer.
Fifth Step: Make the chocolate ganache
Put the 100 g milk chocolate in a heatproof bowl. Warm the 100 ml double cream or heavy cream in a small pan until it is hot but not boiling. Pour the hot cream over the chocolate and let it sit for a minute or two. Then stir gently until the chocolate melts and forms a smooth ganache.
Let the ganache cool for a little while before pouring it over the cheesecake. If it is too hot, it may melt the caramel layer underneath. A slightly cooled ganache gives you a cleaner finish and a thicker top.
Final Step: Chill, decorate, and serve
Pour the cooled ganache over the caramel layer and spread it gently to the edges, or leave some caramel peeking out for a more dramatic look. Put the cheesecake back in the fridge for another 30 minutes to overnight, depending on how soon you want to serve it.
Before serving, decorate with whipped cream and extra caramel if desired. Carefully release the springform tin and move the cheesecake to a serving plate. Use a sharp knife warmed in hot water for cleaner slices.
| Recipe Detail | Time or Amount |
|---|---|
| Prep time | 30 minutes |
| Chilling time | 6 hours |
| Total time | 6 hours 30 minutes |
| Yield | 12 slices |

Dietary Substitutions to Customize Your No-Bake Twix Cheesecake
Protein and Main Component Alternatives
This cheesecake is built on dairy ingredients, but you can still make it fit different needs. For a lighter option, use reduced-fat cream cheese and a lighter whipped topping, though the cheesecake may not set quite as firmly. If you want a richer dessert, stick with the full-fat cream cheese and heavy cream, since they give the most stable result.
For a dairy-free version, choose plant-based cream cheese and a thick dairy-free whipping cream. Coconut-based options can work well, but they may add a slight coconut taste. If that flavor does not bother you, it can pair nicely with chocolate and caramel.
Vegetable, Sauce, and Seasoning Modifications
There are no vegetables in this dessert, but the sauce layer can still be adjusted. Dulce de leche gives a deeper milk-caramel taste, while standard caramel sauce tastes a little lighter and sweeter. If you want less sweetness, use salted caramel or reduce the caramel topping slightly.
You can also change the biscuit base depending on what you have at home. Gluten-free cookies work well, and plain digestive-style biscuits can be used if you want a less sweet crust. For a fun twist, try adding a tiny pinch of sea salt on top or a few crushed biscuit crumbs over the ganache before serving.
Mastering No-Bake Twix Cheesecake: Advanced Tips and Variations
Pro cooking techniques
Start with room temperature cream cheese so the filling blends smoothly. This is one of the easiest ways to avoid little lumps. Also, make sure your cream is cold before whipping or mixing, because that helps the filling thicken faster. When you whip the cream cheese mixture, stop as soon as it turns thick and fluffy.
Use a springform pan for the cleanest finish. That single choice makes release much easier and helps the sides stay neat. If you are making this for a party, line the base with parchment so you can lift the cheesecake more easily after it chills.
Flavor variations
You can turn this recipe into mini dessert cups by dividing the biscuit base and filling into small containers. This is handy for lunch boxes, picnics, or buffet tables. You can also use dark chocolate instead of milk chocolate if you want a less sweet top layer.
For an even more caramel-forward flavor, add a little extra caramel between the filling and ganache. If you like a more grown-up dessert, salted caramel is a great swap. A small pinch of flaky salt on top can also balance the sweetness nicely.
Presentation tips
Keep the ganache glossy by letting it cool before pouring it over the cheesecake. Add whipped cream rosettes around the edge, then drizzle extra caramel over the top. If you want clean slices, wipe your knife between cuts. A few biscuit crumbs or chocolate curls can make the top look more polished without much effort.
Make-ahead options
This dessert is perfect for planning ahead. You can make it the day before serving, let it chill overnight, and decorate it just before guests arrive. If you are short on time, make the base and filling in the morning so the cheesecake is ready by dinner. For individual cheesecakes, reduce the chill time since smaller portions set more quickly.
How to Store No-Bake Twix Cheesecake: Best Practices
Store leftover cheesecake in the fridge, covered loosely with cling film or foil. Keep it in the springform tin if possible, since that helps it hold its shape. It will stay fresh for about 3 to 4 days when chilled properly.
For freezing, wrap the fully set cheesecake tightly in cling film, then in foil. Freeze for up to 3 months. Thaw it in the fridge overnight before serving. If you want the best texture after freezing, add fresh caramel and ganache after thawing.
Do not leave the cheesecake out at room temperature for more than 2 hours, since the filling contains dairy. For meal prep, you can make the crust and filling ahead of time, then add the caramel and chocolate layers on the day you want to serve it.
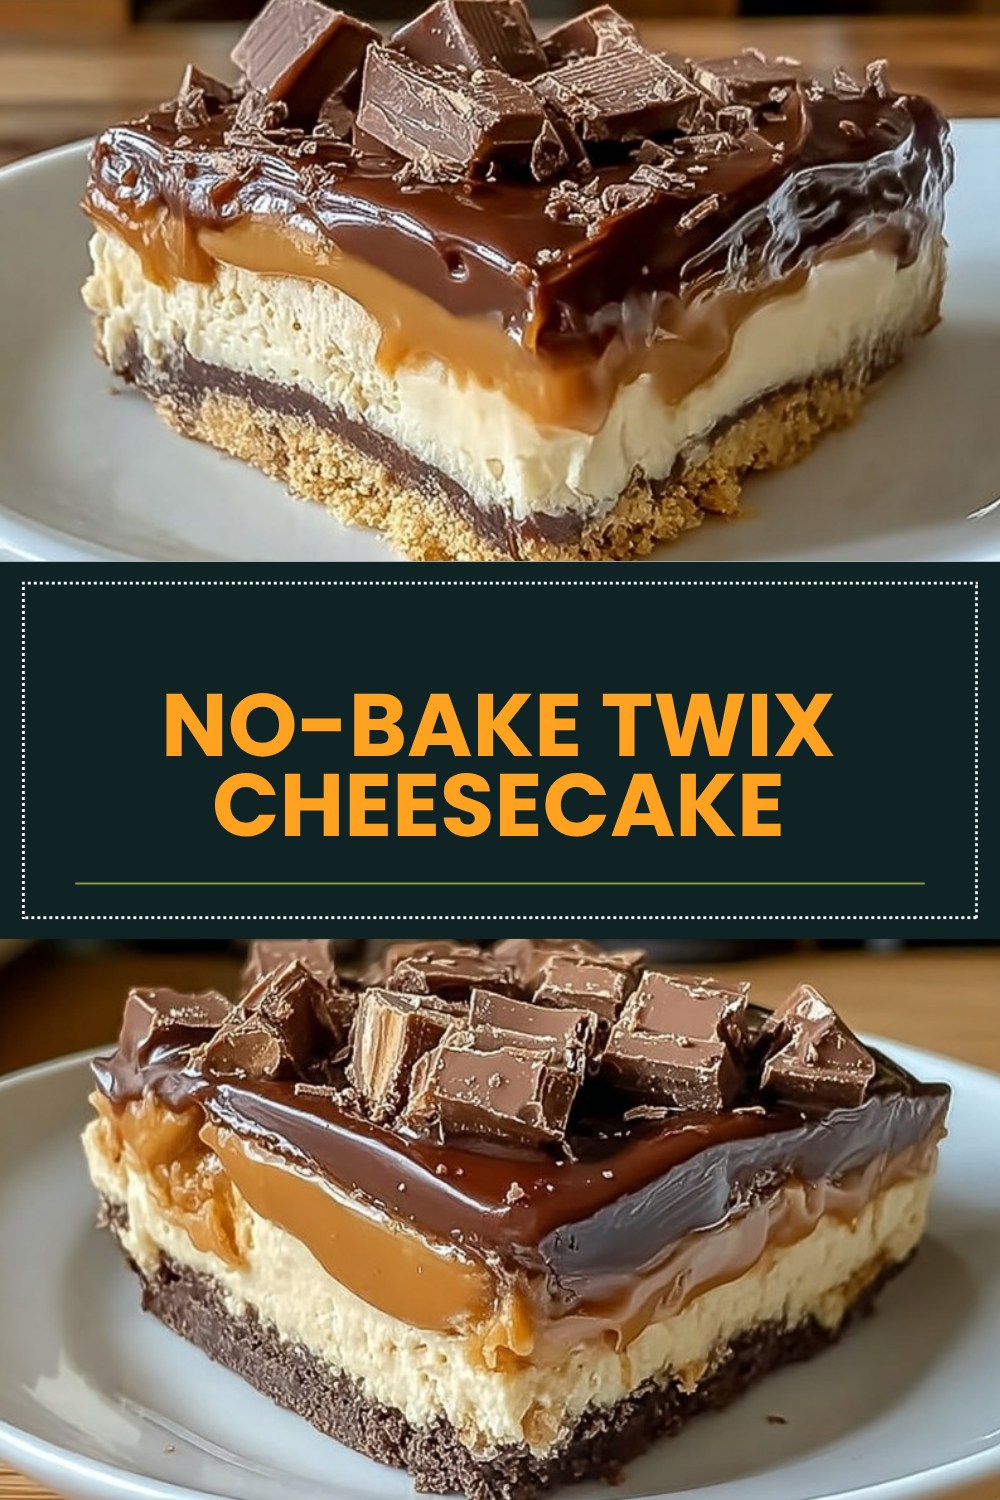
FAQs: Frequently Asked Questions About No-Bake Twix Cheesecake
What size pan do I need for no-bake Twix cheesecake?
Use an 8-inch springform pan for the best results with no-bake Twix cheesecake. This size allows the biscuit base to press evenly into the bottom, creating a sturdy crust that mimics the shortcake finger in a Twix bar. Line the base with parchment paper for easy removal. Grease the sides lightly to prevent sticking. If you use a larger 9-inch pan, the cheesecake will be shallower and may need less chilling time—about 4-5 hours instead of 6. For smaller pans like 6-inch, double the recipe or expect thicker slices. Press the crumb base firmly (about 1/4-inch thick) using the back of a spoon or glass for a compact texture that holds the creamy filling well. Release the springform sides just before serving for clean edges. (92 words)
How many people does no-bake Twix cheesecake serve?
A standard no-bake Twix cheesecake made in an 8-inch pan serves 10-12 people, depending on slice size. For generous dessert portions (about 2 inches wide), it yields 10 slices; thinner party cuts stretch to 12. Each serving delivers the crunchy biscuit base, smooth cream cheese filling, gooey caramel drizzle, and chocolate ganache top that captures Twix flavor perfectly. Factor in appetites—at potlucks, it might serve 14 with small wedges. Pair with coffee or ice cream to make slices go further. Leftovers store well, so plan slices accordingly for your group size. Nutrition per slice (1/10th): roughly 450 calories, 30g carbs, 35g fat. (98 words)
How do I store no-bake Twix cheesecake?
After the no-bake Twix cheesecake sets with caramel and chocolate ganache layers, loosely cover it with cling film or kitchen foil to avoid smudging the toppings. Keep it in the springform tin in the fridge until serving—this maintains shape and prevents cracks. Ideal fridge temp is 35-40°F (2-4°C). Avoid airtight containers initially to let it breathe and firm up. Slice just before serving for the freshest texture. If transporting, chill fully first and use a cooler bag. This method keeps the base crisp and filling creamy. Do not leave at room temp over 2 hours to prevent spoilage from dairy ingredients. (102 words)
Can I freeze no-bake Twix cheesecake?
Yes, you can freeze no-bake Twix cheesecake for up to 3 months. First, ensure it’s fully set with all layers. Remove from the springform pan, wrap tightly in two layers of cling film, then aluminum foil to block air and prevent freezer burn or ice crystals in the filling. Place on a flat surface in the freezer initially for 24 hours, then transfer to a labeled freezer bag. Thaw overnight in the fridge (8-12 hours) before adding fresh caramel and ganache if desired—these toppings freeze separately better. Slice while semi-frozen for cleaner cuts. Avoid refreezing thawed portions. (96 words)
Why is my no-bake Twix cheesecake runny and how do I fix it?
A runny no-bake Twix cheesecake often results from under-whipping the cream cheese filling—beat on medium-high for 3-5 minutes until thick and fluffy, incorporating air for structure. Other causes include warm ingredients (chill cream cheese and cream first), high room humidity (use room-temp but dry conditions), or insufficient chilling (minimum 6 hours, ideally overnight). Too much liquid from caramel or inaccurate measurements also contribute—use full-fat dairy and exact quantities. To fix a runny batch, chill longer (up to 24 hours) or add 1-2 tsp dissolved gelatin next time. For future batches, test set by jiggle: center should wobble slightly, edges firm. (104 words)
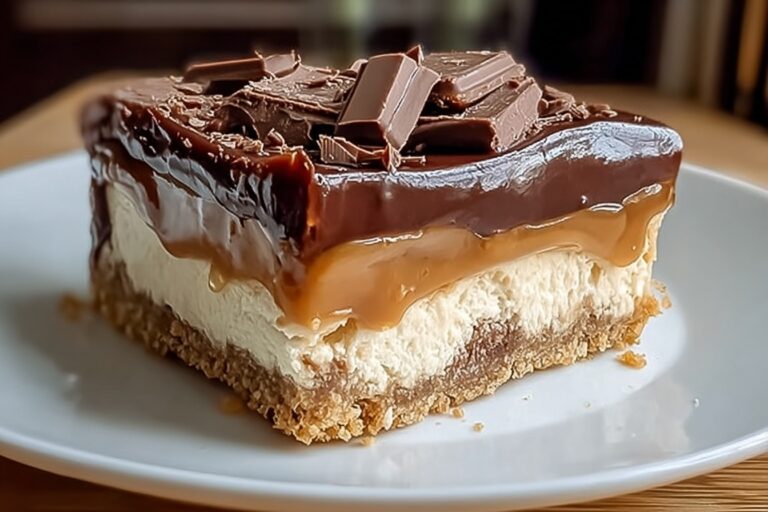
No-Bake Twix Cheesecake
🍰 Treat yourself to a no-bake Twix cheesecake with layers of creamy caramel, chocolate ganache, and biscuit crust for indulgent, candy-bar-inspired delight without the oven!
🍫 Rich, decadent, and easy to make—perfect for parties or sweet cravings, sets perfectly in the fridge for fuss-free dessert heaven.
- Total Time: 6 hours 30 minutes
- Yield: 12 servings
Ingredients
– 250 g shortcake biscuits for the base
– 75 g unsalted butter, melted to bind the biscuit crumbs
– 500 g full-fat cream cheese for the filling
– 75 g icing sugar or powdered sugar for sweetness
– 300 ml double cream or heavy cream to thicken the filling
– 2 tbsp caramel sauce or dulce de leche for caramel flavor
– 100 g milk chocolate for the ganache topping
– 100 ml double cream or heavy cream for the ganache
– 4 tbsp caramel sauce or dulce de leche for the caramel layer
Instructions
1-First Step: Make the biscuit base. Crush the 250 g shortcake biscuits until you get fine crumbs. You can use a food processor or place them in a zip-top bag and roll over them with a rolling pin. Pour the crumbs into a bowl, then add the 75 g melted unsalted butter. Mix well until every crumb looks coated and slightly damp. Press the mixture into the base of an 8-inch springform tin. Use the back of a spoon or the bottom of a glass to pack it down firmly. This helps the crust hold together when you slice it later. Once the base is even, chill it for 30 minutes to 1 hour.
2-Second Step: Mix the cheesecake filling. In a large bowl, combine the 500 g full-fat cream cheese and 75 g icing sugar or powdered sugar. Start mixing on low speed, then move to medium until the mixture looks smooth. If your cream cheese is at room temperature, it will blend much more easily and avoid lumps. Next, add the 300 ml double cream or heavy cream. Whisk until the filling turns thick and smooth. It should look fluffy and hold its shape, but it should not be overbeaten. Once it is ready, stir in the 2 tbsp caramel sauce or dulce de leche. The caramel should swirl through the filling evenly.
3-Third Step: Build the cheesecake layer. Take the chilled biscuit base out of the fridge. Spoon or pour the cheesecake filling over the crust and spread it evenly with a spatula. Smooth the top so it looks level. At this point, the cheesecake needs a long chill so it can firm up properly. Place it back in the fridge for at least 6 hours. If you have time, let it sit overnight. That longer chill gives the best texture and makes slicing much easier. The center should feel set, with just a slight wobble when you move the pan gently.
4-Fourth Step: Add the caramel topping. Once the cheesecake has set, spread the 4 tbsp caramel sauce or dulce de leche over the top. Leave a small gap around the edge so the caramel does not spill over the sides. This makes the cheesecake look neater and gives the chocolate ganache room to sit nicely on top.
5-Fifth Step: Make the chocolate ganache. Put the 100 g milk chocolate in a heatproof bowl. Warm the 100 ml double cream or heavy cream in a small pan until it is hot but not boiling. Pour the hot cream over the chocolate and let it sit for a minute or two. Then stir gently until the chocolate melts and forms a smooth ganache. Let the ganache cool for a little while before pouring it over the cheesecake. If it is too hot, it may melt the caramel layer underneath. A slightly cooled ganache gives you a cleaner finish and a thicker top.
6-Final Step: Chill, decorate, and serve. Pour the cooled ganache over the caramel layer and spread it gently to the edges, or leave some caramel peeking out for a more dramatic look. Put the cheesecake back in the fridge for another 30 minutes to overnight, depending on how soon you want to serve it. Before serving, decorate with whipped cream and extra caramel if desired. Carefully release the springform tin and move the cheesecake to a serving plate. Use a sharp knife warmed in hot water for cleaner slices.
Last Step:
Please leave a rating and comment letting us know how you liked this recipe! This helps our business to thrive and continue providing free, high-quality recipes for you.Notes
🔒 Use a springform pan for effortless removal of the perfectly set cheesecake.
🧀 Start with room temperature cream cheese to ensure a lump-free, silky filling.
⏰ Chill for at least 6-7 hours or overnight for the best texture and flavor.
- Prep Time: 30 minutes
- Chill: 6 hours
- Category: Dessert
- Method: No Bake
- Cuisine: American
- Diet: Vegetarian
Nutrition
- Serving Size: 1 slice
- Calories: 541 kcal
- Sugar: 19g
- Sodium: 353mg
- Fat: 42g
- Saturated Fat: 23g
- Unsaturated Fat: 14g
- Trans Fat: 1g
- Carbohydrates: 39g
- Fiber: 1g
- Protein: 5g
- Cholesterol: 110mg