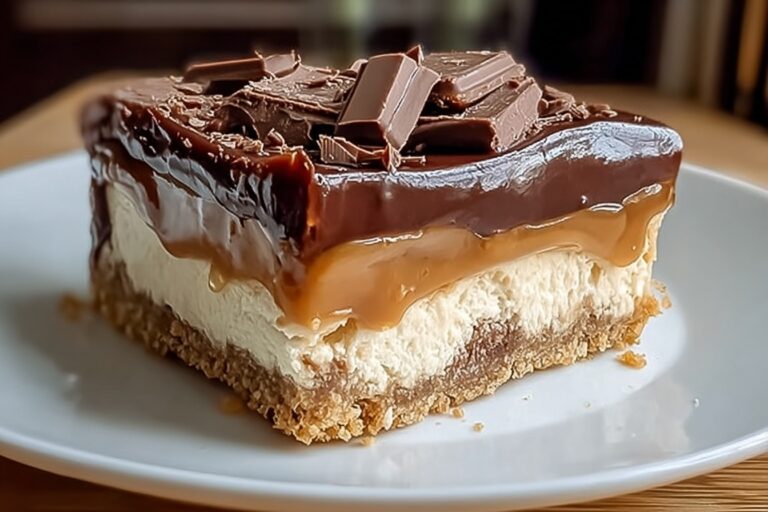
Ingredients
– 250 g shortcake biscuits for the base
– 75 g unsalted butter, melted to bind the biscuit crumbs
– 500 g full-fat cream cheese for the filling
– 75 g icing sugar or powdered sugar for sweetness
– 300 ml double cream or heavy cream to thicken the filling
– 2 tbsp caramel sauce or dulce de leche for caramel flavor
– 100 g milk chocolate for the ganache topping
– 100 ml double cream or heavy cream for the ganache
– 4 tbsp caramel sauce or dulce de leche for the caramel layer
Instructions
1-First Step: Make the biscuit base. Crush the 250 g shortcake biscuits until you get fine crumbs. You can use a food processor or place them in a zip-top bag and roll over them with a rolling pin. Pour the crumbs into a bowl, then add the 75 g melted unsalted butter. Mix well until every crumb looks coated and slightly damp. Press the mixture into the base of an 8-inch springform tin. Use the back of a spoon or the bottom of a glass to pack it down firmly. This helps the crust hold together when you slice it later. Once the base is even, chill it for 30 minutes to 1 hour.
2-Second Step: Mix the cheesecake filling. In a large bowl, combine the 500 g full-fat cream cheese and 75 g icing sugar or powdered sugar. Start mixing on low speed, then move to medium until the mixture looks smooth. If your cream cheese is at room temperature, it will blend much more easily and avoid lumps. Next, add the 300 ml double cream or heavy cream. Whisk until the filling turns thick and smooth. It should look fluffy and hold its shape, but it should not be overbeaten. Once it is ready, stir in the 2 tbsp caramel sauce or dulce de leche. The caramel should swirl through the filling evenly.
3-Third Step: Build the cheesecake layer. Take the chilled biscuit base out of the fridge. Spoon or pour the cheesecake filling over the crust and spread it evenly with a spatula. Smooth the top so it looks level. At this point, the cheesecake needs a long chill so it can firm up properly. Place it back in the fridge for at least 6 hours. If you have time, let it sit overnight. That longer chill gives the best texture and makes slicing much easier. The center should feel set, with just a slight wobble when you move the pan gently.
4-Fourth Step: Add the caramel topping. Once the cheesecake has set, spread the 4 tbsp caramel sauce or dulce de leche over the top. Leave a small gap around the edge so the caramel does not spill over the sides. This makes the cheesecake look neater and gives the chocolate ganache room to sit nicely on top.
5-Fifth Step: Make the chocolate ganache. Put the 100 g milk chocolate in a heatproof bowl. Warm the 100 ml double cream or heavy cream in a small pan until it is hot but not boiling. Pour the hot cream over the chocolate and let it sit for a minute or two. Then stir gently until the chocolate melts and forms a smooth ganache. Let the ganache cool for a little while before pouring it over the cheesecake. If it is too hot, it may melt the caramel layer underneath. A slightly cooled ganache gives you a cleaner finish and a thicker top.
6-Final Step: Chill, decorate, and serve. Pour the cooled ganache over the caramel layer and spread it gently to the edges, or leave some caramel peeking out for a more dramatic look. Put the cheesecake back in the fridge for another 30 minutes to overnight, depending on how soon you want to serve it. Before serving, decorate with whipped cream and extra caramel if desired. Carefully release the springform tin and move the cheesecake to a serving plate. Use a sharp knife warmed in hot water for cleaner slices.
Last Step:
Please leave a rating and comment letting us know how you liked this recipe! This helps our business to thrive and continue providing free, high-quality recipes for you.Notes
🔒 Use a springform pan for effortless removal of the perfectly set cheesecake.
🧀 Start with room temperature cream cheese to ensure a lump-free, silky filling.
⏰ Chill for at least 6-7 hours or overnight for the best texture and flavor.
- Prep Time: 30 minutes
- Chill: 6 hours
- Category: Dessert
- Method: No Bake
- Cuisine: American
- Diet: Vegetarian
Nutrition
- Serving Size: 1 slice
- Calories: 541 kcal
- Sugar: 19g
- Sodium: 353mg
- Fat: 42g
- Saturated Fat: 23g
- Unsaturated Fat: 14g
- Trans Fat: 1g
- Carbohydrates: 39g
- Fiber: 1g
- Protein: 5g
- Cholesterol: 110mg