Ingredients
– 4 boneless skinless chicken breasts, cut into bite-size pieces
– 3 eggs, whisked
– 1/3 cup cornstarch
– 1/3 cup flour
– Salt, to taste
– Oil, for frying
– 1 cup orange juice
– 1/2 cup sugar
– 2 tablespoons rice vinegar or white vinegar
– 2 tablespoons soy sauce
– 1/4 teaspoon ginger
– 1/4 teaspoon garlic powder or 2 finely diced garlic cloves
– 1/2 teaspoon red chili flakes
– Orange zest from 1 orange
– 1 tablespoon cornstarch
– Green onions
– Orange zest
Instructions
1-First Step: Prep the chicken Cut 4 boneless skinless chicken breasts into bite-size pieces. Pat them dry with a paper towel if needed. This helps the coating stick better and gives you a crispier finish. Set out two bowls. In one bowl, whisk 3 eggs. In the second bowl, mix 1/3 cup cornstarch, 1/3 cup flour, and salt to taste. This coating combo gives the chicken a light crust that holds up well under the sauce.
2-Second Step: Coat the chicken Dip each chicken piece into the whisked eggs first, then roll it in the cornstarch and flour mixture. Press gently so the coating sticks all over. Keep going until every piece is coated. For best results, place the coated chicken on a plate or tray for a few minutes before frying. This short rest helps the coating set a little, which can reduce patchy spots in the pan. If you are cooking with kids nearby, this is a good time to wash up the workspace and get the sauce ingredients measured out.
3-Third Step: Fry until golden Heat oil in a deep skillet or pan over medium heat. You want enough oil to cover the bottom well, but you do not need to deep fry unless you prefer that method. Let the oil get hot before adding the chicken. If the oil is too cool, the coating can soak up too much grease instead of crisping up. Cook the chicken in batches so the pan does not get crowded. Fry each batch until golden brown and cooked through, about 4 to 6 minutes depending on the size of the pieces. The inside should reach a safe temperature, and the outside should look crisp and lightly browned. Transfer the cooked chicken to a plate lined with paper towels if you want to catch extra oil.
4-Fourth Step: Make the orange sauce While the chicken cooks, start the sauce in a medium saucepan. Add 1 cup orange juice, 1/2 cup sugar, 2 tablespoons rice vinegar or white vinegar, 2 tablespoons soy sauce, 1/4 teaspoon ginger, 1/4 teaspoon garlic powder or 2 finely diced garlic cloves, 1/2 teaspoon red chili flakes, and orange zest from 1 orange. Stir everything together and bring it to a gentle simmer over medium heat. Once the sauce starts bubbling lightly, mix 1 tablespoon cornstarch with a little water in a small cup to make a slurry, then stir it into the sauce. Keep stirring for 1 to 2 minutes until it thickens and turns glossy. The sauce should coat the back of a spoon and look shiny, not watery. If you want a deeper citrus note, this is the moment to add a little extra zest. For readers who enjoy more background on the health side of oranges, this article on the health benefits of cooking with orange offers helpful context.
5-Fifth Step: Toss and coat Place the fried chicken into a large bowl or back into the skillet if it is roomy enough. Pour the thick orange sauce over the chicken and toss until every piece is evenly coated. Work quickly so the coating stays crisp as long as possible. If the sauce looks too thick, add a small splash of orange juice or water. If it looks too thin, let it simmer for another minute. The goal is a sticky sauce that clings to the chicken without pooling at the bottom of the bowl.
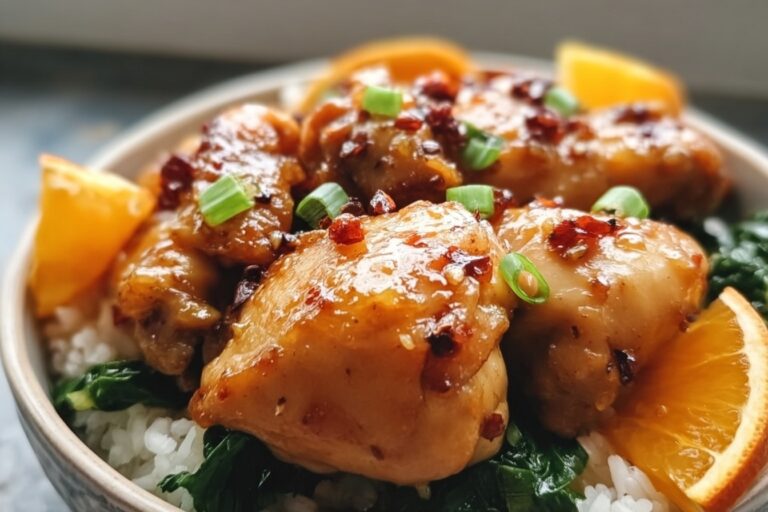
6-Final Step: Garnish and serve Transfer the Sticky Orange Chicken to a serving plate. Top with green onions and a little extra orange zest for a fresh finish. Serve it hot with steamed rice, fried rice, noodles, or even simple sautéed vegetables. For the best texture, toss the chicken with the sauce right before serving. That keeps the coating crisp and the flavor bright. If you want another sweet finish for the table, a treat like this lemon cream pie recipe makes a fun dessert after a savory dinner.
Last Step:
Please leave a rating and comment letting us know how you liked this recipe! This helps our business to thrive and continue providing free, high-quality recipes for you.Notes
🔥 Maintain oil at 350°F and fry in batches to keep chicken crispy without steaming.
🍊 Use fresh-squeezed orange juice and zest for the brightest, most authentic flavor.
🌶️ Adjust chili flakes to your spice preference, or add fresh minced garlic for extra punch.
- Prep Time: 15 minutes
- Cook Time: 20 minutes
- Category: Dinner
- Method: Deep Fried
- Cuisine: Chinese
Nutrition
- Serving Size: about 1 cup
- Calories: 520 calories
- Sugar: 28g
- Sodium: 780mg
- Fat: 18g
- Saturated Fat: 3g
- Unsaturated Fat: 14g
- Trans Fat: 0g
- Carbohydrates: 48g
- Fiber: 1g
- Protein: 36g
- Cholesterol: 210mg