
Why You’ll Love This Strawberry Jello Mold
This Strawberry Jello Mold is the kind of old-school dessert that always gets people talking. It is cool, creamy, sweet, and just a little tangy, which makes every bite feel light but still satisfying. If you want a recipe that works for family dinners, potlucks, holiday tables, or a simple weekend treat, this one is a solid choice.
- Easy to make: You only need a few simple ingredients and basic kitchen tools. The steps are straightforward, so even beginner cooks can make this strawberry jello mold with confidence.
- Great for busy days: Most of the time is hands-off chilling time, which makes it perfect for parents, students, and working professionals who need a dessert that can wait in the fridge.
- Flexible for gatherings: This creamy molded dessert fits right in at brunches, church suppers, birthday tables, and holiday meals. It serves well chilled and can be made ahead.
- Classic flavor with a creamy twist: The mix of strawberry gelatin, cranberry sauce, and sour cream gives this mold a smooth texture and a bright fruity taste that feels nostalgic and fun.
“This is the kind of dessert that tastes like a family gathering from the very first spoonful.”
If you enjoy simple, comforting recipes like this, you may also like these blueberry banana muffins for a cozy breakfast or snack. And if you like sweet, fruit-forward treats, this recipe fits right in with your go-to favorites.
Jump to:
- Why You’ll Love This Strawberry Jello Mold
- Essential Ingredients for Strawberry Jello Mold
- Special Dietary Options
- How to Prepare the Perfect Strawberry Jello Mold: Step-by-Step Guide
- First Step: Gather and measure everything
- Second Step: Dissolve the strawberry gelatin
- Third Step: Add the ice cold water
- Fourth Step: Mix in the cranberry sauce
- Fifth Step: Chill until slightly thickened
- Sixth Step: Fold in the sour cream
- Seventh Step: Pour into the mold
- Eighth Step: Chill until firm
- Ninth Step: Unmold and serve
- Dietary Substitutions to Customize Your Strawberry Jello Mold
- Protein and Main Component Alternatives
- Vegetable, Sauce, and Seasoning Modifications
- Mastering Strawberry Jello Mold: Advanced Tips and Variations
- Pro cooking techniques
- Flavor variations
- Presentation tips
- Make-ahead options
- How to Store Strawberry Jello Mold: Best Practices
- Refrigeration
- Freezing
- Reheating
- Meal prep considerations
- FAQs: Frequently Asked Questions About Strawberry Jello Mold
- What can I use if I don’t have a jello mold for strawberry jello mold?
- How do you make strawberry jello mold step by step?
- Can I make strawberry jello mold ahead of time?
- How long does strawberry jello mold last in the fridge?
- Can I substitute ingredients in strawberry jello mold?
- Strawberry Jello Mold
- Ingredients
- Instructions
- Last Step:
- Notes
- Nutrition
- Did you make this recipe?
Essential Ingredients for Strawberry Jello Mold
Here is the full ingredient list for this creamy Strawberry Jello Mold. Each item plays an important role in the texture and flavor, so it helps to measure everything before you begin.
- 1 package strawberry gelatin, 6 ounces – This gives the dessert its bright strawberry flavor and firm molded texture.
- 2 cups boiling water – Hot water helps dissolve the gelatin fully so the mold sets smoothly.
- 1 cup ice cold water – Cold water cools the mixture and starts the setting process.
- 1 can jellied cranberry sauce, 15 ounces – This adds a sweet-tart flavor and a beautiful color.
- 1 cup sour cream – Sour cream gives the mold a creamy, smooth finish and balances the sweetness.
- Whipped cream for serving, optional – A soft topping that makes each slice feel extra special.
Special Dietary Options
- Vegan: Use a plant-based gelatin alternative, dairy-free sour cream, and coconut whipped topping.
- Gluten-free: This recipe is naturally gluten-free as written, but always check your gelatin label and whipped topping if using packaged products.
- Low-calorie: Choose sugar-free strawberry gelatin, light sour cream, and a light whipped topping.
| Ingredient | What It Does | Simple Swap |
|---|---|---|
| Strawberry gelatin | Sets the mold and brings fruity flavor | Sugar-free strawberry gelatin |
| Jellied cranberry sauce | Adds body and tart sweetness | Whole cranberry sauce for more texture |
| Sour cream | Makes the dessert creamy | Plain Greek yogurt or dairy-free sour cream |
How to Prepare the Perfect Strawberry Jello Mold: Step-by-Step Guide
First Step: Gather and measure everything
Start by setting out all your ingredients so the process feels calm and easy. You will need a 6-ounce package of strawberry gelatin, 2 cups of boiling water, 1 cup of ice cold water, 1 15-ounce can of jellied cranberry sauce, 1 cup of sour cream, and whipped cream if you want a pretty finish. A mold, loaf pan, ring pan, or similar dish will work well.
If you are serving a crowd, this is a nice dessert to make before guests arrive. It chills beautifully and leaves you free to focus on other dishes. If you like easy make-ahead sweets, you may also enjoy this cinnamon bread recipe for another cozy kitchen staple.
Second Step: Dissolve the strawberry gelatin
Pour the strawberry gelatin into a large mixing bowl. Add the 2 cups of boiling water and stir until the gelatin is fully dissolved. Take your time here, because any undissolved granules can affect the texture of the final mold.
The mixture should look smooth and glossy before you move on. If you want the best results, stir for at least 2 minutes. This helps the gelatin start the setting process the right way.
Third Step: Add the ice cold water
Next, stir in the 1 cup of ice cold water. This cools the gelatin and prepares it for the cranberry sauce. It also helps the mixture set evenly once it goes into the fridge.
Make sure the water is truly cold. If it is just cool instead of icy, the mold may need a little longer to firm up. A quick stir is all you need before the next step.
Fourth Step: Mix in the cranberry sauce
Add the 15-ounce can of jellied cranberry sauce to the gelatin mixture. Stir well until the sauce breaks down and blends into the liquid. You should still see tiny bits of cranberry texture, but the mixture should look mostly smooth and even.
This is the step that gives the dessert its classic holiday flavor. The tart cranberry helps balance the sweet strawberry taste, which is what makes this Strawberry Jello Mold stand out from plain gelatin desserts.
Fifth Step: Chill until slightly thickened
Place the bowl in the refrigerator for about 30 to 45 minutes, or until the mixture starts to thicken slightly. You want it soft enough to stir, but not fully set. This is important because the sour cream needs to blend in without sinking.
Check the mixture once or twice during chilling. If your fridge runs very cold, it may thicken faster. If it is still very loose, give it a bit more time.
Sixth Step: Fold in the sour cream
Stir in the 1 cup of sour cream until the mixture becomes creamy and smooth. Folding it in gently helps keep the texture light. The color will turn a soft pink, and the dessert will start to look rich and fluffy.
This creamy layer is what makes the dessert feel special. It softens the fruity flavors and gives every bite a cool, silky finish. If you need a dairy-free version, swap in a thick plant-based sour cream.
Seventh Step: Pour into the mold
Lightly grease your mold if needed, then pour in the mixture carefully. Tap the pan gently on the counter to release any air bubbles. This helps the surface look smoother once it sets.
If you do not have a mold, you can also use a 9×13-inch baking pan. That option works especially well for busy cooks and makes serving very easy. For more fruity breakfast ideas that travel well, apple oat muffins are another reader favorite.
Eighth Step: Chill until firm
Refrigerate the mold for at least 4 to 6 hours, or overnight if possible. The dessert needs plenty of time to firm up completely. If you try to unmold it too early, it may lose its shape.
For the cleanest result, keep the mold level in the fridge. Avoid moving it around while it sets. A steady chill gives you the best finish.
Ninth Step: Unmold and serve
To unmold, dip the outside of the mold briefly in warm water for just a few seconds. Then place a serving plate on top and flip it over gently. If the dessert does not release right away, give it another very quick warm water dip.
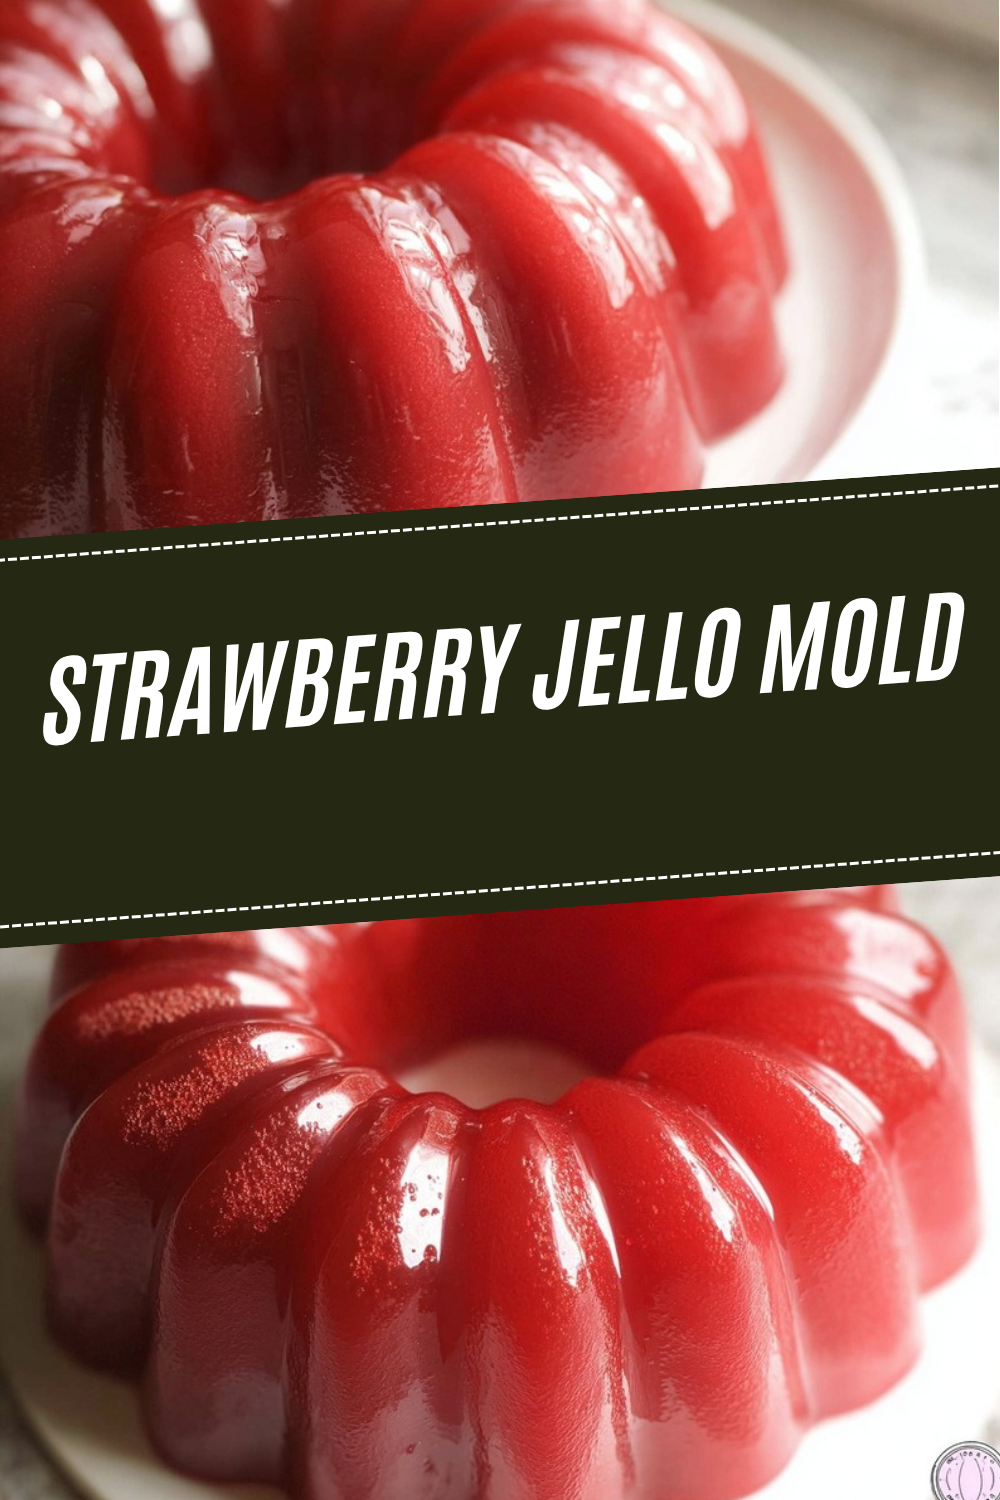
Top with whipped cream if you like, then slice and serve cold. The creamy pink mold looks lovely on a holiday table, but it is just as welcome at a casual family meal.
Tip: If you want cleaner slices, chill the dessert overnight and use a sharp knife dipped in warm water.

Dietary Substitutions to Customize Your Strawberry Jello Mold
Protein and Main Component Alternatives
Although this dessert does not use protein in the usual sense, the creamy base can still be adjusted to fit different needs. If you want a lighter version, use plain Greek yogurt in place of sour cream. This keeps the dessert tangy and creamy while adding extra protein.
For a dairy-free version, choose a coconut-based sour cream or another plant-based substitute with a thick texture. If you like a richer flavor, you can also fold in a small amount of whipped cream alternative made from coconut. The goal is to keep the filling smooth so the Strawberry Jello Mold still sets nicely.
Vegetable, Sauce, and Seasoning Modifications
This recipe does not include vegetables or seasoning in the usual way, but the fruit and gelatin can still be changed based on taste or what you have at home. If you want a stronger cranberry note, use whole cranberry sauce instead of jellied cranberry sauce. For a softer fruit flavor, mix in a little extra cold water and reduce the cranberry texture slightly by mashing it before stirring.
You can also switch to sugar-free strawberry gelatin if you are watching sugar intake. Another easy option is to top the dessert with fresh strawberries instead of whipped cream. That keeps the look bright and fresh while adding a little extra texture.
Mastering Strawberry Jello Mold: Advanced Tips and Variations
Pro cooking techniques
The biggest trick with a molded gelatin dessert is patience. Let the gelatin thicken before adding the sour cream so the mixture stays smooth instead of separating. Also, stir gently once the sour cream goes in. A slow folding motion helps keep the texture even and creamy.
For the best unmolding results, use a mold with simple edges and lightly coat it if needed. If you are serving at a party, chill the dessert overnight so it releases more cleanly. A well-set mold always looks better on the table.
Flavor variations
You can give this Strawberry Jello Mold a few fun twists without changing the basic method. Try adding a spoonful of orange zest for a brighter citrus note, or use raspberry gelatin instead of strawberry for a deeper berry flavor. A few chopped fresh strawberries folded in right before chilling can also add a fresh bite.
If you want a more festive look, serve it with a spoonful of cranberry sauce on top. That extra touch makes it feel even more special for holiday meals or potluck tables.
Presentation tips
A creamy molded dessert always looks best on a simple white platter. Add a dollop of whipped cream on each slice, then finish with a small strawberry or a mint leaf if you have one. Clean slices make the dessert look neat and inviting.
If you are serving guests, place a few extra berries around the plate for color. The pink shade of the mold already stands out, so simple garnish usually works best.
Make-ahead options
This dessert is one of the easiest make-ahead recipes you can keep in your back pocket. You can prepare it one day in advance, and it often tastes even better after chilling overnight. That makes it a smart choice for holidays, birthdays, and busy weekends.
If you are planning ahead for a brunch menu, pair it with a savory dish and a baked treat like peanut butter and jelly pancakes for a playful spread. The mold will be ready and waiting when you need it.
How to Store Strawberry Jello Mold: Best Practices
Fresh Strawberry Jello Mold keeps well when stored the right way. Cover the dish tightly with plastic wrap or foil and keep it in the refrigerator for up to 4 to 5 days. For the best texture, enjoy it within 48 hours, since the creamy layer and gelatin taste freshest early on.
Refrigeration
Store leftovers in the same mold or move slices to an airtight container. Keep them cold at all times, and do not leave the dessert at room temperature for more than 2 hours. If you are taking it to a gathering, pack it in a cooler with ice packs.
Freezing
Freezing is not a good idea for this dessert. The gelatin and sour cream can separate after thawing, which changes the texture and makes the mold watery. It is better to make only what you expect to eat within a few days.
Reheating
This dessert should not be reheated. It is meant to be served chilled, and heat will break the gelatin structure. If it has been sitting in the fridge for a while, just let it rest at room temperature for 10 to 15 minutes before serving.
Meal prep considerations
If you like planning ahead, this mold is a nice choice for batch prep. Make it one or two days before your event, cover it well, and store it in the coldest part of the refrigerator. That way, you save time on the day of the meal and still serve a dessert that looks polished.
FAQs: Frequently Asked Questions About Strawberry Jello Mold
What can I use if I don’t have a jello mold for strawberry jello mold?
No jello mold? Use a 9×13-inch baking pan instead—it’s a simple swap that works perfectly. Mix and pour the layers directly into the pan, then chill as usual. When ready to serve, slice into squares straight from the pan without inverting. This method skips the fancy unmolding step, making it easier for beginners while keeping all the flavor. The result is just as tasty with the crunchy pretzel base, creamy filling, and juicy strawberry jello top. Prep time stays the same (about 20 minutes active), and it serves 12-15 people easily. Pro tip: Line the pan with plastic wrap for clean cuts if desired. Total chill time: 4-6 hours or overnight for best results.
How do you make strawberry jello mold step by step?
Start with a pretzel crust: crush 2 cups pretzels, mix with 3/4 cup melted butter and 3 tbsp sugar, press into a 9×13 pan, bake at 350°F for 10 minutes, then cool. For the cream layer, beat 8 oz softened cream cheese with 1 cup sugar and 1 cup Cool Whip, spread over crust, and chill 30 minutes. Top with strawberry jello (two 3-oz packages dissolved in 2 cups boiling water), stir in 16 oz frozen strawberries and 20 oz drained crushed pineapple, pour over cream layer, and chill 4+ hours until firm. Serves 12. Slice and serve cold. Takes 25 minutes active time. Use fresh strawberries if frozen aren’t available, but drain well to avoid sogginess.
Can I make strawberry jello mold ahead of time?
Yes, strawberry jello mold is ideal for making ahead—it tastes even better after flavors meld. Assemble up to 48 hours in advance: prepare layers as directed, cover tightly with plastic wrap, and refrigerate. The pretzel crust softens slightly but stays crunchy enough, while the jello sets firmly. For parties, make 1-2 days early to save time. If prepping crust separately, store baked crust at room temp up to 1 day. Avoid freezing, as it makes the texture watery upon thawing. Bring to room temp 15 minutes before serving for easy slicing. Perfect for potlucks or holidays, feeding 12-15 with minimal last-minute work.
How long does strawberry jello mold last in the fridge?
Freshly made strawberry jello mold keeps 4-5 days in the fridge when covered tightly with plastic wrap or foil. The dairy-based cream layer and fruit jello hold up well, but the pretzel crust may soften after day 3—still delicious, just less crisp. Store leftovers in the original pan or transfer to an airtight container to prevent drying out. Don’t leave at room temp over 2 hours to avoid spoilage. For best texture, enjoy within 48 hours. It doesn’t freeze well due to separation issues. If transporting, use a cooler with ice packs. Always check for off smells or sliminess before eating. Yields about 12 servings.
Can I substitute ingredients in strawberry jello mold?
Absolutely—strawberry jello mold is flexible. Swap frozen strawberries for 2-3 cups fresh, hulled and sliced (pat dry to prevent watery jello). Use pineapple chunks instead of crushed for texture variety, or skip pineapple for pure strawberry flavor. For the crust, gluten-free pretzels or crushed graham crackers work; reduce sugar slightly for saltier options. Dairy-free? Replace cream cheese and Cool Whip with coconut cream or vegan alternatives, whipped firm. Sugar-free jello and sweetener keep it low-carb. Boiling water can be swapped with pineapple juice for tang. Test small batches first. These tweaks maintain the 4-6 hour chill time and serve 12 reliably without losing the iconic layered appeal.
Strawberry Jello Mold
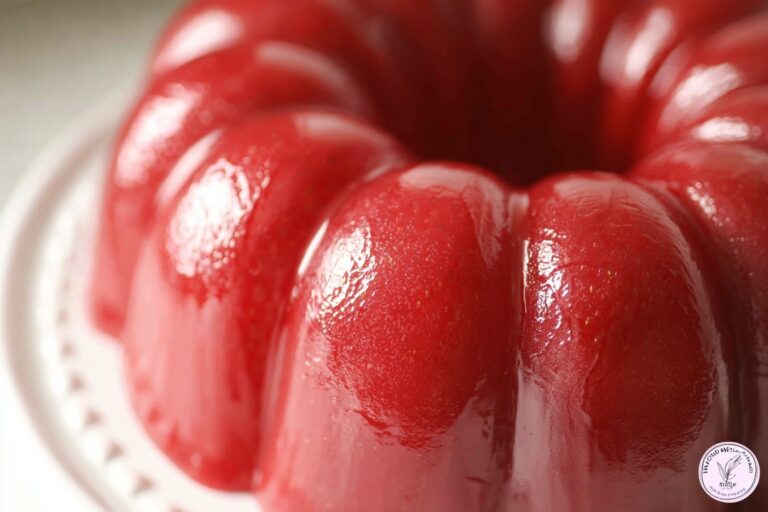
🍓 Delight in the creamy, tangy layers of strawberry Jello blended with jellied cranberry and sour cream for a retro, refreshing treat.
🍓 This no-bake mold is effortless to make and a stunning, wobbly addition to holidays, potlucks, or summer gatherings!
- Total Time: 4 hours 15 minutes
- Yield: 8 servings
Ingredients
– 1 package strawberry gelatin, 6 ounces
– 2 cups boiling water
– 1 cup ice cold water
– 1 can jellied cranberry sauce, 15 ounces
– 1 cup sour cream
– Whipped cream for serving, optional
Instructions
1-First Step: Gather and measure everything Start by setting out all your ingredients so the process feels calm and easy. You will need a 6-ounce package of strawberry gelatin, 2 cups of boiling water, 1 cup of ice cold water, 1 15-ounce can of jellied cranberry sauce, 1 cup of sour cream, and whipped cream if you want a pretty finish. A mold, loaf pan, ring pan, or similar dish will work well. If you are serving a crowd, this is a nice dessert to make before guests arrive. It chills beautifully and leaves you free to focus on other dishes. If you like easy make-ahead sweets, you may also enjoy this cinnamon bread recipe for another cozy kitchen staple.
2-Second Step: Dissolve the strawberry gelatin Pour the strawberry gelatin into a large mixing bowl. Add the 2 cups of boiling water and stir until the gelatin is fully dissolved. Take your time here, because any undissolved granules can affect the texture of the final mold. The mixture should look smooth and glossy before you move on. If you want the best results, stir for at least 2 minutes. This helps the gelatin start the setting process the right way.
3-Third Step: Add the ice cold water Next, stir in the 1 cup of ice cold water. This cools the gelatin and prepares it for the cranberry sauce. It also helps the mixture set evenly once it goes into the fridge. Make sure the water is truly cold. If it is just cool instead of icy, the mold may need a little longer to firm up. A quick stir is all you need before the next step.
4-Fourth Step: Mix in the cranberry sauce Add the 15-ounce can of jellied cranberry sauce to the gelatin mixture. Stir well until the sauce breaks down and blends into the liquid. You should still see tiny bits of cranberry texture, but the mixture should look mostly smooth and even. This is the step that gives the dessert its classic holiday flavor. The tart cranberry helps balance the sweet strawberry taste, which is what makes this Strawberry Jello Mold stand out from plain gelatin desserts.
5-Fifth Step: Chill until slightly thickened Place the bowl in the refrigerator for about 30 to 45 minutes, or until the mixture starts to thicken slightly. You want it soft enough to stir, but not fully set. This is important because the sour cream needs to blend in without sinking. Check the mixture once or twice during chilling. If your fridge runs very cold, it may thicken faster. If it is still very loose, give it a bit more time.
6-Sixth Step: Fold in the sour cream Stir in the 1 cup of sour cream until the mixture becomes creamy and smooth. Folding it in gently helps keep the texture light. The color will turn a soft pink, and the dessert will start to look rich and fluffy. This creamy layer is what makes the dessert feel special. It softens the fruity flavors and gives every bite a cool, silky finish. If you need a dairy-free version, swap in a thick plant-based sour cream.
7-Seventh Step: Pour into the mold Lightly grease your mold if needed, then pour in the mixture carefully. Tap the pan gently on the counter to release any air bubbles. This helps the surface look smoother once it sets. If you do not have a mold, you can also use a 9×13-inch baking pan. That option works especially well for busy cooks and makes serving very easy. For more fruity breakfast ideas that travel well, apple oat muffins are another reader favorite.
8-Eighth Step: Chill until firm Refrigerate the mold for at least 4 to 6 hours, or overnight if possible. The dessert needs plenty of time to firm up completely. If you try to unmold it too early, it may lose its shape. For the cleanest result, keep the mold level in the fridge. Avoid moving it around while it sets. A steady chill gives you the best finish.
9-Ninth Step: Unmold and serve To unmold, dip the outside of the mold briefly in warm water for just a few seconds. Then place a serving plate on top and flip it over gently. If the dessert does not release right away, give it another very quick warm water dip. Top with whipped cream if you like, then slice and serve cold. The creamy pink mold looks lovely on a holiday table, but it is just as welcome at a casual family meal.
Last Step:
Please leave a rating and comment letting us know how you liked this recipe! This helps our business to thrive and continue providing free, high-quality recipes for you.Notes
🍓 Spray the Jello mold lightly with oil for easy unmolding without cracking.
❄️ Chill the mixture partially before adding sour cream to create beautiful layers and prevent sinking.
⏰ Allow full 4+ hours chilling time for the mold to set firmly and hold its shape.
- Prep Time: 15 minutes
- Chilling Time: 4 hours
- Cook Time: 0 minutes
- Category: Dessert
- Method: No-Cook
- Cuisine: American
- Diet: Vegetarian
Nutrition
- Serving Size: 1 slice
- Calories: 180 kcal
- Sugar: 35g
- Sodium: 100mg
- Fat: 5g
- Saturated Fat: 3g
- Unsaturated Fat: 2g
- Trans Fat: 0g
- Carbohydrates: 32g
- Fiber: 1g
- Protein: 2g
- Cholesterol: 20mg