Ingredients
– 1 package strawberry gelatin, 6 ounces
– 2 cups boiling water
– 1 cup ice cold water
– 1 can jellied cranberry sauce, 15 ounces
– 1 cup sour cream
– Whipped cream for serving, optional
Instructions
1-First Step: Gather and measure everything Start by setting out all your ingredients so the process feels calm and easy. You will need a 6-ounce package of strawberry gelatin, 2 cups of boiling water, 1 cup of ice cold water, 1 15-ounce can of jellied cranberry sauce, 1 cup of sour cream, and whipped cream if you want a pretty finish. A mold, loaf pan, ring pan, or similar dish will work well. If you are serving a crowd, this is a nice dessert to make before guests arrive. It chills beautifully and leaves you free to focus on other dishes. If you like easy make-ahead sweets, you may also enjoy this cinnamon bread recipe for another cozy kitchen staple.
2-Second Step: Dissolve the strawberry gelatin Pour the strawberry gelatin into a large mixing bowl. Add the 2 cups of boiling water and stir until the gelatin is fully dissolved. Take your time here, because any undissolved granules can affect the texture of the final mold. The mixture should look smooth and glossy before you move on. If you want the best results, stir for at least 2 minutes. This helps the gelatin start the setting process the right way.
3-Third Step: Add the ice cold water Next, stir in the 1 cup of ice cold water. This cools the gelatin and prepares it for the cranberry sauce. It also helps the mixture set evenly once it goes into the fridge. Make sure the water is truly cold. If it is just cool instead of icy, the mold may need a little longer to firm up. A quick stir is all you need before the next step.
4-Fourth Step: Mix in the cranberry sauce Add the 15-ounce can of jellied cranberry sauce to the gelatin mixture. Stir well until the sauce breaks down and blends into the liquid. You should still see tiny bits of cranberry texture, but the mixture should look mostly smooth and even. This is the step that gives the dessert its classic holiday flavor. The tart cranberry helps balance the sweet strawberry taste, which is what makes this Strawberry Jello Mold stand out from plain gelatin desserts.
5-Fifth Step: Chill until slightly thickened Place the bowl in the refrigerator for about 30 to 45 minutes, or until the mixture starts to thicken slightly. You want it soft enough to stir, but not fully set. This is important because the sour cream needs to blend in without sinking. Check the mixture once or twice during chilling. If your fridge runs very cold, it may thicken faster. If it is still very loose, give it a bit more time.
6-Sixth Step: Fold in the sour cream Stir in the 1 cup of sour cream until the mixture becomes creamy and smooth. Folding it in gently helps keep the texture light. The color will turn a soft pink, and the dessert will start to look rich and fluffy. This creamy layer is what makes the dessert feel special. It softens the fruity flavors and gives every bite a cool, silky finish. If you need a dairy-free version, swap in a thick plant-based sour cream.
7-Seventh Step: Pour into the mold Lightly grease your mold if needed, then pour in the mixture carefully. Tap the pan gently on the counter to release any air bubbles. This helps the surface look smoother once it sets. If you do not have a mold, you can also use a 9×13-inch baking pan. That option works especially well for busy cooks and makes serving very easy. For more fruity breakfast ideas that travel well, apple oat muffins are another reader favorite.
8-Eighth Step: Chill until firm Refrigerate the mold for at least 4 to 6 hours, or overnight if possible. The dessert needs plenty of time to firm up completely. If you try to unmold it too early, it may lose its shape. For the cleanest result, keep the mold level in the fridge. Avoid moving it around while it sets. A steady chill gives you the best finish.
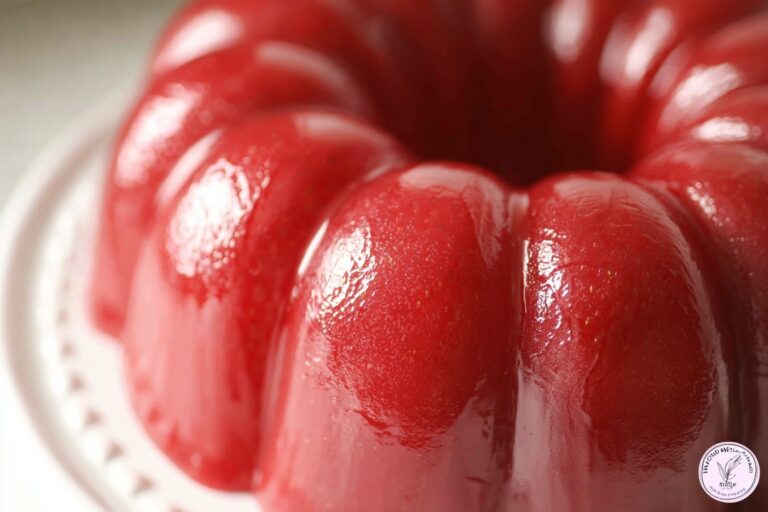
9-Ninth Step: Unmold and serve To unmold, dip the outside of the mold briefly in warm water for just a few seconds. Then place a serving plate on top and flip it over gently. If the dessert does not release right away, give it another very quick warm water dip. Top with whipped cream if you like, then slice and serve cold. The creamy pink mold looks lovely on a holiday table, but it is just as welcome at a casual family meal.
Last Step:
Please leave a rating and comment letting us know how you liked this recipe! This helps our business to thrive and continue providing free, high-quality recipes for you.Notes
🍓 Spray the Jello mold lightly with oil for easy unmolding without cracking.
❄️ Chill the mixture partially before adding sour cream to create beautiful layers and prevent sinking.
⏰ Allow full 4+ hours chilling time for the mold to set firmly and hold its shape.
- Prep Time: 15 minutes
- Chilling Time: 4 hours
- Cook Time: 0 minutes
- Category: Dessert
- Method: No-Cook
- Cuisine: American
- Diet: Vegetarian
Nutrition
- Serving Size: 1 slice
- Calories: 180 kcal
- Sugar: 35g
- Sodium: 100mg
- Fat: 5g
- Saturated Fat: 3g
- Unsaturated Fat: 2g
- Trans Fat: 0g
- Carbohydrates: 32g
- Fiber: 1g
- Protein: 2g
- Cholesterol: 20mg